SLA (Service Level Agreement)
SLA (Service Level Agreement) lets you set time-based deadlines on your workflows and tasks. When a deadline passes, the system automatically raises the priority and can run an action you define -- like sending a notification or reassigning the task.
SLA Levels
Each SLA model has up to three levels. They trigger one after another as more time passes:
| Level | What it means | What happens |
|---|---|---|
| Goal | The target time has passed | Priority goes up and the Goal action runs |
| Deadline | Even more time has passed | Priority goes up again and the Deadline action runs |
| Critical | The final time limit is exceeded | Priority reaches its highest level and the Critical action runs |
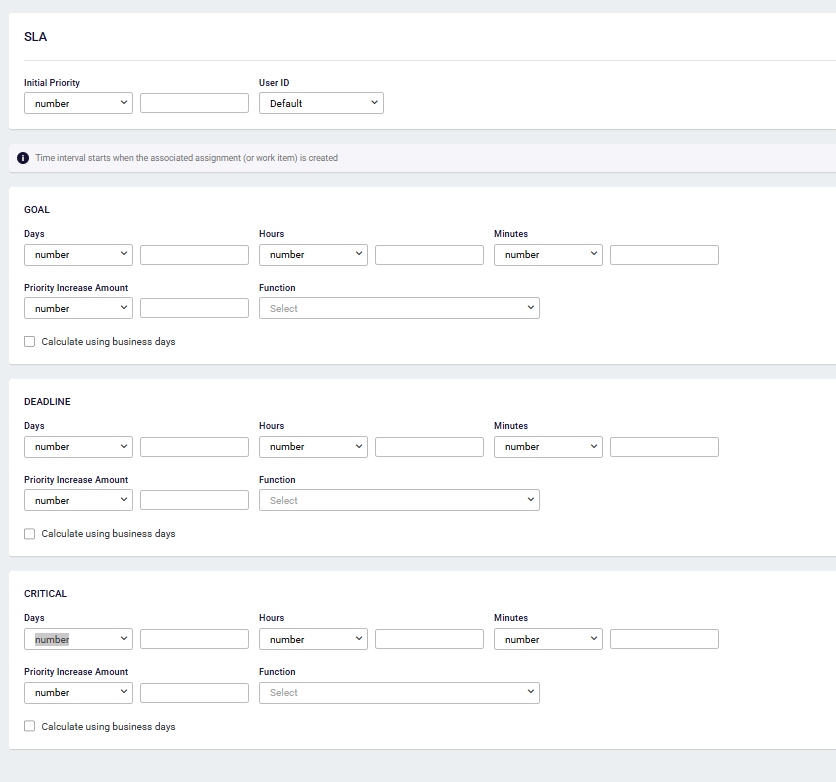
For each level, you set:
- Time interval -- How long before this level triggers (days, hours, minutes).
- Priority -- The priority level to assign when this level is reached.
- Function (optional) -- An action to run automatically when the time is exceeded, such as sending an email or reassigning the task.
- Business days -- Turn this on to count only working hours. Weekends and holidays are skipped.
You also set an initial priority, which is the priority a process or task starts with.
Applying SLA to a Workflow
You can add SLA at two levels: the whole workflow, or a specific User Task.
On the Whole Workflow
Open your workflow's properties and find the SLA Settings section. Select an SLA model from the dropdown.
The SLA timer starts when the process is created and tracks the overall process duration.
On a User Task
Select a User Task step on the canvas and open its properties. Find the SLA Settings section and select an SLA model from the dropdown.
The SLA timer starts when the task is created and tracks only that task's completion time.
You can use both levels in the same workflow. For example, set a 5-day deadline on the overall process and a 1-day goal on each approval task.
Due Date Calculation
When a process starts or a task is created, the system calculates due dates for each tier in order:
- Goal due date = creation time + Goal time interval
- Deadline due date = Goal due date + Deadline time interval
- Critical due date = Deadline due date + Critical time interval
Example: A task created on Monday at 9:00 AM with a Goal of 1 day, a Deadline of 2 more days, and a Critical of 2 more days would have due dates of Tuesday 9 AM, Thursday 9 AM, and the following Monday 9 AM (with business days enabled, weekends are skipped).
When business days is turned on, only working hours count. If a deadline falls outside working hours, the system moves it to the start of the next business day.