Creating Workflow
Create Screen & Workflow Integration In Screens
To create a process by using the wizard, you need to create at least one process start (maker) screen and a confirmation (checker) screen. You can create more than one confirmation page as needed.
Process Start Screen
You can create a module to classify the screens to be used.
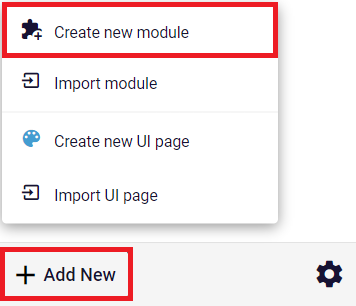
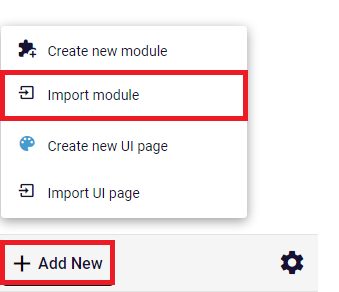
Click Add New on the bottom left menu and select Create new module.
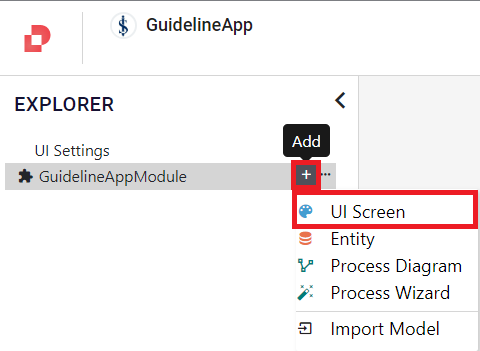
To create a screen, click Add on the right side of the module and select UI Screen.
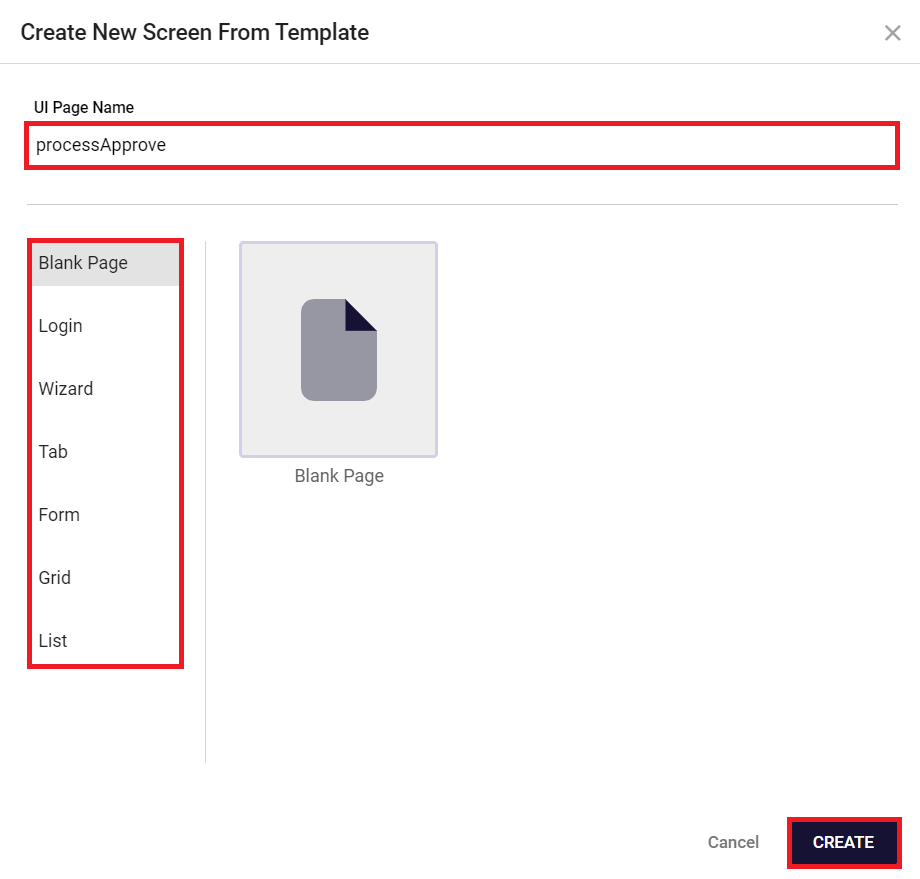
After naming your page in the menu, select a ready template or a blank page and click the Create.
Note: To check more detailed information about how to create a UI screen, click here.

You can also import an existing module for process pages.
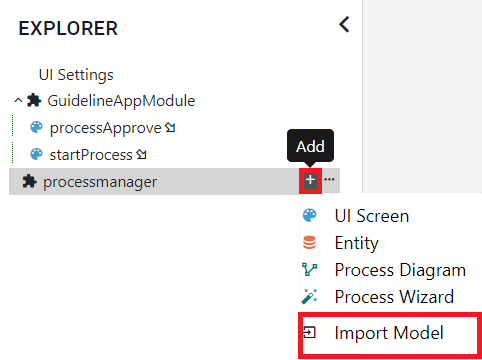
- To import a module, click Add in the Processmanager module and select Import Model.
- To import your files, click Click here to upload your files
- Select your files from your local server/database.
- Click Import.
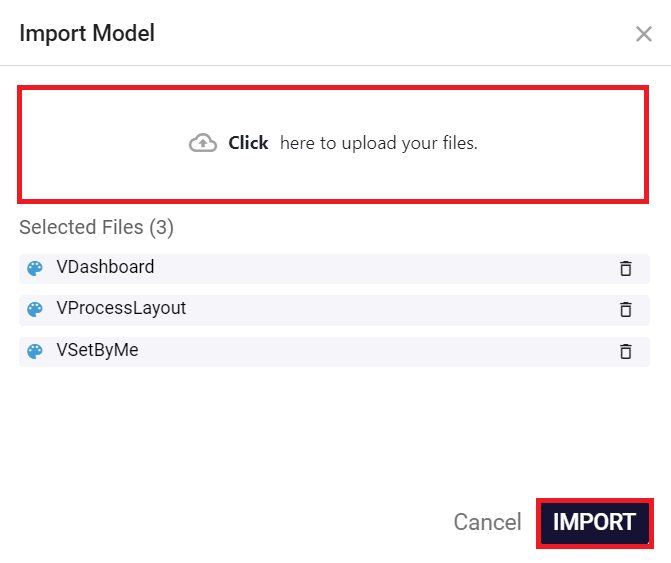
Your selected files appears under Selected Files section.
Note: To delete them, you can click the trash bin icon on the right.
Importing the Processmanager Module:
You need process pages to use in the process.
To import the processmanager module to your page:
- After clicking on the Add New on the bottom left and click Import Module.
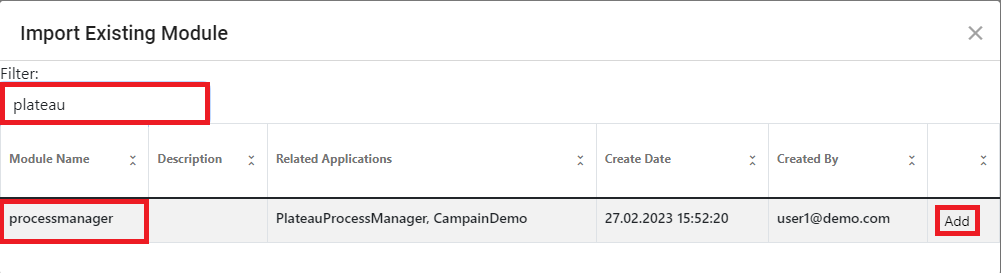
- In the window that opens, to add the process module search for the processmanager module from the Filter field and click Add in the line where the listed process module is located.
The startProcess screen is the screen on which the user, initializes the process,which is submitted to the approval of the approver. After the steps in the 2nd and 3rd articles of the webbing are completed, you have created your ‘startProcess’ screen.
The startProcess screen is the screen where the process is started. To start the process, you need the VProcessLayout Block Component in the processmanager module.
To add, search vprocesslayout in the Search Component section, click or drag and drop the VprocessLayout component.
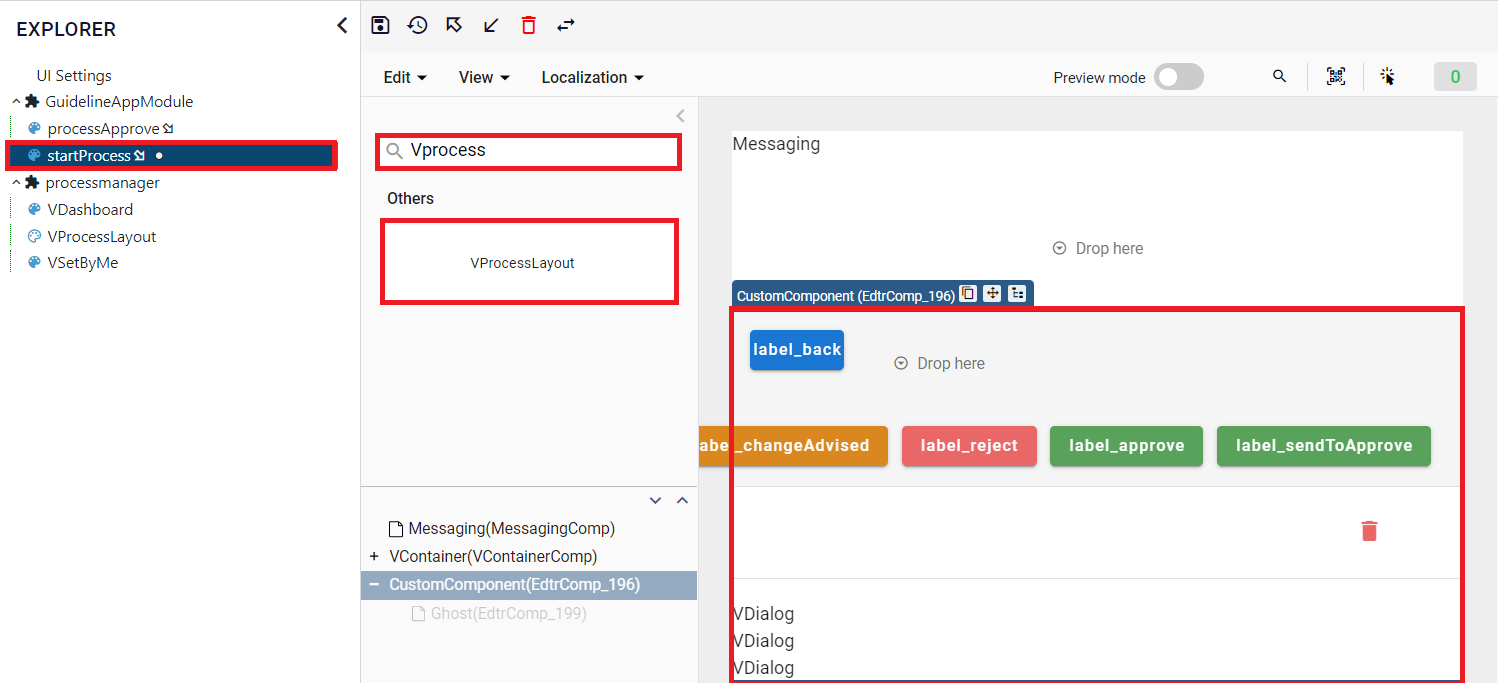
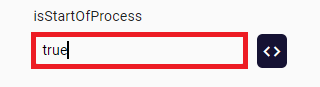
To indicate/specify that a page is the process start page, set isStartOfProcess to true in the Sub props of the Block Component.
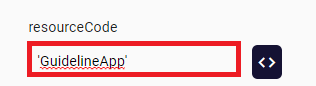
Give a value to resourceCode.
This value should match the resourceCode value in the process metadata that you defined in the YAML file as the process configuration in the product.
Note: Make sure that you type the “resourceCode” value between quotes ('Example').
To see the changes, click the Preview mode and render the page.

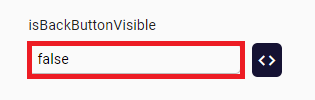
Note: If you want to remove the Back button, you can set the isBackButtonVisible prop to false.
Process Approve Screen
You need to create a process start page. To see how to create a UI page, click here.
Create the process start page by following the first four steps of process start page and name processApprove.
In the processApprove page,you need to add the VprocessLayout Block Component, as was done on the StartProcess screen.
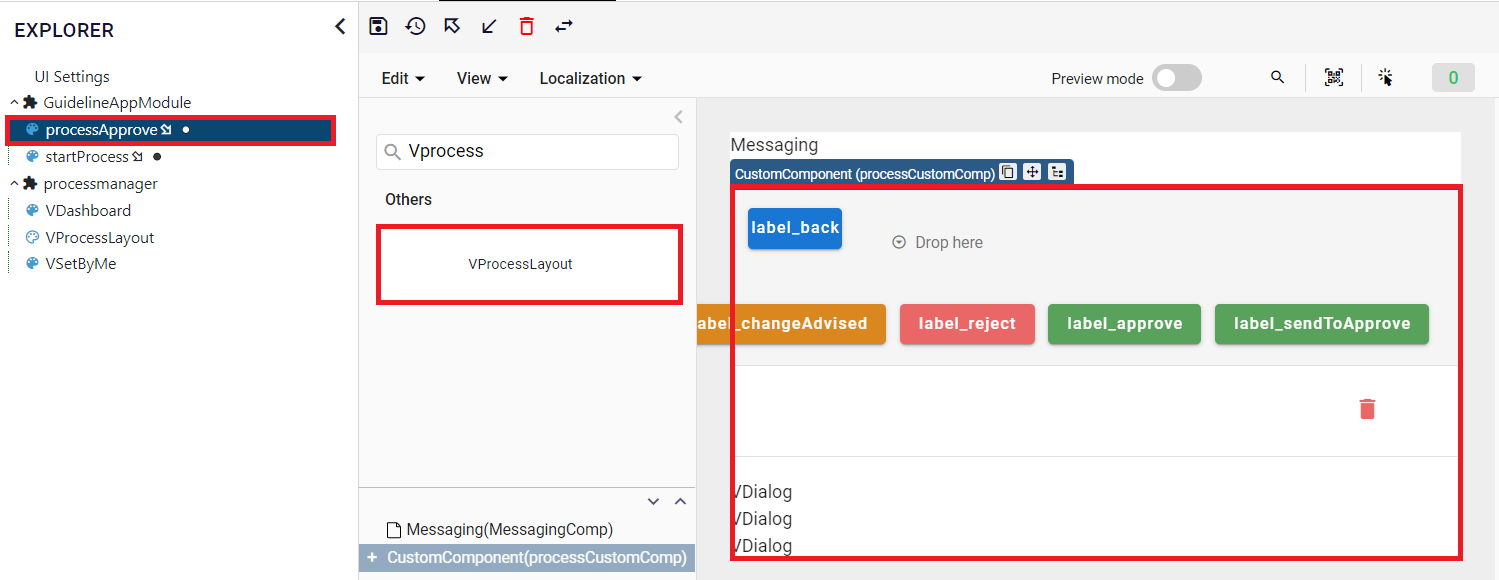
There is nothing mandatory to be done, since the default values will be enough to approve/reject the process. It is enough to make only the buttons desired to be used invisible.
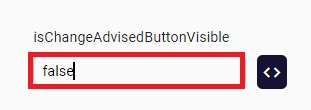
EXAMPLE: If you don’t want to use the Request Change property, you can set the isChangeAdvisedButtonVisible prop to false.
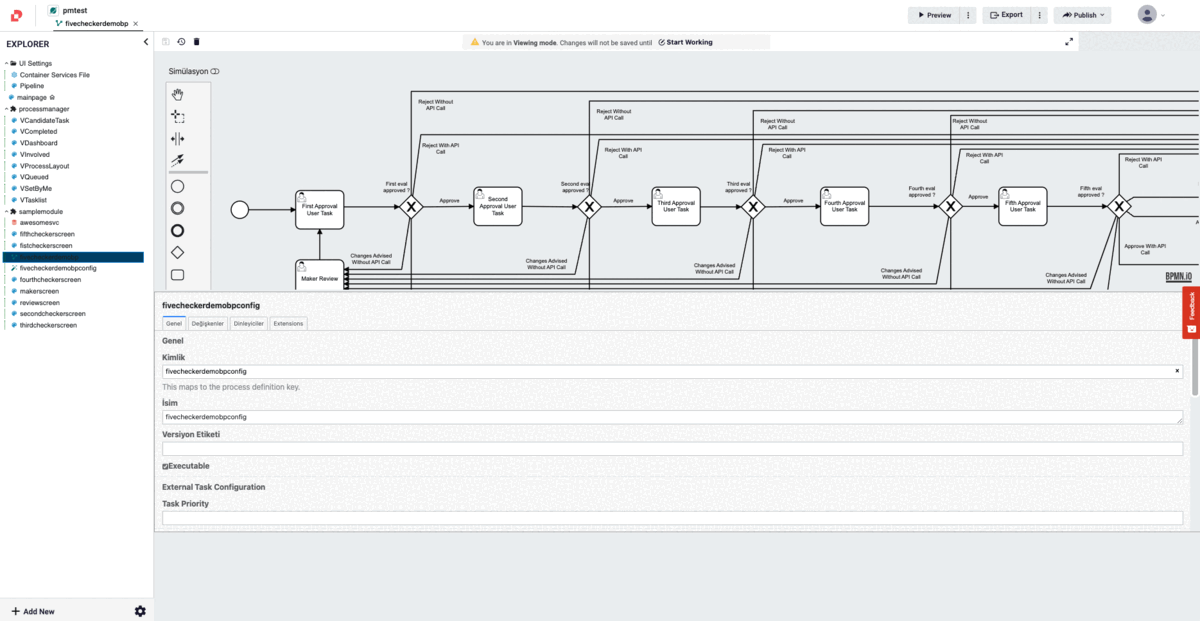
Create Easy Process with Wizard
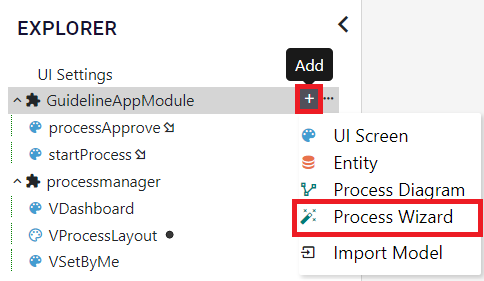
- To create a process wizard, click Add in the module with the screens and select Process Wizard from the drop-down menu.
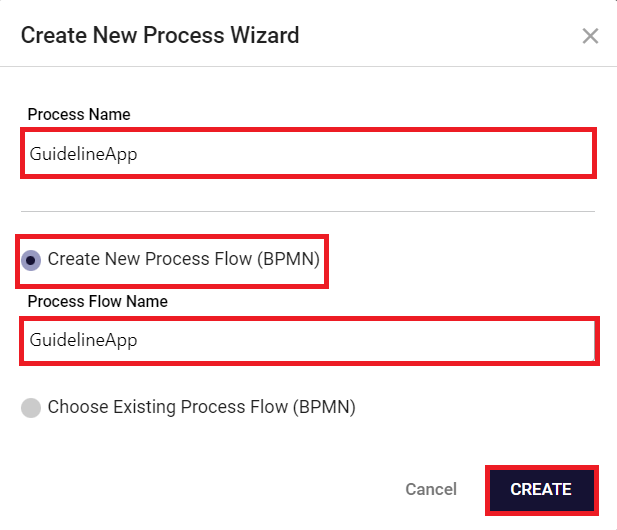
- Name the process.
You can create a new process or select an existing process by selecting New Process Flow (BPMN) or Existing Process FLow (BPMN).
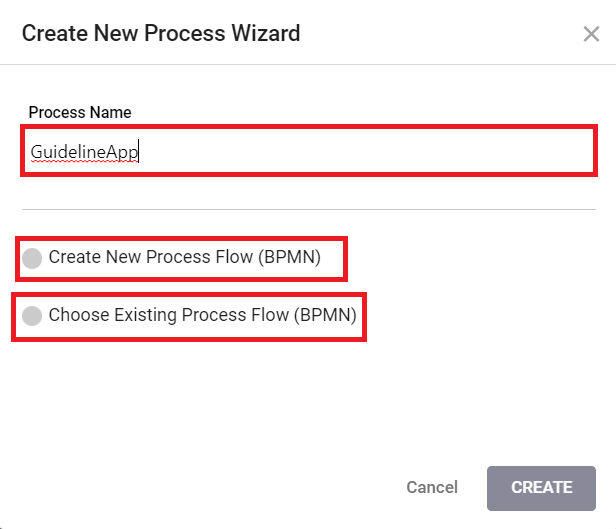
You can change the name in the Process Flow Name section.
After giving the name of the process, a five-step page appears on the screen to create the process.
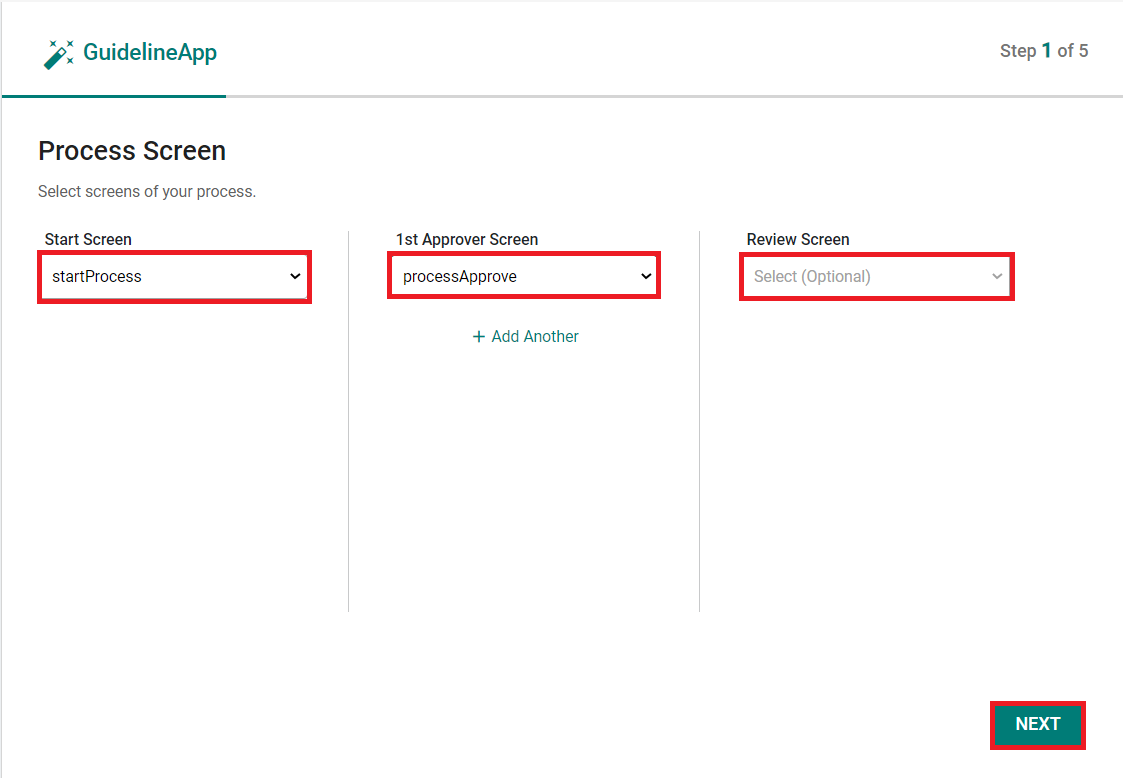
STEP 1
o StartScreen : Select your process start page from the Start Screen drop-down menu.
o 1.st Approver Screen : Select your confirmation page from the 1st Approver Screen drop-down menu. You can select more than 1 confirmation pages by clicking the 'add Another' button.
o Review Screen : Depending on the scenario, you can set a Review Screen from the Review Screen drop-down menu.
EXAMPLE: If the approver is authorized to request changes in the scenario, when the approver requests a change, the process returns to the initiator, the user makes changes and sends the screen back to approval. After the change, the approver can approve the screen, reject it or request changes again.
After selecting the process screens, it is clicked the NEXT.
STEP 2
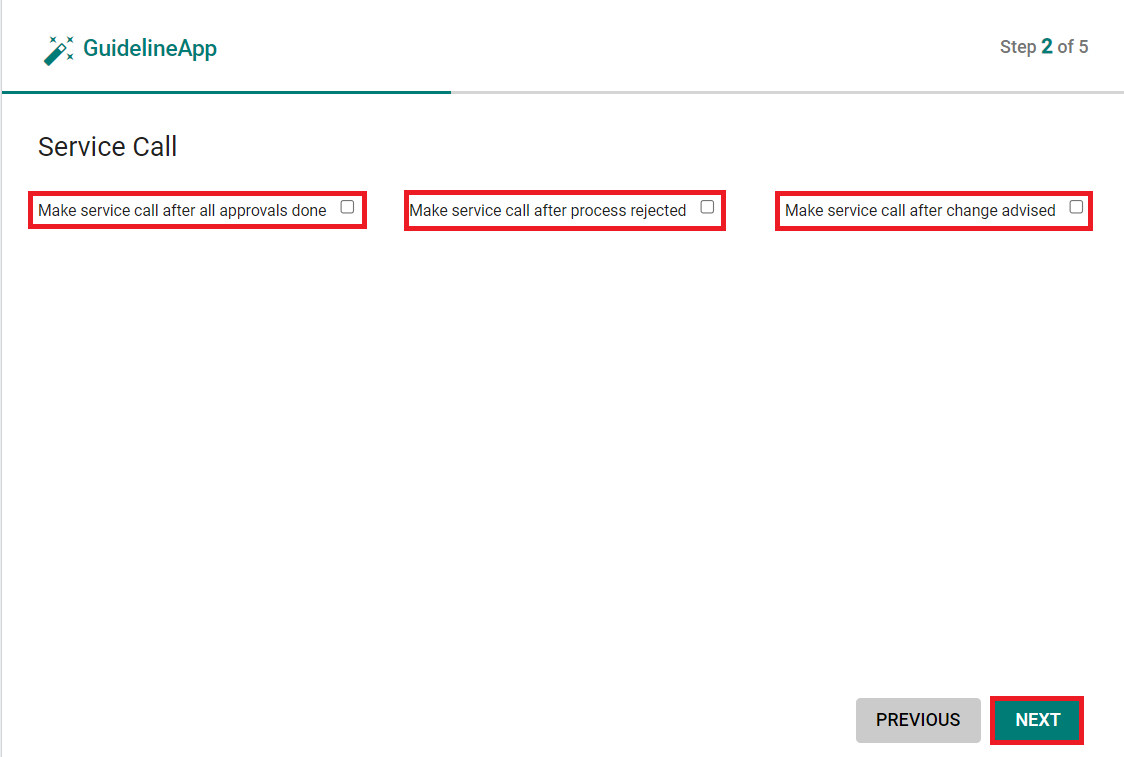
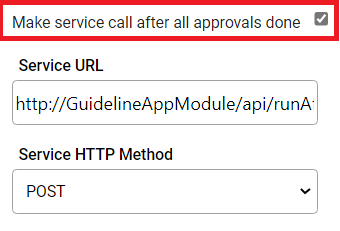
o If the scenario includes sending a service request after the approval, Make sure that you mark the make service call after all approvals done option.
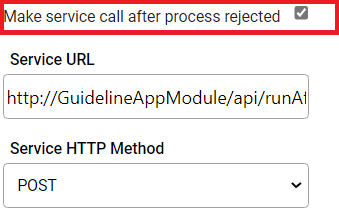
o If the scenario includes sending a service request after the approver rejection, Make sure that you mark the make service call after process rejected option.
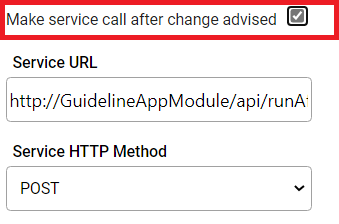
o If the scenario includes sending a service request after the approver requests a change, make sure that you mark the make service call after change advised option.
After you select the conditions, click the NEXT.
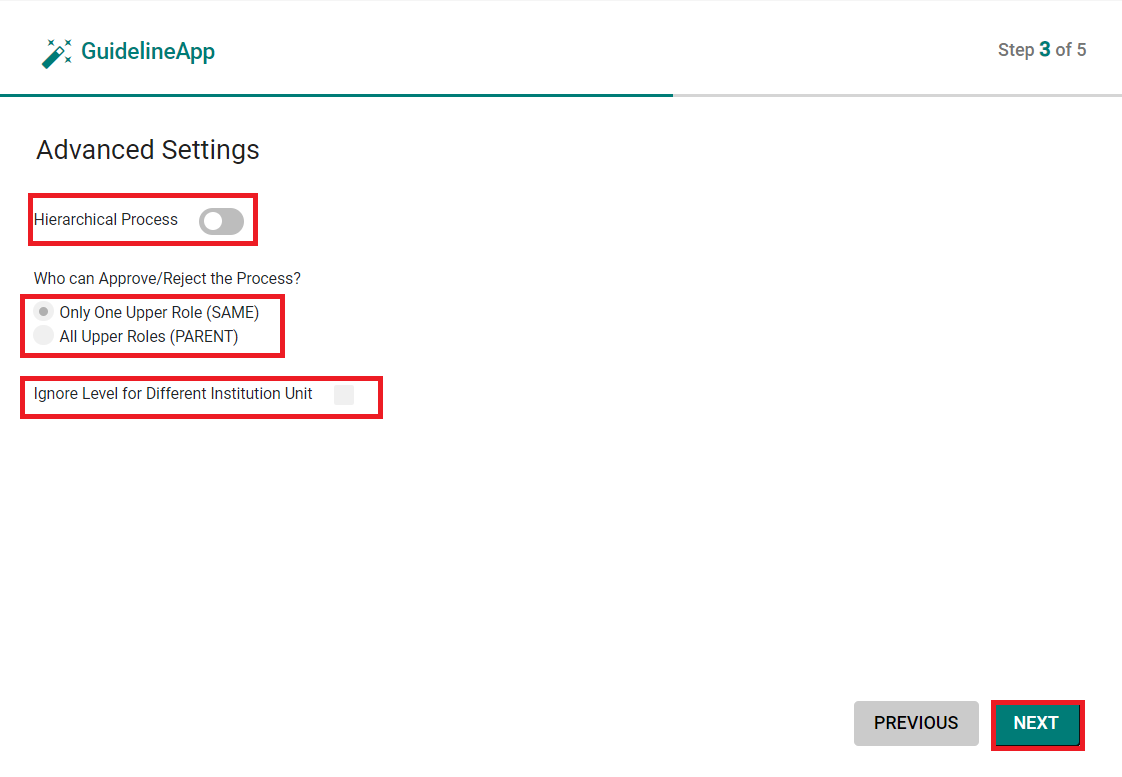
STEP 3
o To add an hierarchical process, turn on Hierarchical Process on Advanced Settings screen. Select whom you want to approve or reject the process.
STEP 4
There are a few important points in this section that you need to check. To make changes:
o To add your specified change to the process, click you the Add New.
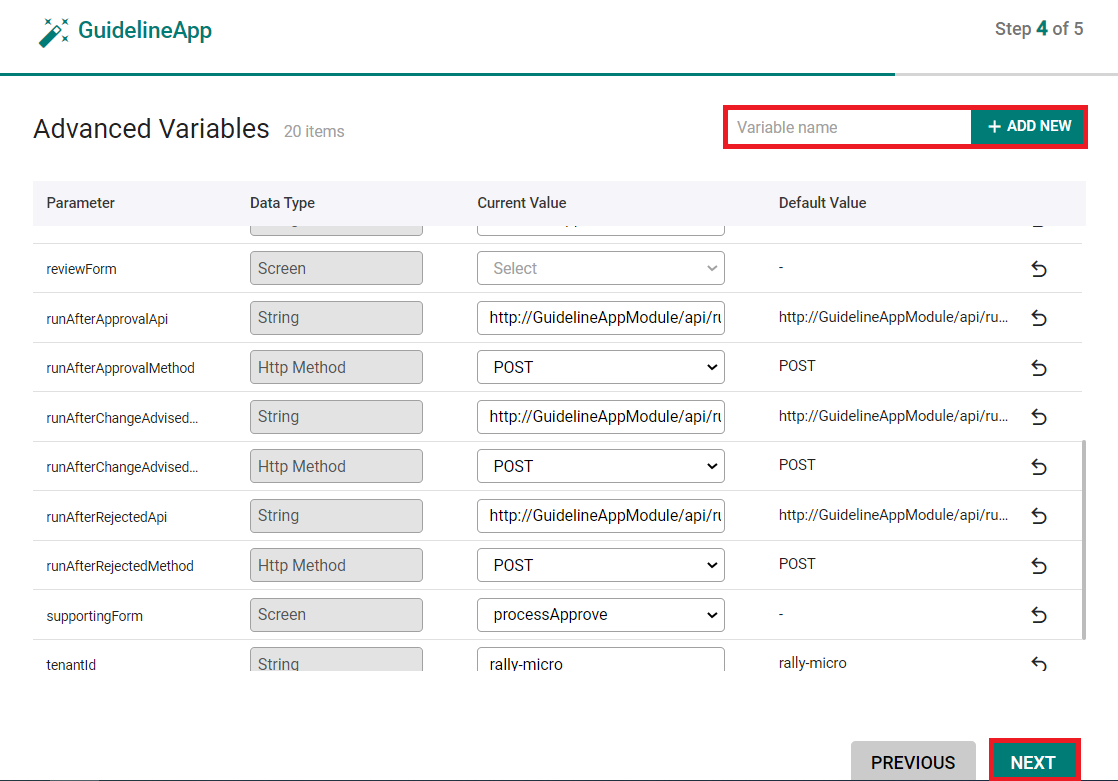
o Make sure to check CheckerRoles

o Make sure to check MakerRole

o Make sure to check ResourceCode.
Note: It should be the same as the value given to the resourceCode prop of the process Block Component created on the start page.

After the necessary arrangements and controls, click NEXT button.
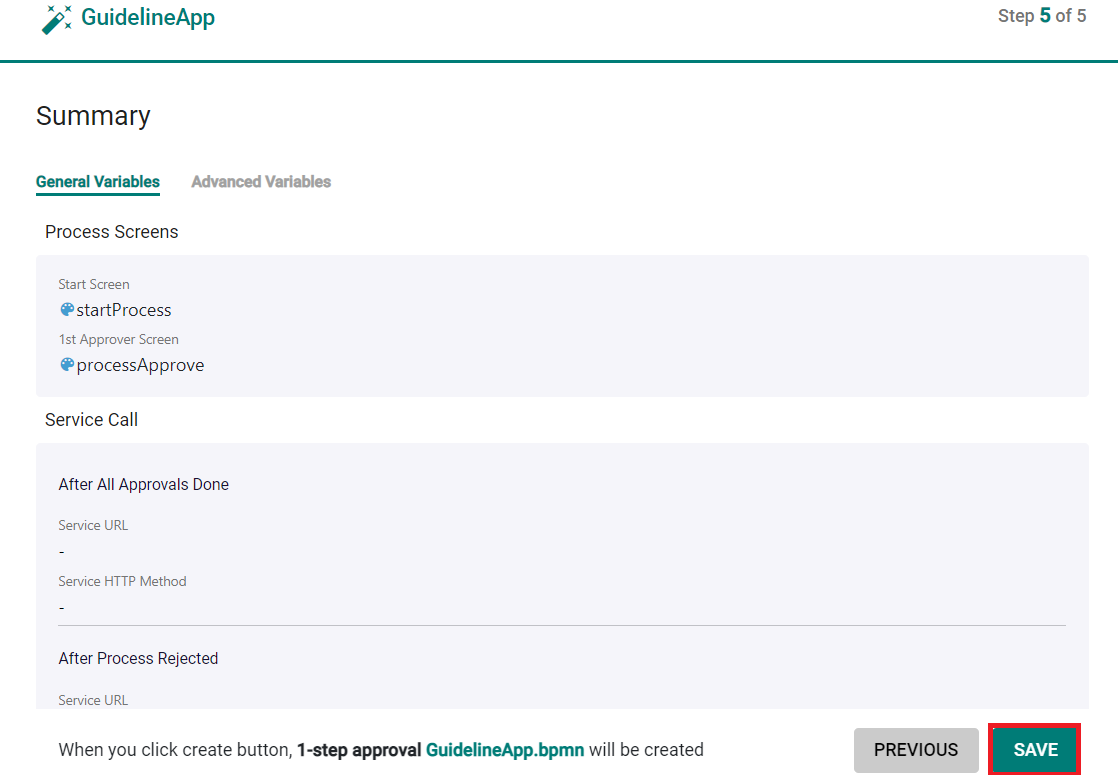
STEP 5
In the last tab, after checking your changes, click SAVE. Your Process Diagram is successfully created.
- Google Cloud Platform Playground with Plateau Process Manager is now available on Plateau Studio. You can create your Plateau workflows, integrate them with UIs and publish to GCP.
For testing purposes, we now create the roles that you defined in the workflow wizard automatically. You can access the playground user credentials in the publish details section.
Note: If you publish your workflow to GCP, we've created the roles in the workflow wizard automatically for you to test easily. You can access the playground user credentials in the publish details section.