Use Your Local AI Agents
Studio CLI connects the application you have open in Plateau Studio to a folder on your own computer. Your pages, scripts, styles and services are written into that folder as plain files, where a local AI coding agent such as Claude Code or Mantis CLI can work on them — and send the result straight back into your open Studio session.
Studio stays in charge the whole time. Sending changes back does not save, stop working, or publish anything: your changes arrive in Studio as unsaved work, and you review and save them there exactly as you do today.
This page explains the whole flow. If you have never used a terminal before, follow it from the top — every step is written out.
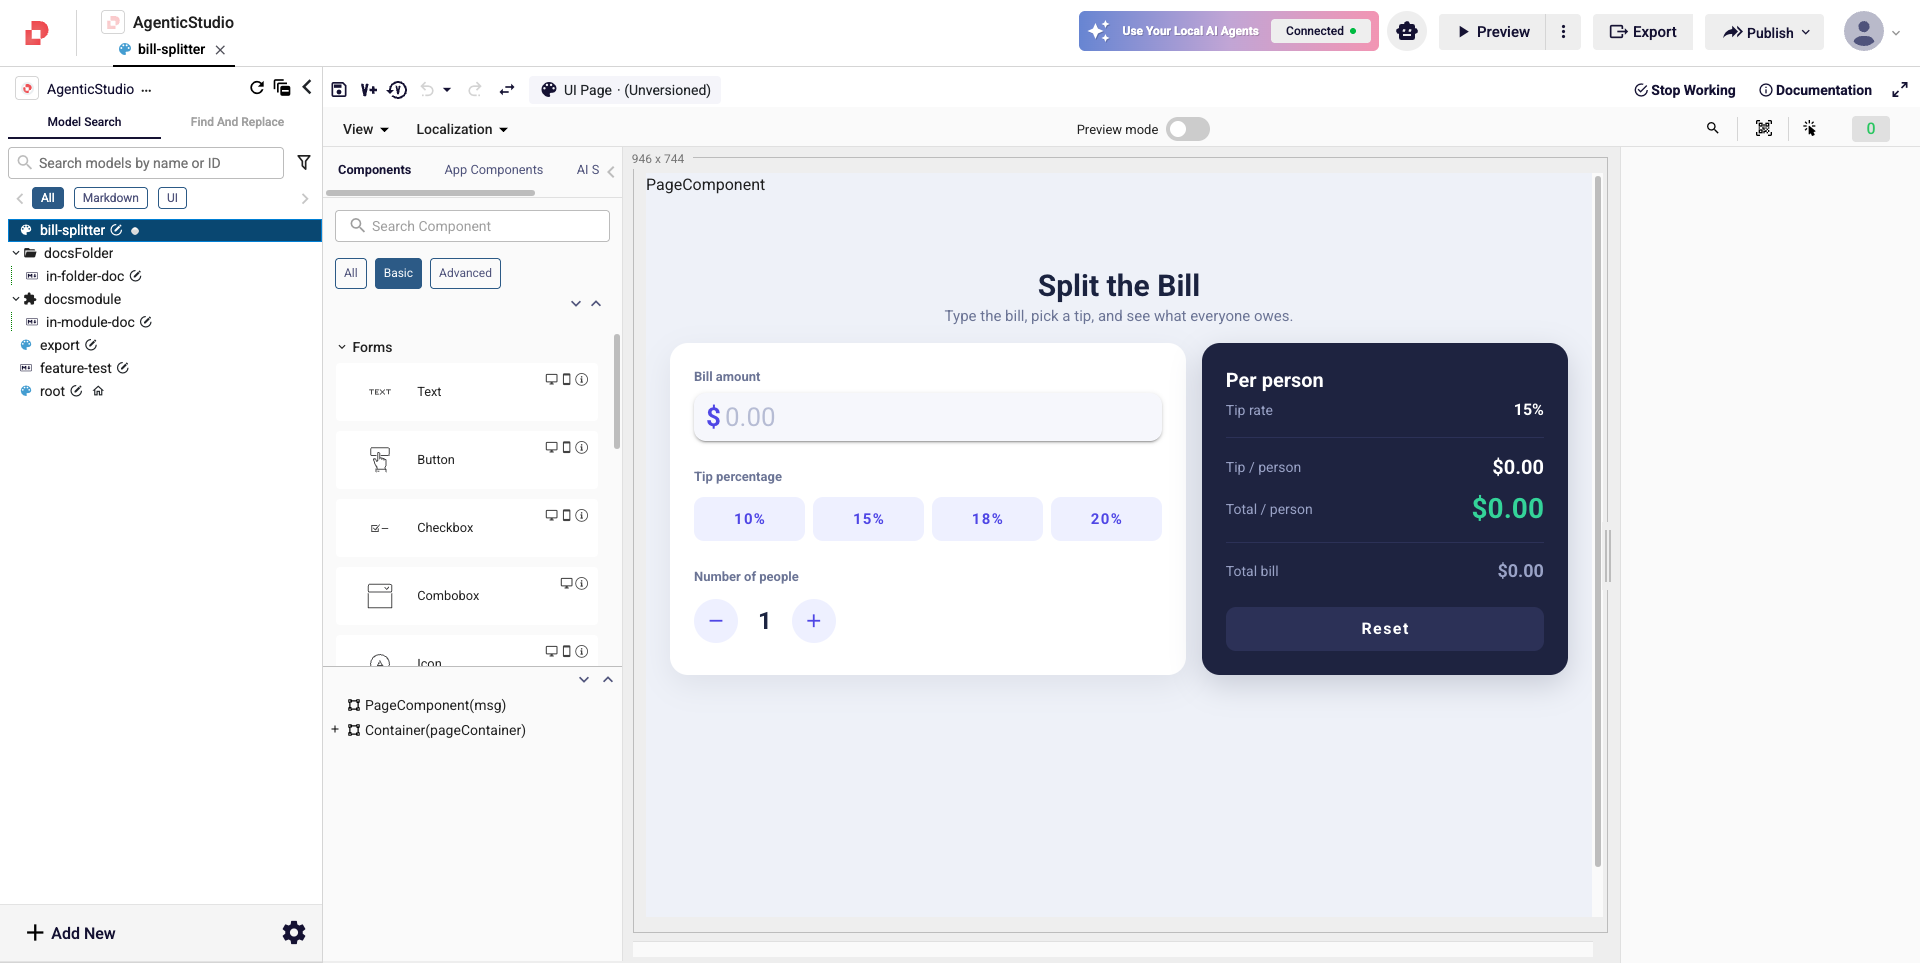
How It Works
Studio CLI runs on your computer and acts as a bridge between your browser and a folder on your disk.
| Step | What happens |
|---|---|
| Sync (pull) | Every model of the app you have open in Studio is written into your folder as a file. |
| Edit | You tell your AI agent what you want, and it changes those files. |
| Push | The changed files are sent back into the open Studio session. The agent does this for you when it finishes; you can also do it yourself with one command. |
| Save | You review the result in Studio and save it as usual. |
Three things are worth knowing before you start:
- Nothing is published automatically. Push only places your changes into the Studio session in your browser. Saving, stopping working and publishing all still happen in Studio, by you.
- You cannot overwrite a colleague's work. Files follow the same Start Working rules as Studio. Any model that is not being worked on by you arrives on your disk as read-only.
- Nothing leaves your machine. The bridge is a direct connection between your own browser and your own folder.
Before You Start
| Requirement | Details |
|---|---|
| Node.js 20 or newer | Download it from nodejs.org. The installer includes npm, which is what you need. |
| Access to Plateau Studio | The same Studio you already use, with an application open. |
| macOS or Windows | Both are fully supported. |
| A terminal | On macOS this is the Terminal app. On Windows it is PowerShell or Command Prompt. |
New to the terminal? You only need two skills: opening it, and pasting a line of text then pressing Enter. Every command you need is written out on this page and can be copied.
How To Open a Terminal
On macOS
- Press Command (⌘) + Space to open Spotlight.
- Type Terminal and press Enter.
- A window with a text prompt opens. This is where you paste commands.
On Windows
- Press the Windows key.
- Type PowerShell and press Enter.
- A window with a text prompt opens. This is where you paste commands.
To run a command, click inside the window, paste the text, and press Enter. The command has finished when the prompt appears again on a new line.
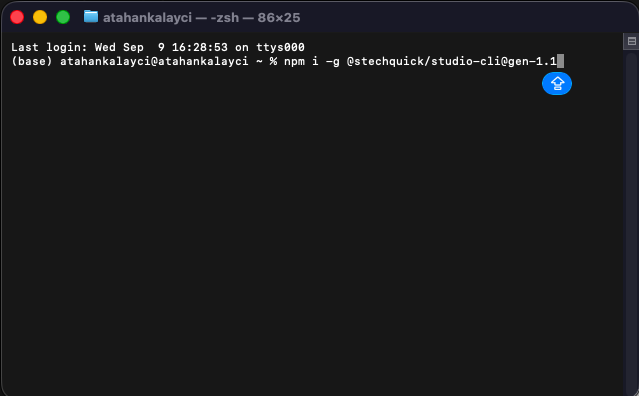
Checking Node.js
Paste this into the terminal and press Enter:
node --version
If you see a version number such as v20.11.0, you are ready. If you see command not found or a version lower than 20, install Node.js from nodejs.org first and open a new terminal window afterwards.
Installing Studio CLI
The installation command is shown to you inside Studio, so you always get the version that matches your environment.
Open your application in Plateau Studio. Look at the top right of the header — the Use Your Local AI Agents button sits to the left of Preview.
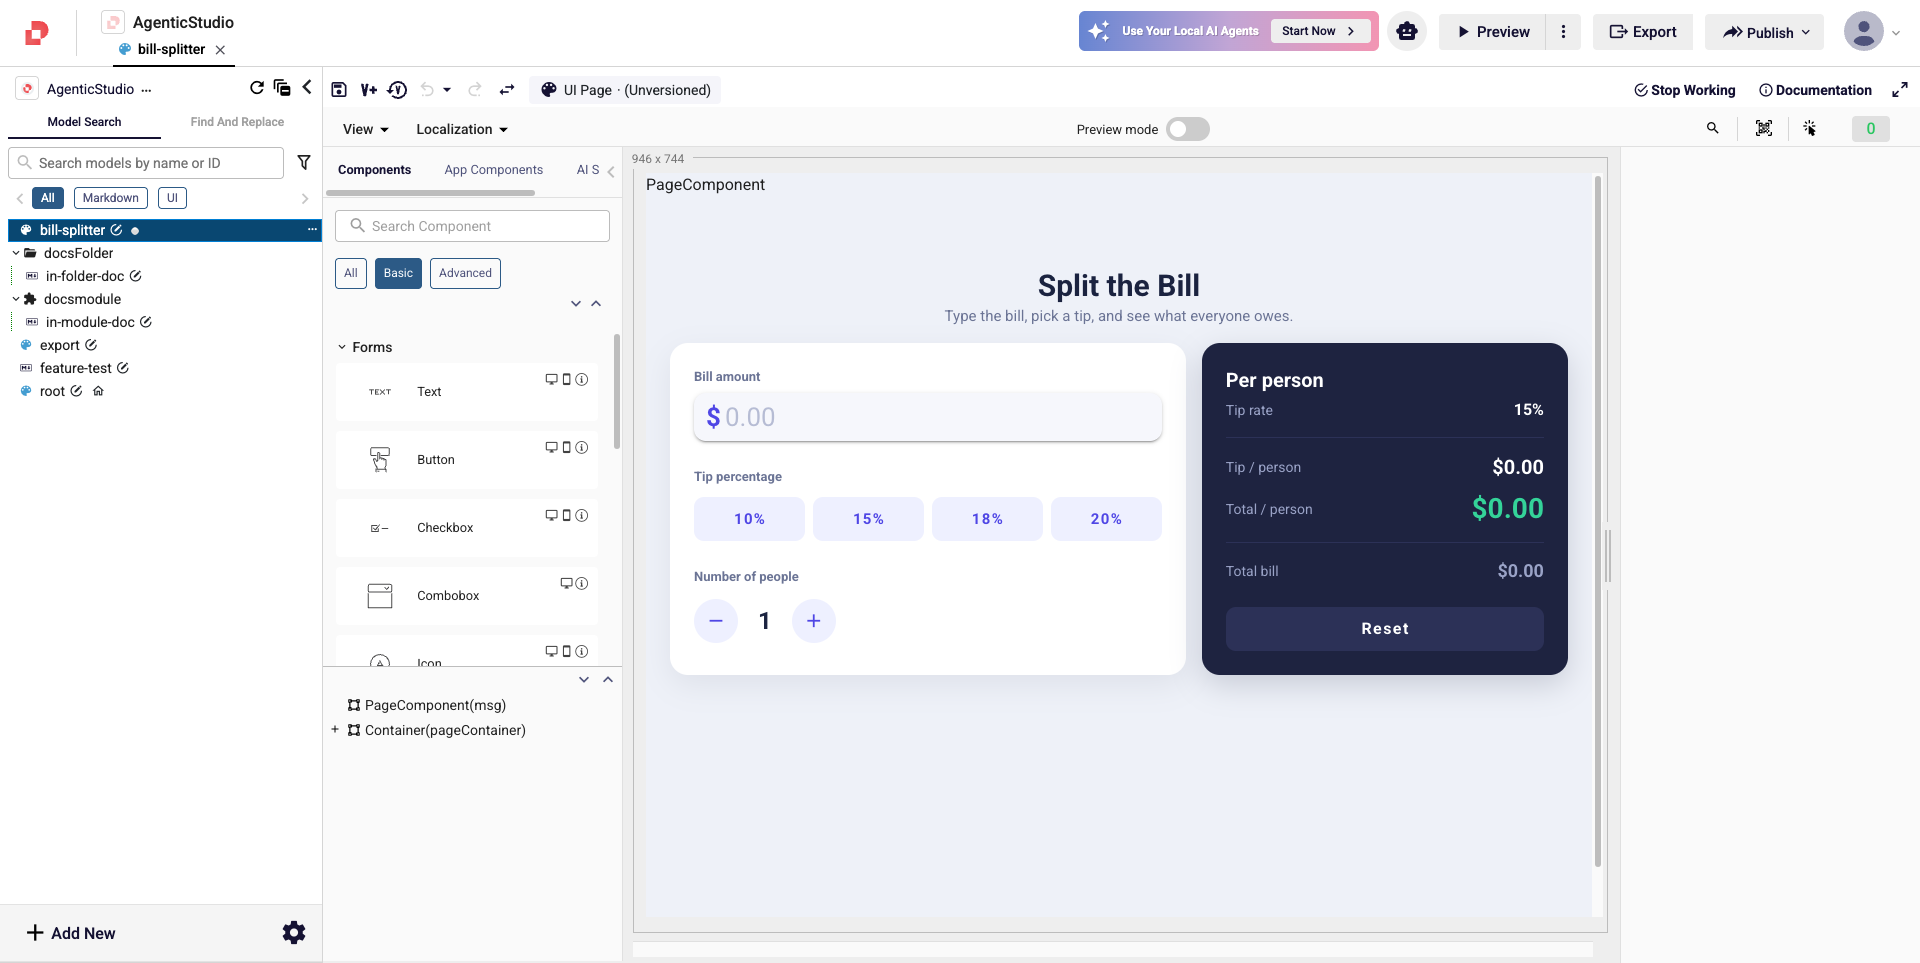
The right side of that button reads Start Now the first time you use it. Click the button.

The AI Agent Sync dialog opens over your application.
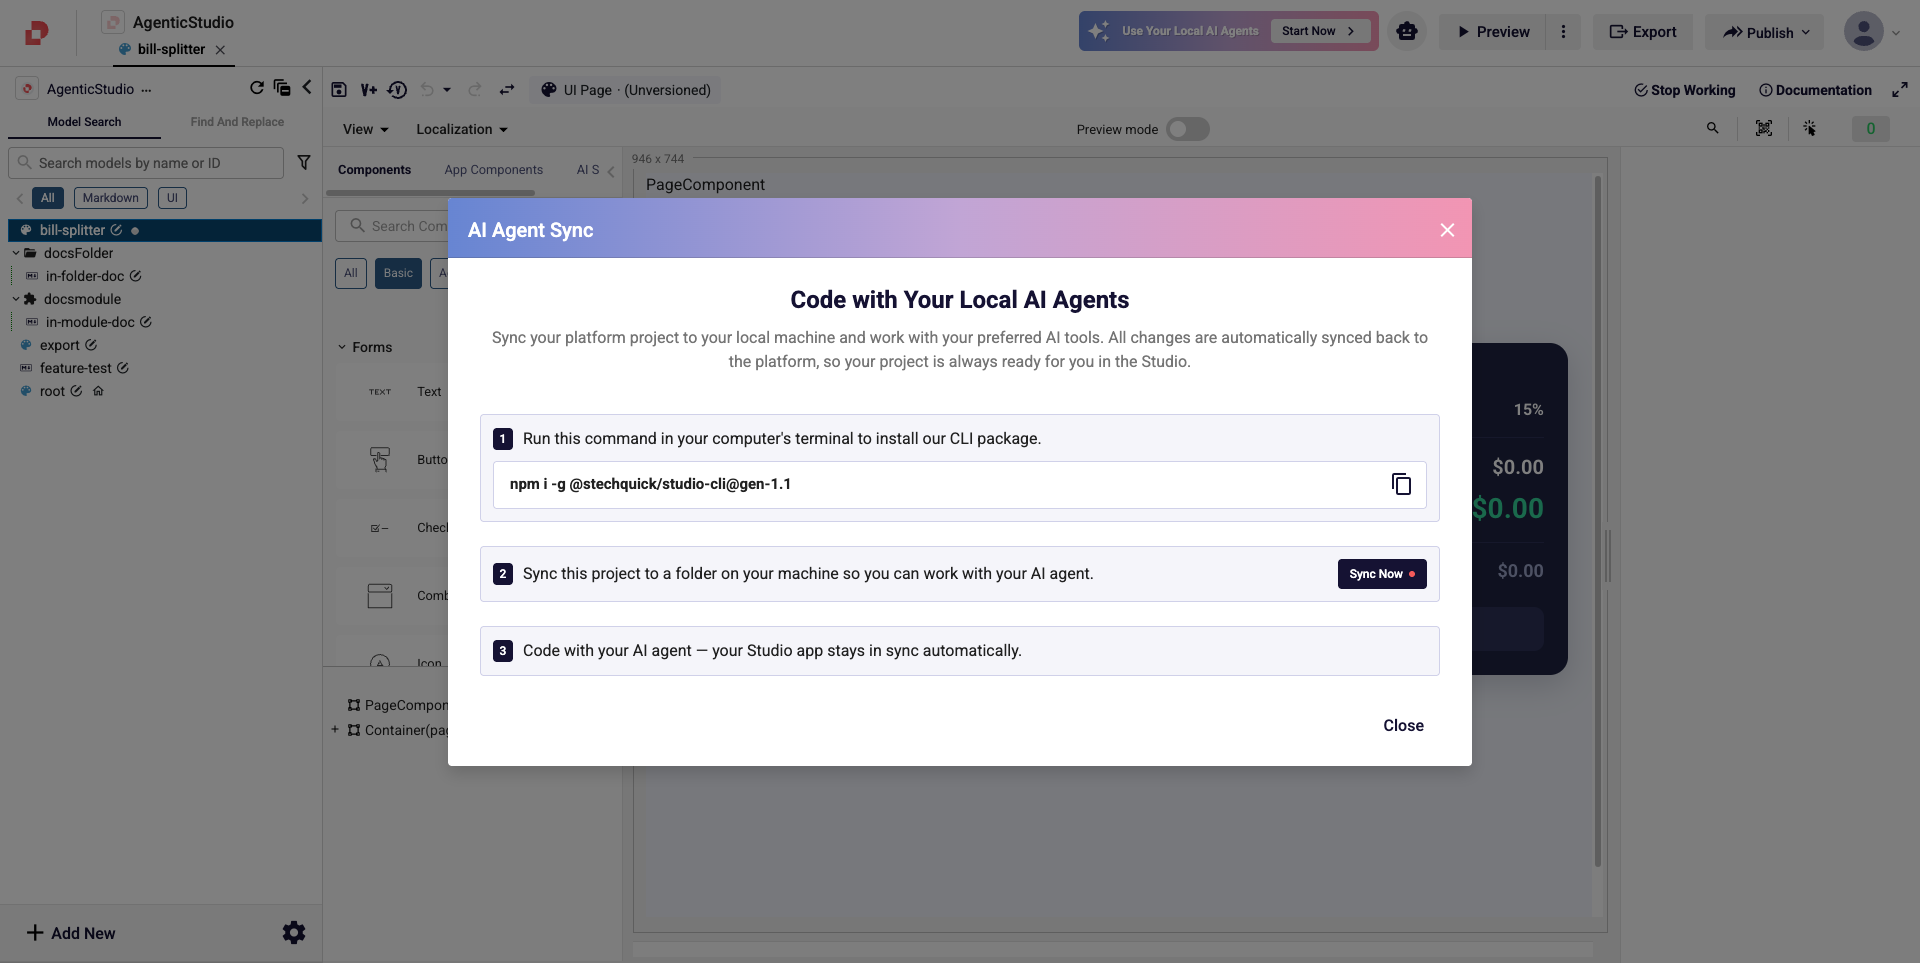
It has three numbered steps:
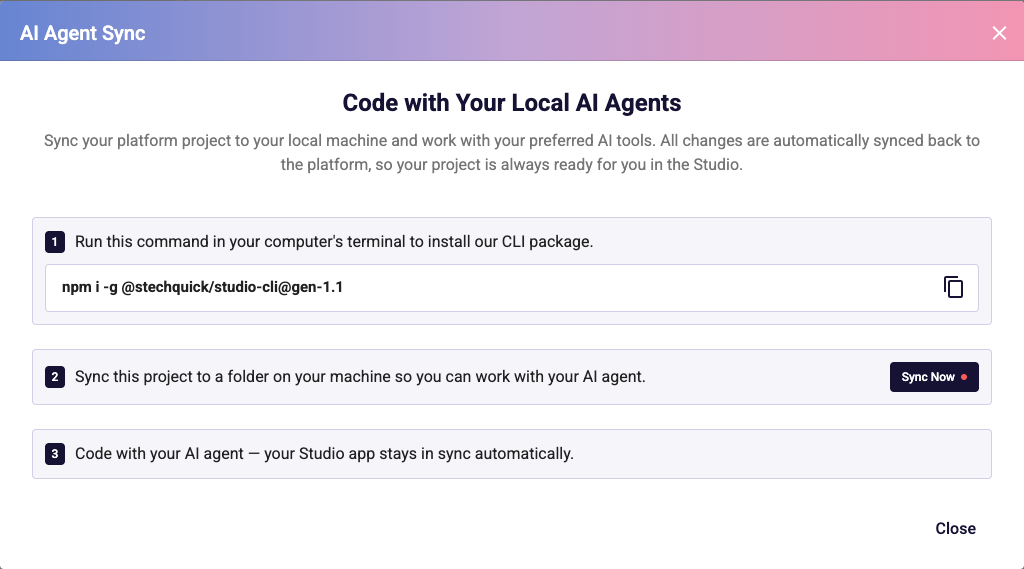
In step 1 of the dialog, click the copy icon at the right of the command box.

Open a terminal, paste the command, and press Enter. It looks like this:
npm i -g @stechquick/studio-cli@gen-1.1Always copy the command from the dialog rather than from this page. The
gen-part at the end pins the CLI to the protocol of your Studio environment, and it changes between releases.Check that it worked:
studio --versionYou should see a version number followed by the protocol generation:
4.1.3-4 (gen-1.1)
Using an internal npm registry? If your machine cannot reach
https://registry.npmjs.org/, apply the registry settings your team uses before running the install command. The same.npmrcsettings used for other Plateau packages apply here.
Connecting Studio To Your Computer
First Connection
Open the application you want to work on in Plateau Studio.
Click Use Your Local AI Agents in the header. The AI Agent Sync dialog opens.
In step 2 of the dialog, click Sync Now.

Your browser asks for permission to open Studio CLI. Allow it. This is the browser handing control to the CLI on your computer, and it only appears until you tell the browser to remember your choice.
A folder picker opens — the normal one from your operating system. Choose an empty folder, or create one, for example
Documents/my-app. This folder becomes your workspace.The button in the header walks through Searching…, Launching…, Select a folder… and Pulling… while your application is written into the folder. When it settles on Connected with a green dot, you are connected and your models are already on disk.

Your application looks exactly as it did before — the only change is the button:
You will not see the setup dialog again. From the next session onwards, the button reads Sync Now and one click reconnects you.
What The Button Tells You
The right side of Use Your Local AI Agents always shows where the connection stands.
| The button reads | What it means |
|---|---|
| Start Now with a chevron | You have not set this up in this browser yet. Clicking opens the AI Agent Sync dialog. |
| Sync Now with a red dot | You are set up but not connected — the CLI was closed, or Studio was reloaded. Clicking reconnects directly, without the dialog. |
| Searching… | Studio is looking for a Studio CLI already running on your computer. |
| Launching… | Studio is starting the CLI for you. |
| Select a folder… | The CLI is waiting for you to choose a workspace folder in the picker. |
| Pulling… with a spinner | Your application is being written into the folder. |
| Connected with a green dot | Connected and in sync. Hover the button and it turns into Disconnect. |
The four states you will actually see:
Start Now — first time in this browser:
Connected — the bridge is running and in sync:
Disconnect — what Connected turns into when you hover it:

Sync Now — set up before, but not connected right now:

Hover the button at any time to see the workspace folder it is connected to.
Connecting Manually
If the one-click flow does not work on your machine — usually because the studio:// handler could not be registered — you can start the bridge yourself.
In a terminal, go to your workspace folder and start the bridge. Leave this window open:
cd Documents/my-app
studio connect
15:33:19 • bridge listening on ws://127.0.0.1:51075
15:33:19 • rendezvous listening on ws://127.0.0.1:51763
15:33:19 • waiting for Studio web to connect…In Studio, click Use Your Local AI Agents.
Both steps are needed. The command on its own does nothing until Studio connects to it. Because the CLI is already waiting, Studio finds it immediately and the folder picker is skipped.
What Is In Your Workspace Folder
After the first sync, your folder mirrors the structure you see in the Studio Explorer: the same folders, one file per model.
my-app/
├── .ai-kit/                    reference material for AI agents
├── .claude/                    settings for Claude Code
├── .opencode/                  settings for Mantis CLI
├── .studio/                    the bridge's connection and sync state
├── .mcp.json                   test-browser tooling for AI agents
├── AGENTS.md                   instructions AI agents read automatically
├── CLAUDE.md                   instructions Claude Code reads automatically
├── App Settings.appSettings    your application settings
├── bill-splitter.qjson         a UI page
├── root.qjson                  a UI page
├── export.qjson                a UI page
├── feature-test.md             a markdown model
├── docsFolder/                 a folder from the Explorer
│   └── in-folder-doc.md
└── docsmodule/                 models that come from a module
    └── in-module-doc.md
| Item | What it is |
|---|---|
*.qjson | Your UI pages and block components. |
*.js, *.ts, *.css, *.md, … | Scripts, styles, services, data types and the other text models of your app. |
| A folder named after a module | Models that come from a module, kept under the module owner's folder. |
.ai-kit/ | Reference material for AI agents: page structure, available components, styling rules, validation tools. |
CLAUDE.md, AGENTS.md, .claude/, .opencode/, .mcp.json | Instruction and configuration files that Claude Code and Mantis CLI read automatically. |
.studio/ | The bridge's own connection and sync state. Leave it alone. |
Editing Your Models
Read-Only Files And Start Working
The rule is the same as in Studio: you must be working on a model before you can change it. When you pull, every file's permission mirrors that state.
| State in Studio | On your disk |
|---|---|
| You are working on it | Editable |
| Nobody is working on it | Read-only |
| A colleague is working on it | Read-only |
| It comes from a versioned or imported module | Always read-only |
To make a read-only file editable, start working on it. Either way works:
In Studio, the familiar way: click Start Working on the model, then run
studio pull— the file unlocks on your disk.In the terminal, in one step:
studio startWorking bill-splitter.qjson15:41:02 • bill-splitter.qjson is now editable
Both do the same thing: the model is now checked out under your name in Studio, and the file is writable on your computer.
If a colleague has the model, you will see:
15:41:02 ✗ checkout failed for model du4htiy9-… — file may be locked by another user
Ask them to Stop Working on it in Studio, then try again. Do not force the file writable yourself: a file you unlocked by hand has no checkout in Studio, and pushing it can conflict with your colleague's work.
Making Your Changes
Start your AI agent in the workspace folder and describe what you want. It has everything it needs already: the models as plain files, and the guides that came with them. See Working With AI Agents.
Sending Your Changes Back
If an AI Agent Made the Change
You usually do not have to do anything here. Sending the work back is part of the agent's job: when it has finished editing and validating, it pushes the changes into your open Studio session itself, and tells you the result. So the normal flow is — describe what you want, wait for the agent to finish, then switch to the browser and review what arrived.
The agent will tell you if it could not push — for example because the bridge is not connected. If that happens, push it yourself with the command below.
Pushing It Yourself
From your workspace folder:
studio push
15:36:03 • pushed 1/1 model(s)
Your changes appear in the open Studio session immediately. If the model you changed is open in an editor tab, Studio refreshes it so you can see the result straight away.
Running push by hand is always safe, even right after the agent pushed — if there is nothing new to send, it says so and does nothing.
If nothing has changed, push tells you so and does nothing:
15:35:13 • push OK — already up to date, no changes to send
Push understands more than simple edits:
| What you did locally | What push does in Studio |
|---|---|
| Edited a file | Updates the model's content |
| Renamed or moved a file | Renames or moves the model, and updates references to it in other models |
| Created a new file | Creates a new model, already checked out to you |
| Deleted a file | Deletes the model, and warns you if others still reference it |
Files that cannot be sent are skipped and listed, so you always know what did not go:
15:36:03 ! skipped: OtherPage.qjson — read-only (use startWorking to check out)
15:36:03 • pushed 1/1 model(s), 1 read-only skipped
Push never saves, stops working, or publishes. Your changes land in Studio as unsaved work. Review them in the browser and save them as you normally would.
Ending a Session
- Review and save your work in Studio.
- Hover the Connected button — it turns into Disconnect — and click it. If you started the bridge manually, press Ctrl + C in that terminal instead.
Your files stay on disk. The next time you connect and pull, they are brought up to date again.
Command Reference
All commands run from your workspace folder. Every command accepts --help, for example studio push --help.
| Command | What it does | Needs an open connection? |
|---|---|---|
studio connect | Starts the bridge for a folder and waits for Studio | — |
studio pull | Studio → your files | Yes |
studio push | Your files → Studio | Yes |
studio startWorking <file> | Starts working on a model and unlocks the file | Yes |
studio convertToBlock <file> | Turns a page into a block component | Yes |
studio buildQjson <path> | Compiles and validates .qjson files | No |
studio figmaPull <url> <token> | Downloads a Figma selection for reference | No |
studio protocol install | Registers the one-click connect handler | No |
studio connect
Starts the local bridge and waits for Studio to connect. Keep the terminal open while you work.
studio connect                 # bridge the current folder
studio connect -d ~/my-app     # bridge a specific folder
| Option | Meaning | Default |
|---|---|---|
-d, --dir <dir> | Workspace folder to bridge | the current folder |
You never choose a port. The bridge takes a free one from the operating system, and Studio finds it automatically through a fixed rendezvous port.
studio pull
Writes every model of the application currently open in Studio into your folder, and refreshes the .ai-kit/ material used by AI agents.
studio pull
studio push
Sends your locally changed, editable files back into the open Studio session, including new, renamed, moved and deleted files.
studio push
studio startWorking
Starts working on a model in Studio under your name and makes the file editable on your disk, in one step. It is the same as clicking Start Working in Studio and running studio pull again.
studio startWorking bill-splitter.qjson
studio convertToBlock
Converts a .qjson page into a reusable block component in Studio.
studio convertToBlock bill-splitter.qjson
studio buildQjson
Compiles and validates a .qjson file, or a whole folder of them. You will not normally run this yourself — it exists so AI agents can check their own work before they push it.
studio buildQjson bill-splitter.qjson
studio figmaPull
Downloads a Figma selection — node tree, SVG render and image fills — into a .figma/ folder in your workspace, as a design reference to build against.
studio figmaPull "https://www.figma.com/design/KEY/Name?node-id=8-681" figd_yourtoken
- url — the link Figma gives you when you copy a link to a selection.
- token — a Figma personal access token.
studio protocol
Registers or removes the studio:// link handler behind one-click connect. Installing the CLI does this for you; run it manually only if the header button does not respond.
studio protocol install
studio protocol uninstall
Global Options
| Option | Meaning |
|---|---|
-v, --verbose | Detailed logging, useful when reporting a problem |
--version | Prints the CLI version and its protocol generation |
--help | Lists all commands |
Working With AI Agents
Studio CLI was built with AI-assisted development in mind. Every studio pull prepares your workspace for it:
.ai-kit/— a knowledge pack describing page structure, the available components, styling rules and the validation tools.CLAUDE.mdandAGENTS.md— instruction files that tools like Claude Code and Mantis CLI read on their own, so the agent knows how to author Plateau models correctly from your very first prompt.
Choosing an Agent
Two agents are set up for you out of the box, and the workspace works the same with either:
| Agent | Start it with |
|---|---|
| Mantis CLI — the agent AILab maintains for use inside the company, with our own providers and local models | mantiscli |
| Claude Code | claude |
If you have trouble installing, signing in to, or running Mantis CLI, contact the AILab team — they maintain it. Problems with the sync itself, on either agent, are Studio CLI's side and belong in this guide.
A Typical Session
Start working on the models the agent will change — it cannot edit read-only files, by design — then:
studio pull      # latest models plus the AI context
mantiscli        # or: claude
Describe what you want in plain language:
Add a search field above the orders table on this page and wire it to filter the results.
The agent reads the guides in .ai-kit/, edits the page, validates its own work, and then pushes the result into Studio itself — that last step is part of its instructions, not something you have to remember. It reports what it changed, whether validation passed, and whether the push went through.
So your side of the loop is short: describe the change, then switch to the browser and review what arrived. Save it in Studio if you are happy with it.
Only if the agent says the push failed — usually because the bridge is not connected — do you need to run it yourself:
studio push
If you are building from a Figma design, pull it into the workspace first with studio figmaPull so the agent has a visual reference.
Letting The Agent See Its Work
On its own, an agent can edit files and validate them, but it cannot see how a page actually renders. You can give it a second, dedicated browser for that — one it can screenshot and click through without touching yours.
There is nothing to set up. studio pull already places the browser tooling in your workspace, and the agent follows the instructions that come with it. The first render check may take a moment while the browser is downloaded. That browser is completely separate from yours, so your tabs and settings are never shared with it.
From then on, every studio push also mirrors the pushed pages into that test tab. The agent can take a screenshot, read errors, click through what it built and fix what it finds, while you keep working in your own browser undisturbed.
The test tab is a viewer with the safety rails built in: it never saves, never starts working on a model, never creates anything, and Studio ignores anything it tries to send back. Closing it changes nothing; refreshing it simply replays what was pushed.
Full Example: Changing a UI Page with a Local AI agent
This walkthrough runs the entire flow once, from a fresh machine to a change visible in Studio. The application is called AgenticStudio and it contains a UI page called bill-splitter. The goal is to change the subtitle text on that page — a small change, so the focus stays on the flow itself.
1. Open the application in Studio
Open Plateau Studio and open the AgenticStudio application, then open the bill-splitter page from the Explorer. Leave the tab open for the rest of the walkthrough — everything you do locally is aimed at this session.
2. Install Studio CLI
Click Use Your Local AI Agents in the header. It reads Start Now because this browser has not been set up yet.
The AI Agent Sync dialog opens over your application.
Copy the command from step 1 with the copy icon.
Paste it into a terminal and press Enter:
npm i -g @stechquick/studio-cli@gen-1.1
Check it:
studio --version
4.1.3-4 (gen-1.1)
3. Sync the application to a folder
Back in the dialog, click Sync Now in step 2.
Allow the browser to open Studio CLI, then choose an empty folder in the picker — Documents/agenticstudio for this example.
The button runs through Launching…, Select a folder… and Pulling…, and settles on Connected with a green dot.
Your application looks the same as before; only the button changed.
Open the folder. It mirrors the Studio Explorer:
agenticstudio/
├── .ai-kit/
├── AGENTS.md
├── CLAUDE.md
├── bill-splitter.qjson
├── root.qjson
├── docsFolder/
└── docsmodule/
4. Start working on the page
If bill-splitter.qjson arrived read-only, nobody is working on it yet. Take it over from the terminal:
cd Documents/agenticstudio
studio startWorking bill-splitter.qjson
15:41:02 • bill-splitter.qjson is now editable
In Studio, the bill-splitter page now shows as being worked on by you — exactly as if you had clicked Start Working on it there. If the page was already checked out to you, the file was editable from the start and you can skip this step.
5. Make the change
Start your AI agent in the same folder — Mantis CLI or Claude Code, whichever you use:
mantiscli # or: claude
If Mantis CLI does not start or cannot sign in, contact the AILab team.
Describe the change in plain language:
On the bill-splitter page, change the subtitle to say "see instantly what everyone owes".
The agent edits bill-splitter.qjson, validates the result, and pushes it into Studio — then tells you what it did:
15:36:03 • pushed 1/1 model(s)
If it reports that the push did not go through, run studio push yourself and carry on.
6. Review the result and save
Switch to the browser. The bill-splitter page has refreshed, the new subtitle is on screen, and the Explorer shows a dot next to the page name marking it as modified but unsaved.
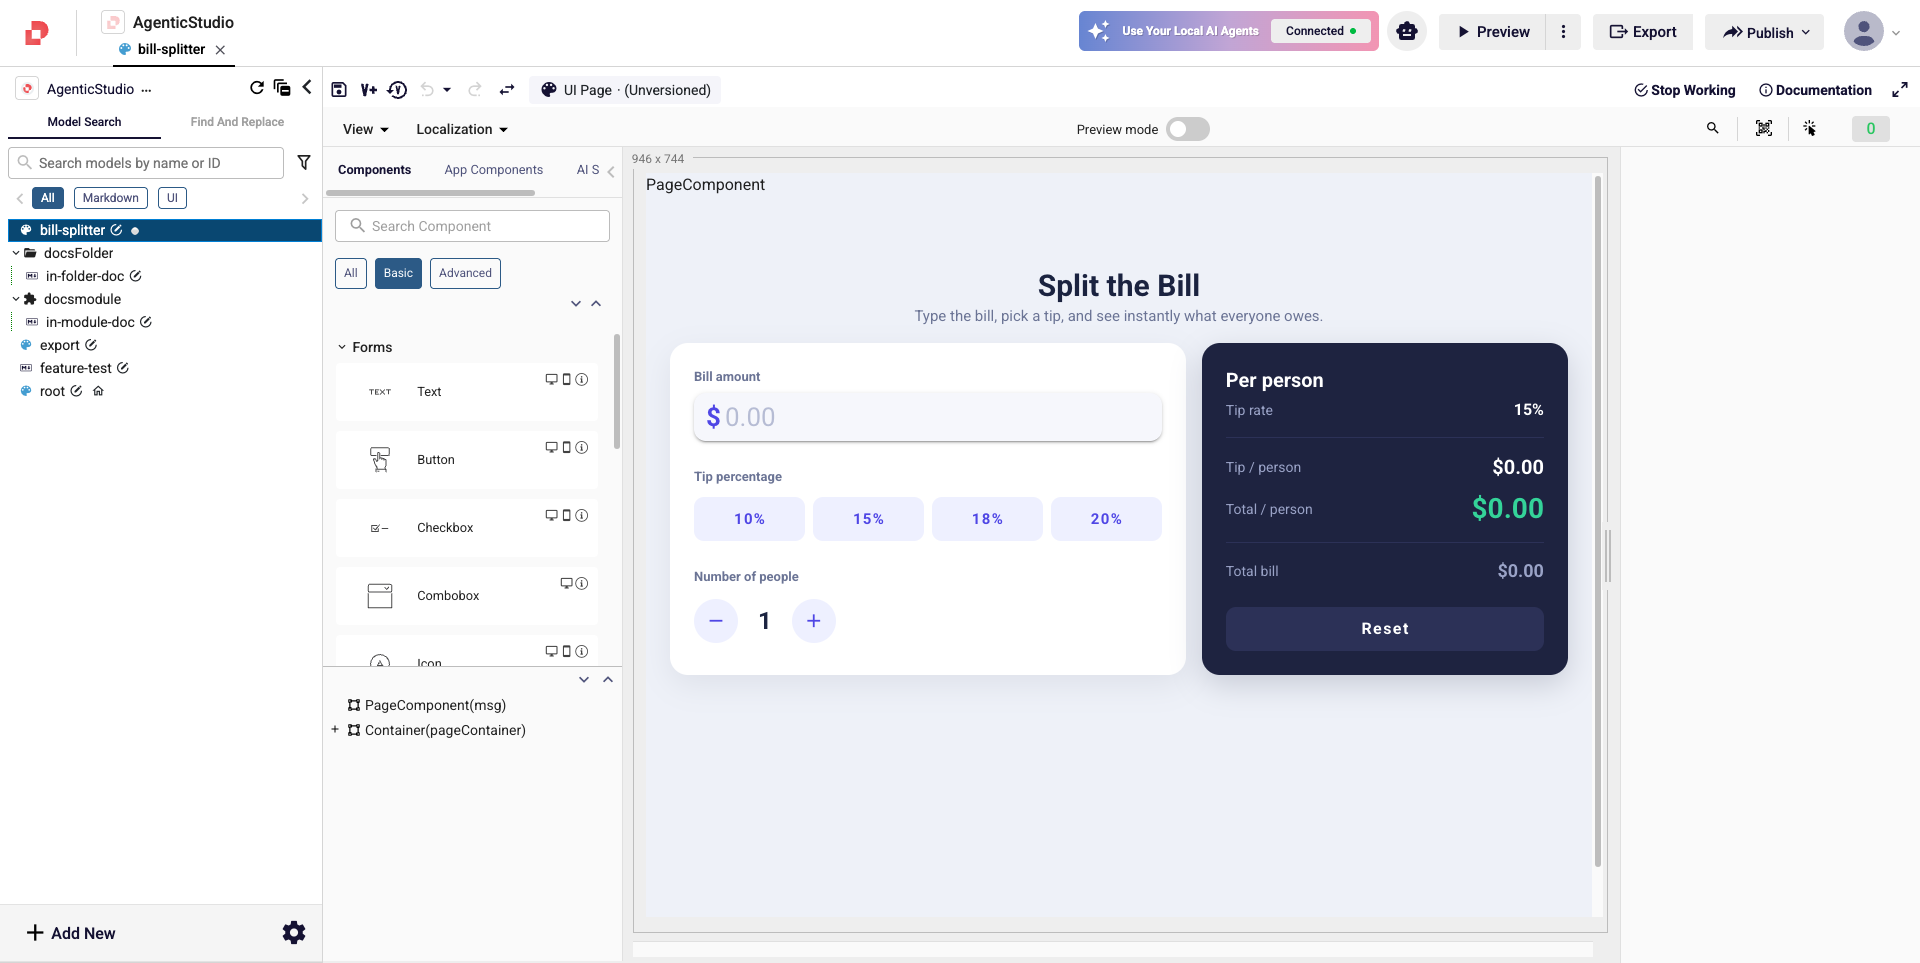
Compare it with the page in step 1 — the subtitle is the only thing that changed, and you never touched the browser to do it.
Preview the page, check the change looks right, and save the model as you always do. Nothing was saved or published until this moment.
7. Finish the session
Hover the Connected button until it reads Disconnect, and click it.
The button then reads Sync Now with a red dot, ready for next time.
Your folder stays on disk. One click on Sync Now and a studio pull bring it up to date again.
That is the whole loop:
connect → pull → start working → ask your agent → review and save in Studio