Workflow Editor
Workflows are flows that consist of multiple steps, follow defined rules, include both human and autonomous steps, and can be easily reorganized. The Workflow Model Editor enables users to design (draw) a workflow. A workflow is defined as a workflow model. Workflow models are the fundamental building blocks of Plateau Studio Workflow.
This page describes the general structure of the editor. For detailed information on developing a workflow, please refer to the Workflow Development page.
Workflows can take many forms. Some example workflows include:
- Credit card fee refund workflow
- Customer onboarding workflow
- Return and refund workflow, etc.
Editor Layout
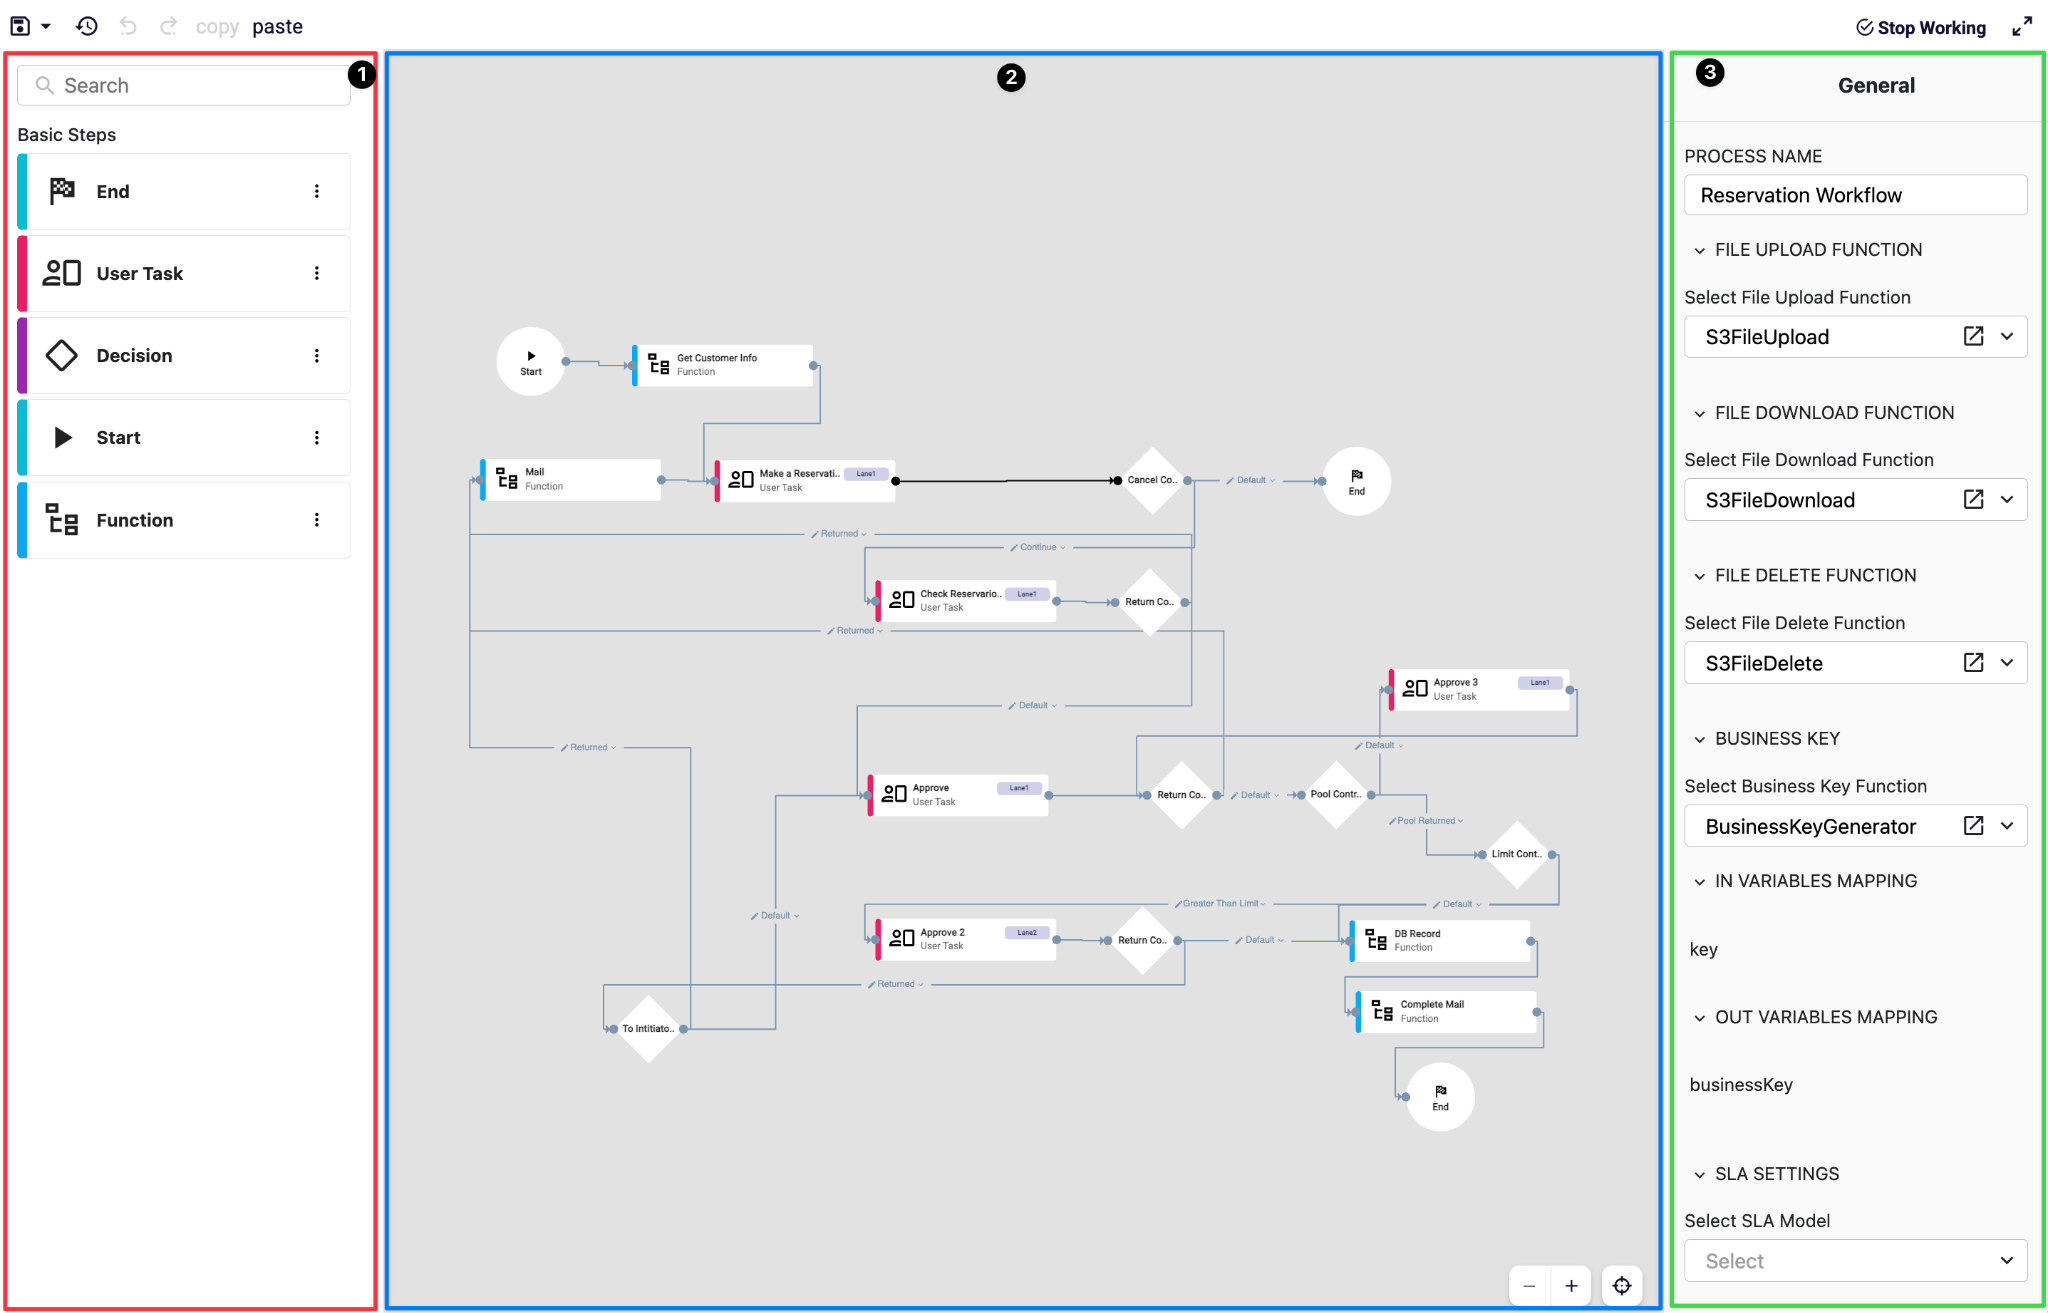
The Workflow Model Editor consists of three main sections:
Left Panel (1)
Contains the list of available workflow steps that can be placed into a workflow. Users can add any step to their workflow using drag and drop. The search field at the top allows users to search within the available steps.
Canvas (2)
The central area where the workflow is designed using drag-and-drop. It displays workflow steps and the connections between them. Users primarily manage the workflow flow from this area.
Steps dragged from the left panel and dropped onto the canvas are added to the workflow.
A step on the canvas can be removed from the workflow by right-clicking on it.
Users can zoom in/out using a mouse or touchpad.
The positions of steps and connections can be changed using drag and drop.
Right Panel (3)
Allows users to configure either the overall workflow settings or components within the workflow, such as steps and connections. Since the configuration options for the workflow itself and for steps/connections differ, the fields displayed in this panel can change dynamically.
This panel enables configuration of many items, including:
Critical workflow-level settings,
Configurations between workflow steps,
Input/output mapping settings for steps.
FAQ
How do I add a workflow step?
A step can be added by dragging the desired item from the left panel and dropping it onto the canvas. However, if the added step is not directly or indirectly connected to the Start step, the workflow will not pass through this new step during normal execution.
How do I open the configuration for a workflow step?
When you click a workflow step on the canvas, the configuration options for that step will appear in the right panel.
How do I connect two workflow steps?
The circles on both sides of a workflow step represent the possible connections:
- The left circle indicates the incoming connection from the previous step,
- The right circle indicates the outgoing connection to the next step.
To create a connection, drag from the circle to the target step.
How do I delete a workflow step or a connection?
Right-click the workflow step or connection, then use the Delete button from the menu to remove the selected component from the workflow.
How do I undo an action?
You can undo or redo actions using the undo/redo icons located to the right of the save button in the editor.
What keyboard shortcuts are available?
- CTRL + Mouse: Select multiple workflow steps.
- CTRL + Z: Undo the last action.
- CTRL + C: Copy the selected workflow step(s).
- CTRL + V: Paste the copied workflow step(s).
References
- Workflow Development
- Workflow Configurations
- Steps