Symphony User Guide
Pre Existing
- functions: These are process functions.
- qjsonfunc: The qjsonfunc serves Qjson. If there isn't need to serve Qjson service, it can be remove
- samplefunc: The samplefunc is one of the functions. It created to be an example function. It can be remove
- test: It is for manuel http request. There are two test samples available
- unitTest: It is for writing your own unit test . Write
$ symphony-cli sym-testcommand for start the unit test.
Additional Files
- Note: if you are not familiar with these files, don't interfere
- .vscode: Check in the .vscode folder if you want to share settings, task configuration and debug configuration with the team.
- .gitignore : The.gitignore file is a text file that tells Git which files or folders to ignore in a project.
- .package.json : This file is used to give information to npm that allows it to identify the project as well as handle the project's dependencies.
- .app.yaml : The app.yaml file also contains information about your app's code, such as the runtime and the latest version identifier. Each service in your app has its own app.yaml file, which acts as a descriptor for its deployment.
- .jenkinsfile: As discussed in the Defining a Pipeline in SCM, a Jenkinsfile is a text file that contains the definition of a Jenkins Pipeline and is checked into source control. Consider the following Pipeline which implements a basic three-stage continuous delivery pipeline.
- .jest.config.js : The jest.config.js file is used for configuring Jest, the JavaScript testing library used for writing unit and integration tests in Pup. The modulePaths property tells Jest where it can resolve NPM modules used inside of the code you're testing.
- .local.ts : The local.ts file that enables the project to be run locally.
- .tsconfg.json : The presence of a tsconfig.json file in a directory indicates that the directory is the root of a TypeScript project. The tsconfig.json file specifies the root files and the compiler options required to compile the project.
Files To Be Created
dist: Directory dist/ is where the output of the compiler is stored for working in the local. There isn't in environment.
node_modules: They are the modules or dependencies of your project. All the files for the modules are stored in the nodes_modules directory of your project root. There isn't in environment
Add New Function
You must be under the project directory you created. After that use $ symphony-cli sym-addfunc \[Function Name\] command
Build Project
Write $ symphony-cli sym-build command
Run Project
There is an adapter that provides working on two different environments. In this way, it can work in different environments.
Classic
Build must be run first. (Refer to Build Project) After that run $ symphony-cli sym-start command if you want with random port. For running with specific port try , $ symphony-cli sym-start -p 3003 command
Serverless
There are three different architectural workspaces as local, remote and playground.
- Local: If serverless architecture is installed in locale, it can be worked in this area. You can see more details with
$ symphony-cli sym-deploy --helpcommand - Playground: A ready-made static environment, runs on the symphony cloud. You can see more details with
$ symphony-cli sym-deploy --helpcommand - Remote: It is the real deployment environment. And relevant parameters are needed to operate. In General it runs on Jenkins. You can see more details with
$ symphony-cli sym-deploy --helpcommand
Development in Symphony
Library descriptions are available as code comment

Getting Data From The Request
Getting Data From The Body :
const x = sym.request.body.number1
Getting Data From The Header:
const x = sym.request.headers.number1
Getting Data From The Cookie:
const x = sym.request.cookie.number1
Getting Data From The Querystring:
const x = sym.request.queryString.number1
Add Data To Response
Add Data To Body :
sym.response.body.calculations = { funcName: "samplefunc", sum: sum, difference: difference };
Add Data To Header:
sym.response.headers.test ="SampleTest";
Add Data To Cookie:
sym.response.cookie.test ="SampleTest";
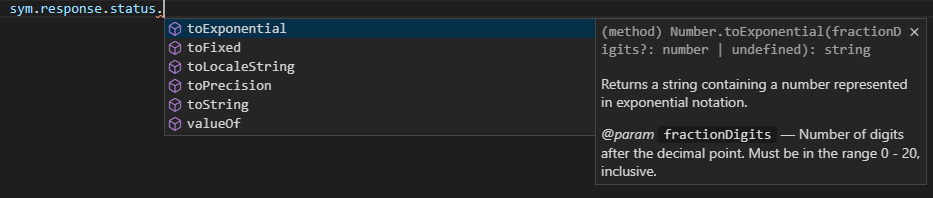
Set The State Code :
Library descriptions are available as code comment
Set The Cors Headers :
In the sym-engine\pipeline.ts page, the CORS settings for all functions are made using the sym.response.manageCors command within the preFunc method."
   preFunc: async sym => {
        console.log(`${sym.properties.funcName} : preFunc is starting... HTTP Method: ${sym.request.httpMethod}`);

        if (!sym.response.manageCors({
            allowOrigins: { "*": true },
            allowHeaders: ["X-PINGOTHER", "Content-Type", "Cookie", "Set-Cookie", "accesstoken", "correlationid", "authorization"]
        })) {
            return { stopExecution: true };
        }

        console.log(`${sym.properties.funcName} : preFunc is finished HTTP Method: ${sym.request.httpMethod}`);
    }
Content-Type:
To change content type for a function by code
sym.response.headers["content-type"] = "application/json; charset=utf-8";
To change default content type application wise change sym-engine/config.yaml\ To change default content type for a single function change functions/{funcName}/config.yaml
  response:
    defaultContentType: "application/json; charset=utf-8"
Rest Request
Sample:
   const respGet = await sym.rest.get({ symConfigKey: "restGetExample" });
        sym.response.body.restGetResponse = { listEmp: respGet.body };
Config:
Value of key structure must contains url and timeout. like that:
  restGetExample:
    url: "http://dummy.restapiexample.com/api/v1/employees"
    timeout: 2000
UrlData: symphony version: >= 0.1.9
In order to create parametric urls like Path Parameters use urlData object.
  localEndpoint:
    url: "http://localhost:4321/{path1}/{path2}?lang=tr"
    timeout: 2000
const resp = await sym.rest.get({ symConfigKey: "localEndpoint", urlData: { path1: "test", path2: "retrieve" } });
this results in a url like http://localhost:4321/test/retrieve?lang=tr
QueryData: symphony version: >= 0.1.9
In order to add queryParameters / queryString / searchParams to urls use queryData object.
  localEndpoint:
    url: "http://localhost:4321/{path1}/{path2}?lang=tr"
    timeout: 2000
const resp = await sym.rest.get({ symConfigKey: "localEndpoint", queryData: { x: "5", y: "6" }, urlData: { path1: "test", path2: "retrieve" } });
this results in a url like http://localhost:4321/test/retrieve?lang=tr&x=5&y=6
Soap Request
Sample:
   const soapBody = { "intA": "2", "intB": "3" };
   const respSoap = await sym.soap.request({ request: { body: soapBody, methodName: "Add", symConfigKey: "soapExample" } });
        sym.response.body.soapResponse = { total: respSoap.data };
Config:
Value of key structure must contains url and timeout. like that:
  soapExample:
    url: "http://www.dneonline.com/calculator.asmx?wsdl"
    timeout: 5000
Config
There is a config.yaml for each function. Default key in the first level is for environment. You can design key-value structure for sub level of default key except service keys and bag key.
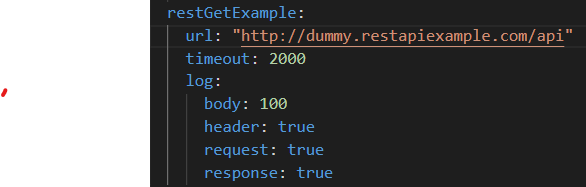
Rest Service Keys
 restGetExample:
    url: "http://dummy.restapiexample.com/api/v1/employees"
    log:
      body: 100
      header: true
      request: true
      response: true
log item is used for request log. you can arrange the options according to your needings. Body option can closed by false or you can give character number length.
Soap Service Keys
 soapExample:
    url: "http://www.dneonline.com/calculator.asmx?wsdl"
    timeout: 5000
Bag Keys
Note: The environment key is an environment where the bag value is kept. It can be set as memory and hazelcast.
  bag:
    environment: memory
    hazelcastClusterMembers: [
            "127.0.0.1:5701",
            "127.0.0.2:5701"
        ]
How to read parametric variable from environment
Environment parameters can be read in config file. We need to recognize "process.env" consept of Node.js. In shortly this is a variable which keeps the environment values in node.js. And it needs to be set in advance to read the environment values as a parameter. If we suppose the process.env is set like this; process.env["urlKey"]= http://213.161.158.121:6082
 default:
  retrieveNonCustomerAddress:
    url: \${urlKey}/api/address/getCustomerAddress
Environment
If you want to prepare config struct as each different environment, you can make this with jenkins.file
Cache
There are two type of cache using such as bag and sessionbag. Bag keeps process data between the functions. sessionbag keeps session data in the app. Three options has provided to use cache structs such as memory,jwt and hazelcast. This options can arranged by config.yaml for both bag and sessionbag.
 bag's default value is memory and sessionbag's default value is none.
important: If you work with system multiple nodes for instance kubernetes. Memory option will not work cause nodes can restart and the memory of nodes can be refresh.
Bag
It is the struct which keep needed data between functions. For example, you have three function as A,B,C and you want to pass a data from B to C. You can set bag value as false at the A function because you don't need to pass data from A to B.

But you should set bag value as true at B function. Because we want to when we are at C function, know data of B function.

And you can take the bag data of the B , When you are at C

SessionBag
This cache type can used by all functions. It based on session informations of the app. It needs to be prepared in config.yaml to use.
Log
thanks to this struct, you can write log as sysout and disk(.txt)
syntax is like that,
sym.logger.log({message:"test",level:LogLevel.log})
First parameter is content of log, second is level of log. level is required. also you can use "console.log()" but we don't have support for disc log in this way.
Log Levels
- error: For writing error log. It contains call stack
- warn: For writing warn log .It contains call stack
- trace: For writing trace log .It contains call stack
- log: For writing trace log .It doesn't contain call stack
- info: For writing info log .It doesn't contain call stack
- debug: For writing debug log .It doesn't contain call stack
When from debug level to error level , order of importance increases
Log Config
Log config structer is available for log settings.

- minlevel: For decide beginning of log level. For instance, if you decide trace as minlevel,it writes trace,warn,and error levels. But if you want to comprehensive level, you can set debug. Also if you don't want to writing log, you can set none.
- path: For writing disc log. You must to give a path if you want to disk log(.txt)
- disk: For writing disc log .You must to set true if you want to disk log(.txt)
- request log settings: log item is used for request log. you can arrange the options according to your needings. Body option can closed by false or you can give character number length.
Validation
Validation structer for symphony function request inputs
There are two type validation for as one input and multiple inputs
Here is for one field
- doValidate: validate for one input with multiple function. if it find least one error, it returns. if it doesn't find any error it returns undefined.
   const test= "56098551384"
        sym.doValidate("test",test,[
            sym.validate.maxLength({maxLength:11}),
            sym.validate.maxLength({maxLength:12}),
            sym.validate.identityNumber()
            ])
- doValidates: validate for one input with multiple function. it checks each function and if it find error , it returns every error. if it doesn't find any error it returns undefined.
Here is for multiple field
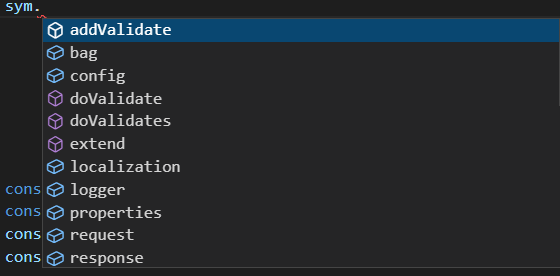
- addValidate: it doesn't run validate functions. It just adds the functions to the validation list
- resultValidate: it runs functions that added to validation list. if it find least one error, it returns. If it doesn't find any error it returns undefined.
- resultValidates: it runs functions that added to validation list. it checks each function and if it find error , it returns every error. if it doesn't find any error it returns undefined.
  const test= "56098551384"
  const test2="test";

        sym.addValidate("test",test,[
            sym.validate.maxLength({maxLength:11}),
            sym.validate.identityNumber()
            ])
        sym.addValidate("test2",test2,[sym.validate.maxLength({maxLength:5})])

  const validationResult=sym.resultValidates();
Also you can handle your error message header and status before the request.
sym.addValidate("test1",test1,[sym.validate.maxLength({maxLength:4,errorMessage:"there is an error"},{status:400,headers:"test"})])
Localization
Localization structure is for your language changes automaticly
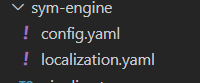
firstly you need to arrange your localization.yaml under the sym-engine folder like the visual.
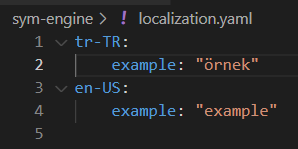

first parameter is your text, other parameter is for language options. currently turkish and english languages are available. if you don't give language options. It will have arranged according to first language option in the localization.yaml
Pipeline Functions
Pipeline functions are created for some particular needings such as to run when application is starting or before every request or after. In general this needings are in common for all the functions for instance logging for every functions. These functions can writed in pipeline.ts file.
- preFunc: It works before each function execution
preFunc: async sym => {
       //write code to execute before each function execution
       //to stop execution return {stopExecution: true}
    },
- postFunc: It works after each function execution
  postFunc: async sym => {
       //write code to execute after each function execution
    },
- appStart: It works when starts application execution
appStart: sym => {
       //write code to execute when starts application execution
    },
- onBeforeRest: It works before each rest request execution
onBeforeRest: async ({ url, body, header }: {
        url: string;
        body?: string | Record<string, any> | FormData | undefined;
        header: Record<string, string | string[] | undefined> | undefined;
    }): Promise<{
        url: string;
        body?: string | Record<string, any> | FormData | undefined;
        header: Record<string, string | string[] | undefined> | undefined;
    }> =>  {
        //write code to execute before each rest request execution
        return{
            url:url,
            body:body,
            header:header
        }
    },
- onAfterRest: It works after each rest response execution.
onAfterRest: async ({ body, status, statusText, headers }: {
        body: Record<string, any>;
        status: number;
        statusText: string;
        headers: Record<string, string | string[] | undefined> | undefined;
    }): Promise<void> =>{
        //write code to execute after each rest response execution
    },
Also If you want to reach sym object here, you have to add sym object into the rest service call function as a parameter.
 let resp= await sym.rest.get({sym:sym,symConfigKey:"sampleKey",body:{result:"succesfully"}})


async ({sym, body, status, statusText, headers }: {
        sym:ISymphonyObject;
        body: Record<string, any>;
        status: number;
        statusText: string;
        headers: Record<string, string | string[] | undefined> | undefined;
    }): Promise<void> => {
        console.log("seko--sym--",sym);
        console.log("seko-body--",body)
    },
- onBeforeSoap: It works when before each soap request execution
onBeforeSoap:({url,request}:{url:string,request:ISoapRequest}): {
        url: string;
        request: ISoapRequest;
    }=>{
        return{
            url:url,
            request:request
        }
    },
- onAfterSoap: It works when after each soap request execution
  onAfterSoap: (response:any):void=>{
       //write code to execute after each soap request execution
    },
Scheduler
Scheduler feature in Symphony is used for some timed and regularly functions. It works in two ways. It can used with callback method as first way. In this way you can execute your custom callback functions by passing a parameter. as for second way ; You have already particular functions in symphony app and these functions are unique for app. These functions can executed too by passing names of these functions as a parameter.
Scheduler Object Scheduler can be used by accessing via symphony object. Scheduler object has schedule function and this function gets an object named 'funcOptions' and gets time(millisecond) as a parameter to decide your working period .\
funcOptions: 'funcOptions' object includes some parameter for execute a function in scheduler such as header, cookie,body and importantly 'func'.\
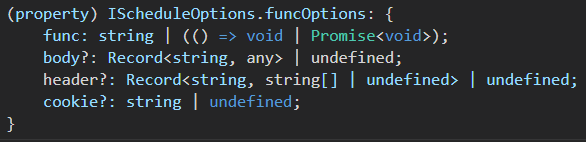
func: func property in funcOptions object can be a string name as well as a callback function. This point is important because it will decide your working method. If you choose to give string name, Definitely It has to be a name of your current functions in the symphony app, other option will a callback function and content of the callback doesn't matter.
Example: First using
 let handler:IJobHandle = symphony.Scheduler.schedule({funcOptions:
                {func:"sampleFunction",
                 body:{ "x":5, "y": 6 }
                },time:10000});
Example: Second using
            handler = symphony.Scheduler.schedule({funcOptions:
                {func:function(){console.log('hello world')},
                 body:{ "x":5, "y": 6 }
                },time:10000});
Schedule function will give you a handler object.\ handler: Handler is used for start,stop and pause your scheduled functions\ Start Scheduled:
handler.startSchedule();
Stop Scheduled:
handler.stopSchedule();
Pause Scheduled:
handler.pauseSchedule();
Using Symphony Libraries
There are some symphony libraries such as metric and log and more which we provide in the Symphony. All you need to use these libraries is to integrate to the sym object which one of the important object in symphony that contains important methods and sub objects.
Firstly you need to import your library like below this.

Second step is to integrate your library to sym object. You need to create an instance from your library object and you will give it as a parameter to extend method in sym object. And this method will give you a new object which combined your default sym object and your library object.

In this way you can use you library in symphony app.

Using Auto Retry
Auto Retry is used for some service calls and similar processes which don't response successfully first time. it is given retry count and delay time between retries as parameter.
In this example Auto retry is being used for an api call.
    let response = await symphony.retry({ retryCount: 6, retryDelay: 3000 }, async function () {
        return await sym.rest.get({ symConfigKey: 'retryApi' });
    });
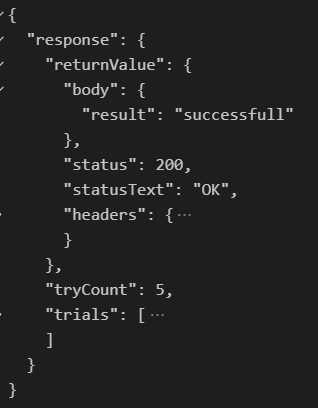
It will give you the response and try count and trials response and successful response.