Localization Settings
Localization allows you to add multi-language support to your applications. You can prioritize Global Localization files that are either created within your application under Explorer > UI Settings or imported from modules.
To interact with localization details, see Add Multi Language (Localization)
How to Add Global Localization to Application?
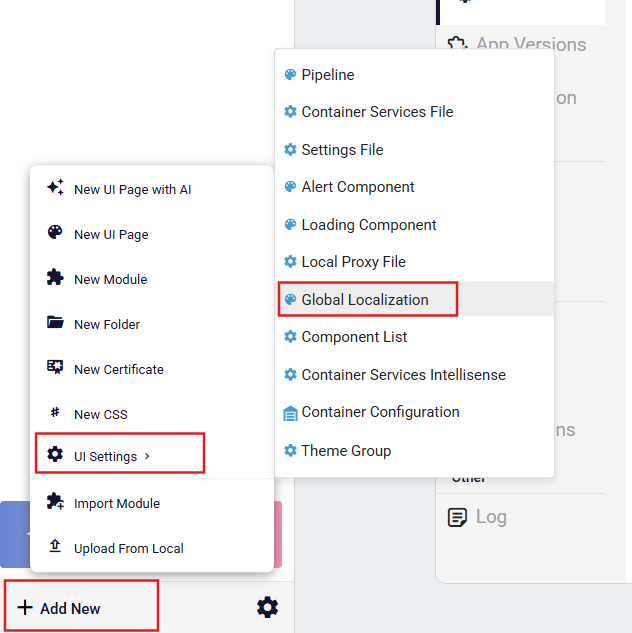
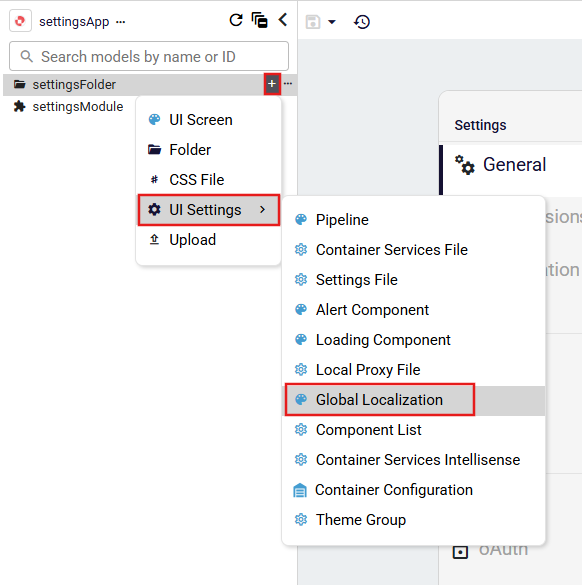
In the navigation menu on the left side of the page, click the Add New button. Then, in the UI Settings dropdown that appears, select Global Localization. Alternatively, if a folder or module has been added to the navigation menu, you can click the + action next to the item to expand its context menu and select Global Localization from the UI Settings dropdown.
Settings files added under a module can be shared along with the module and used in another application by importing the corresponding module. This allows settings defined in one application to be reused across multiple applications.
- Adding Global Localization To The Root
- Adding Global Localization To The Folder
- Adding Global Localization To The Module

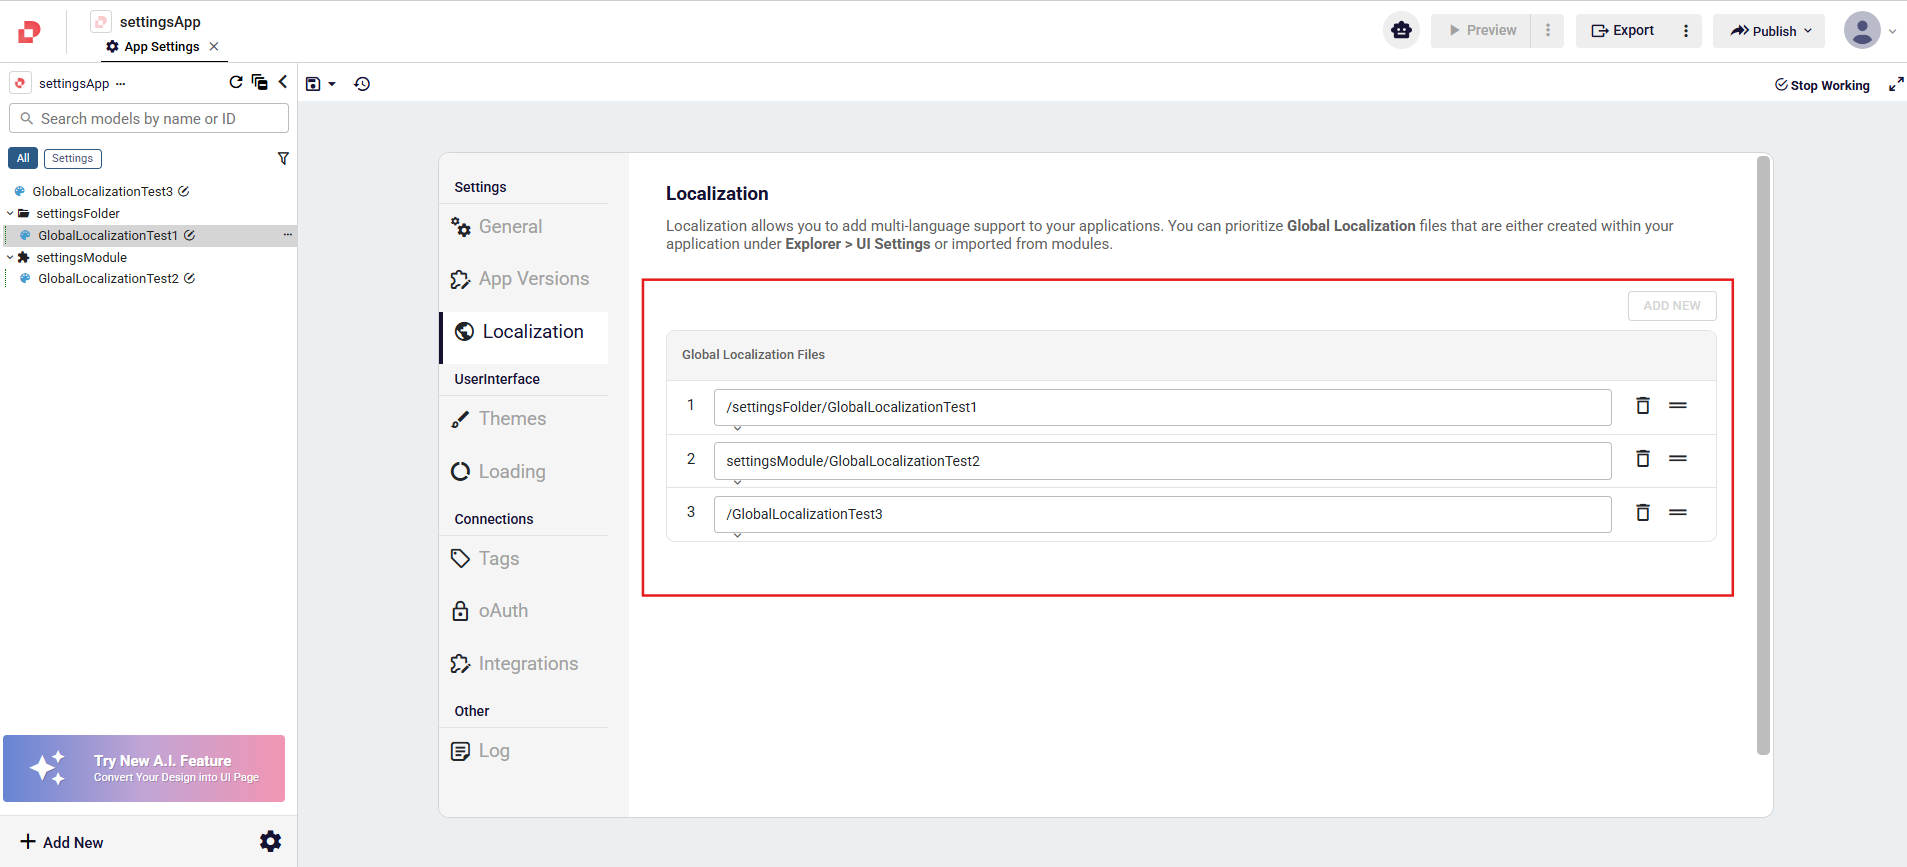
How to Use Global Localization Files?
Existing localization files can be navigate to: Settings → Localization
One or more Global Localization files can be added using the Add New button. Each entry represents a localization file path within the application.
File Path: Path of the Global Localization file (e.g.
/LocalizationTest)Order: Orders the Global Localization files. Global localization files are processed from top to bottom. If the same localization key is defined on multiple files, the key value read from a subsequent page will override the value from the previous one.
Delete (🗑️): Removes the Global Localization file.