How To Transfer To Plateau Studio
Create Studio Account
- Go to the Studio's login Link.
- Enter your desired email address in the CREATE NEW ACCOUNT button.
- Click on the NEXT button and enter the numbers from the OTP message sent to your email address in the provided boxes.
- Click on the NEXT button. Set your account password and click on the FINISH button.
- Select your Name, Surname, and Role, and log in to the Studio.
For more detailed information, you can visit this link.
Create Organization
- Log in to the Studio.
- Click on the CREATE ORGANIZATION button at the top right
- In the opened dialog window, enter the name of the Organization you want to create and click on the CREATE button.
Note: Within Plateau Studio, an Organization refers to a working structure that will be present in your application and can grant working permissions to users. Authorization is given by the person who creates the organization.
Example: You can create an organization with the name of your product/project that includes Backoffice, Web Application, Landing Page, and Mobile Application. If multiple applications are being developed from the directorate working group, you can create an organization named "Directorate."
For more detailed information, you can visit this link.
Create Application
- After creating the Organization, continue by clicking on the buttons below the Create New Application panel.
- In the dialog that appears, enter the name and description (optional) of the application, and click on the CREATE button.
For more detailed information, you can visit this link.
Start / Stop Working
- Start Working allows you to take ownership of the Working model and start working.
- Stop Working allows you to release the Working model and perform versioning.
For more detailed information, you can visit this link.
Plateau Studio Migration Steps
UI Page Transfer
Plateau Studio has a module structure corresponding to MicroUI. You can import your existing screens under MicroUI into the module structure and import your QUI application shell screens into the Root Level in Plateau Studio.
To create a module (e.g., Customer), click on the Add New button in the Application you created in the Studio, and select New Module in the opened panel.
Create a module with the same name and then click on the + button when hovering over the module in the Studio. In the opened panel, select Import Model and import the screens under MicroUI into the module
If your screens from the QUI application shell are not under the module, click on the Add New button in the Application you created in the Studio, and select Upload UI Page in the opened panel. Then, select and import the qjson files from your local system.
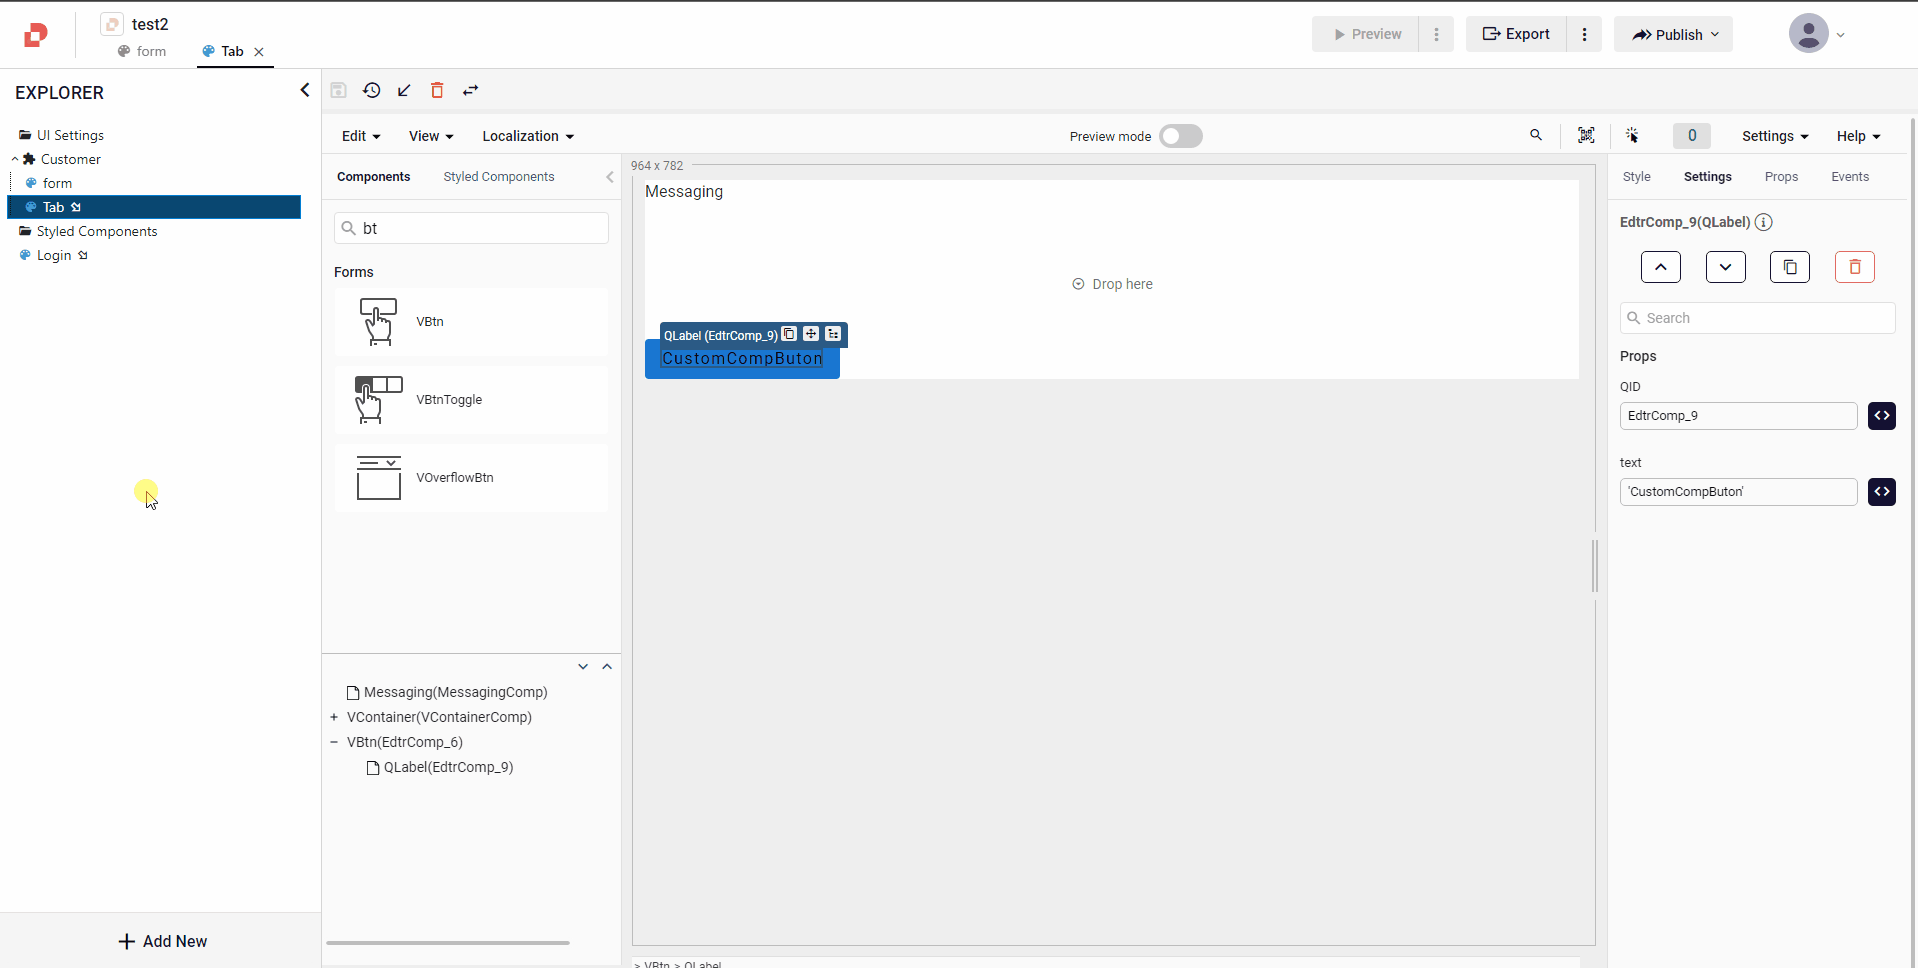
Using Block(Custom) Component
Within the Studio, use the Convert to Block(Custom) Component button to convert the page to a Block(Custom) Component. This way, it will be listed in the Quick Editor like other components, and you can add it to the page by drag and drop.
If the pages you turned into Block(Custom) Components are used in other pages, find them in the component list and remove the component that is listed as Block(Custom) Component by adding it again via Drag&Drop.
Using Go
To use the go command in Plateau Studio, open the event where you use quick.Quick.go('/static/qjsons/homePage.qjson') and click on the Add button in the top-right corner of the dialog.
In the dialog that appears, select Page Routing Code and select the page you want to navigate, using go.
Selecting Page Routing Code will generate an auto-generated go command for you. Replace your old go command with this new one, and make sure not to modify the code, or else the go command won't work.
Selecting Page Path will only generate the page path.
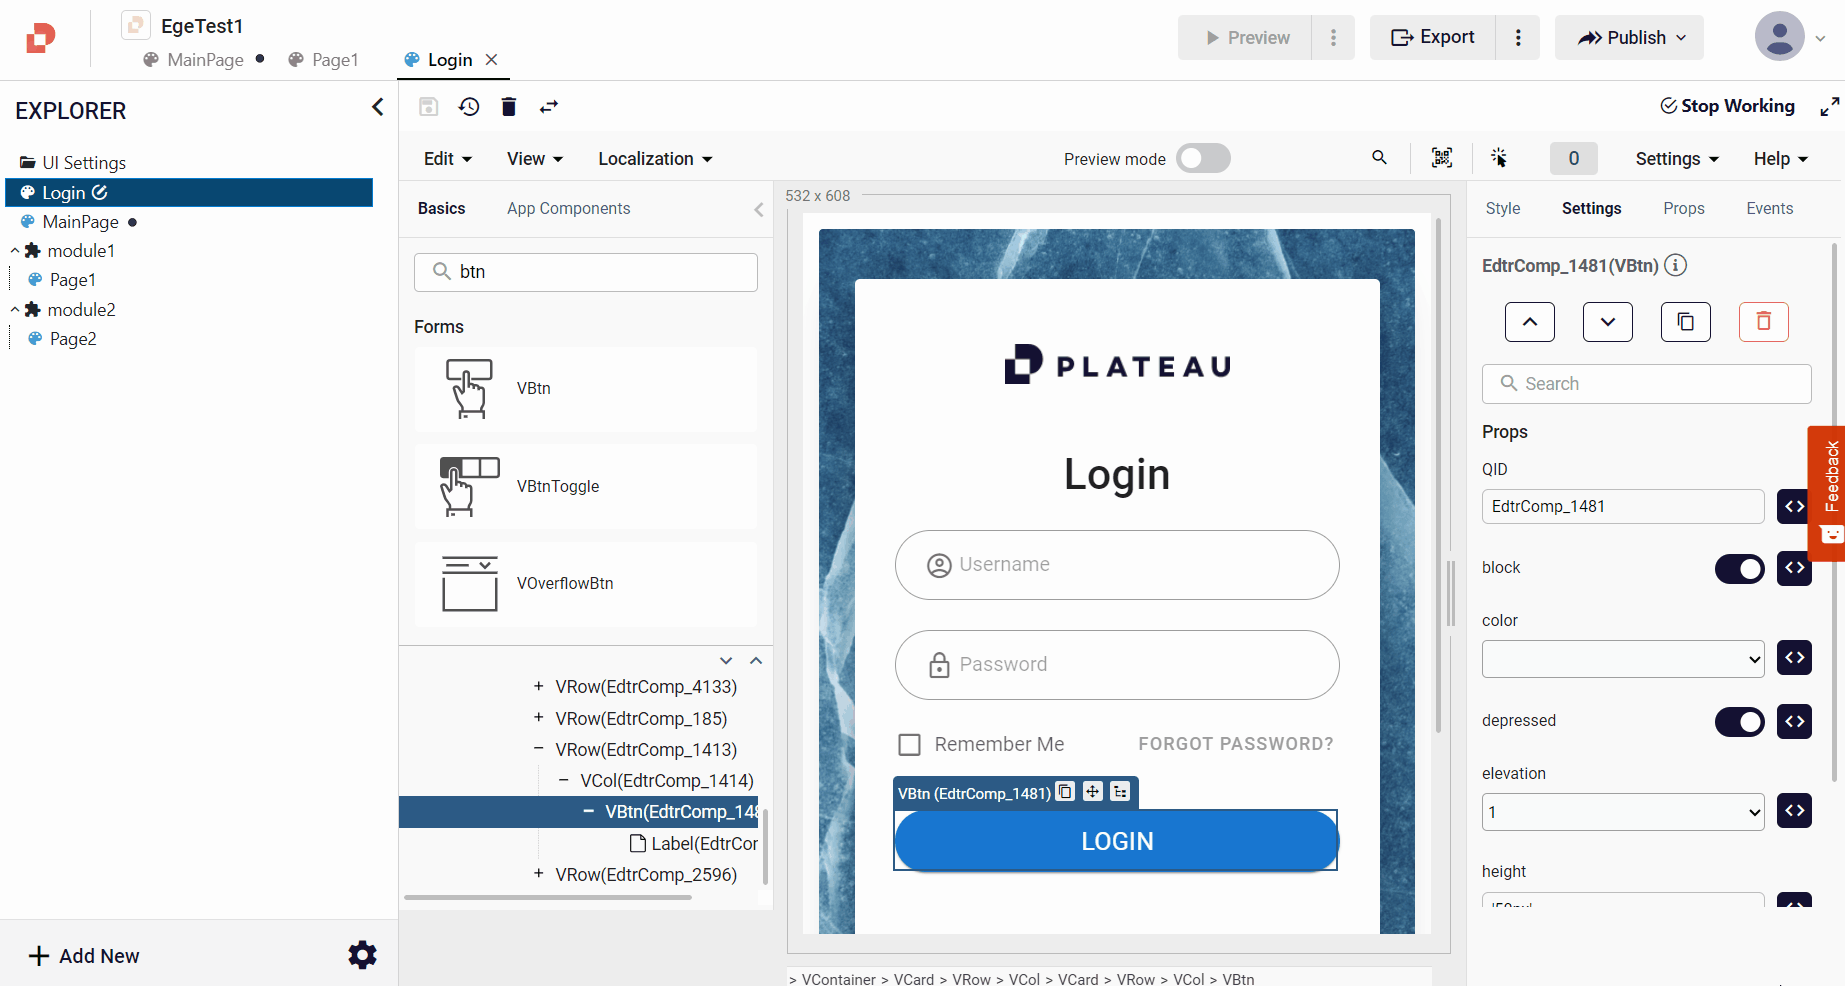
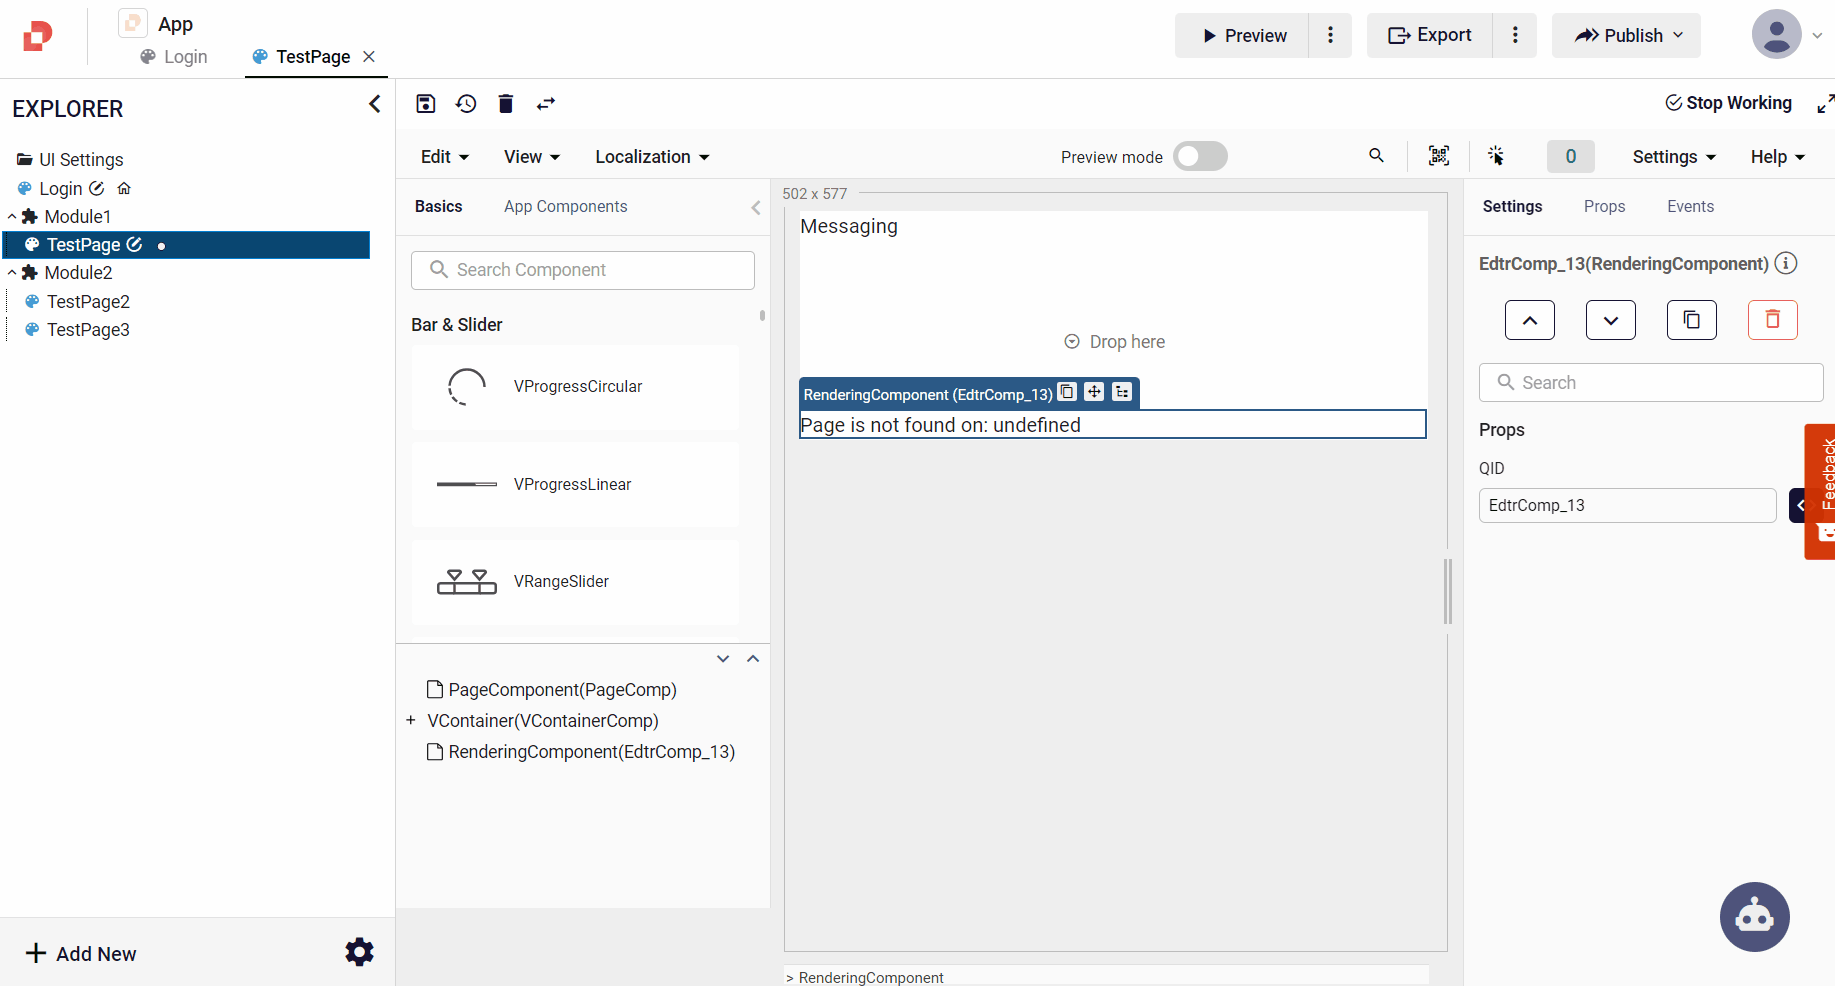
- If you are redirecting to a page in multiple places, in order to progress faster (even though we do not recommend it), after importing your pages into Studio, you can obtain the ID of the page with Copy ID in explorer as below, open the source code of your UI pages in notepad, copy and replace the places where the page path is mentioned.
Using Image
When you move your current project to Studio, you need to edit the image paths. You can use the Upload/Use Image feature to edit the image paths with the following steps.
First, click on the "Add New" button, and among the options that appear, select "Upload from Local". Then, choose the desired images to upload.
Once you've uploaded the images, you can select them from the dropdown menu that appears in the "src" property of components like VImg, QImgZoom, and VCarouselItem.
Additionally, to provide an image path in Plateau Studio, open the event you use for image paths, and click on the "Add" button in the top right corner of the dialog.
In the opened dialog, select the 'Images' option, and then choose one of the components like VImg, QImgZoom, or VCarouselItem. By doing so, you will be setting the path of the desired image to the component.

- If you have a frequently used page redirect within your UI pages during the transition, you can obtain the ID of the image with Copy ID in explorer after importing your images into Studio. First click three dots on the right to copy your image ID, with the same method as shown above in Using Go chapter. Then, open the source code of your images in notepad, copy and replace the places where the image path is mentioned.
Application Settings Transfer
In the project's content, select and add the settings files from the UI Settings section in the Explorer panel.
Then, replace the content with the content of the settings files in your project to transfer the settings files to Studio
First Page
For the Application's First Page, click on the three dots on the model outside the module and click on Set As Start Screen in the panel that appears.

Application Preview
Allows you to observe all the pages of the Application before publishing. This feature becomes active only when the Start Screen is set.
For more detailed information, you can visit this link.
Handling CORS Error
- If you encounter a CORS error in service requests, ensure that the browser you are using with Studio does not have any CORS restrictions, or add the following CORS settings to the service's response:
- Access-Control-Allow-Credentials
- Access-Control-Allow-Headers
- Access-Control-Allow-Methods
- Access-Control-Allow-Origin
Export Compiled App Package
The Export button in Studio allows you to download your pages as a built zip file without the need for a QUI project or a build pipeline. This enables you to obtain the built version of your pages as a downloadable zip file.
By using the exported files, you can deploy them to your own pipeline and make them live by performing a git commit & push. When performing the Export process, make sure that your pages are marked as a major version to be selectable in the export.
Export Uncompiled App Models
- To perform the File System operation used in Quick Standalone, click on the three dots next to the Export button in Studio.
- In the panel that appears, select Export Uncompiled App Models.
Note: For the initial usage, you need to first install symphony-cli via npm. After selecting the option, follow the instructions provided to synchronize the qjson files you have worked on in Studio to your local machine every time you click the Export button using the command symphony-cli studio-sync at the specified path. If Symphony-Cli is not installed, you can view the download steps by clicking on this link.
If you encounter any issues during the Studio transition, you can reach us at Plateau@softtech.com.tr
LET'S DEVELOP TOGETHER