Workflow Development Starter Guide
This section explains the steps required to design and run a basic process on the Workflow platform.
Creating an Application
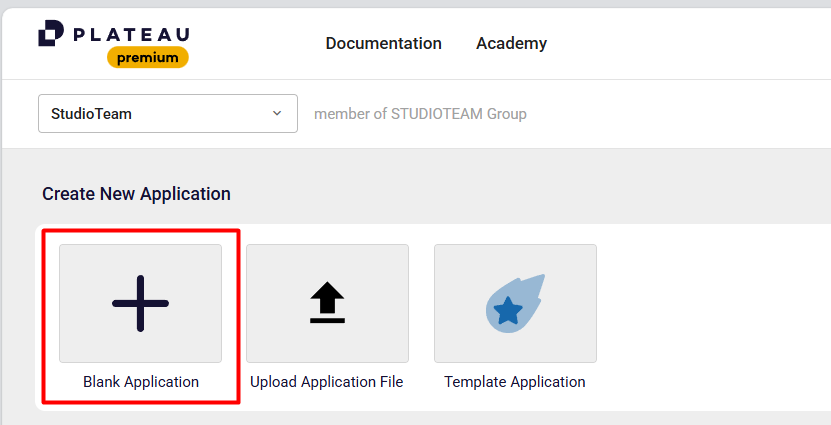
Before starting workflow development, a new application must be created within Studio.
- Open the Studio application.
- From the main menu, select Blank Application.
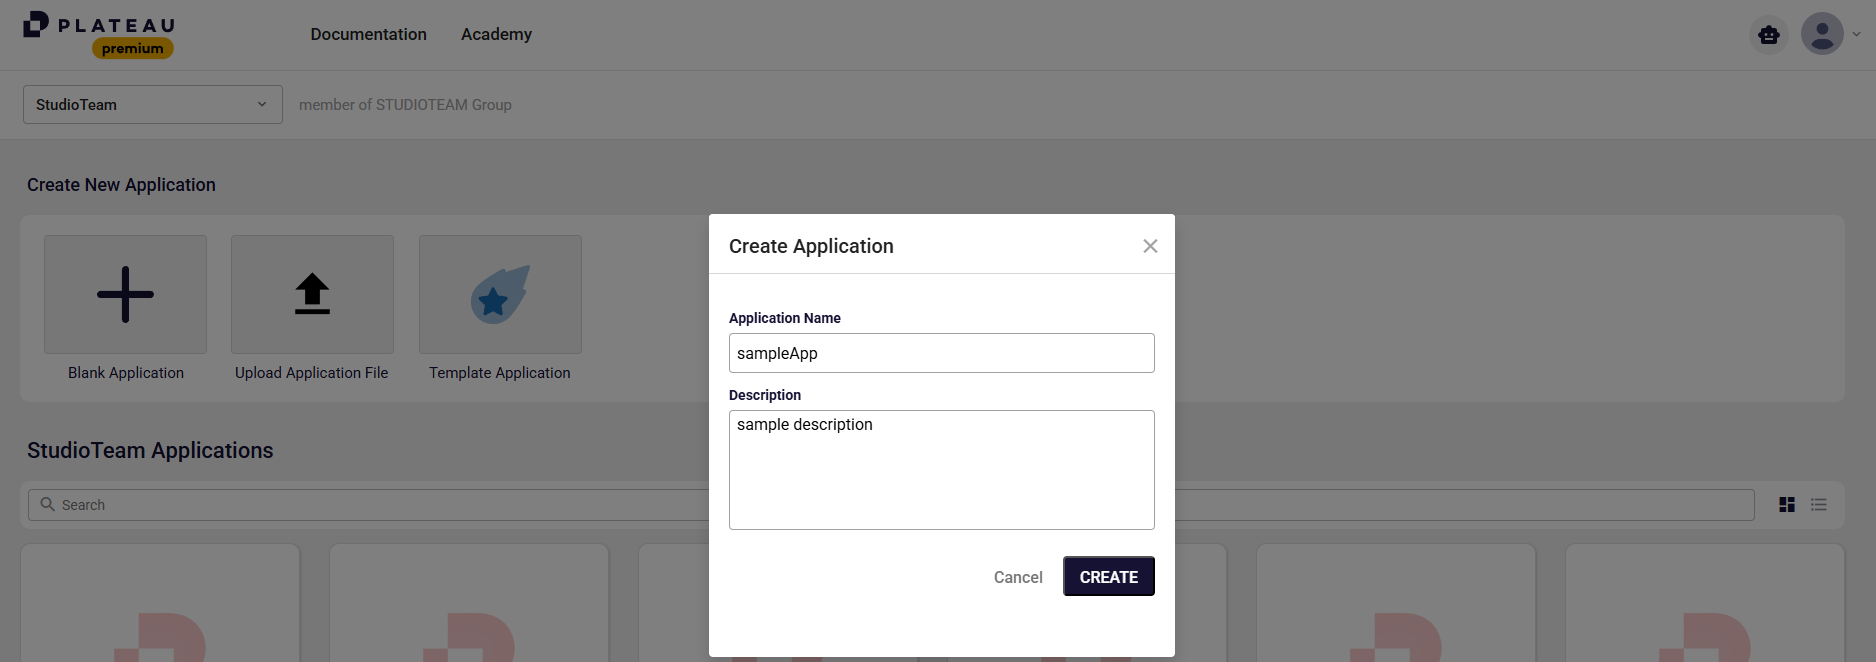
- Enter a name for your application.
- Optionally, provide a description.
- Click the Create button to create the application.
Opening & Editing an Application
- To open an application, simply click on its name.
- To edit an existing application:
- Click the three dots (...) icon located on the right side of the application.
- Select the Edit option.
- From here, you can update the following: Application name, Application description
Importing the Studio Core Module
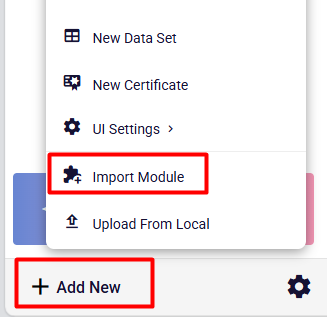
In order to include the core functionalities and components required for workflow development, the Studio Core Module should be imported into the project as shown below.
- Within the application, click on Add New located at the bottom-left corner.
- From the opened menu, select Import Module.
- Choose Studio Core Module from the list.
- Start the import process.
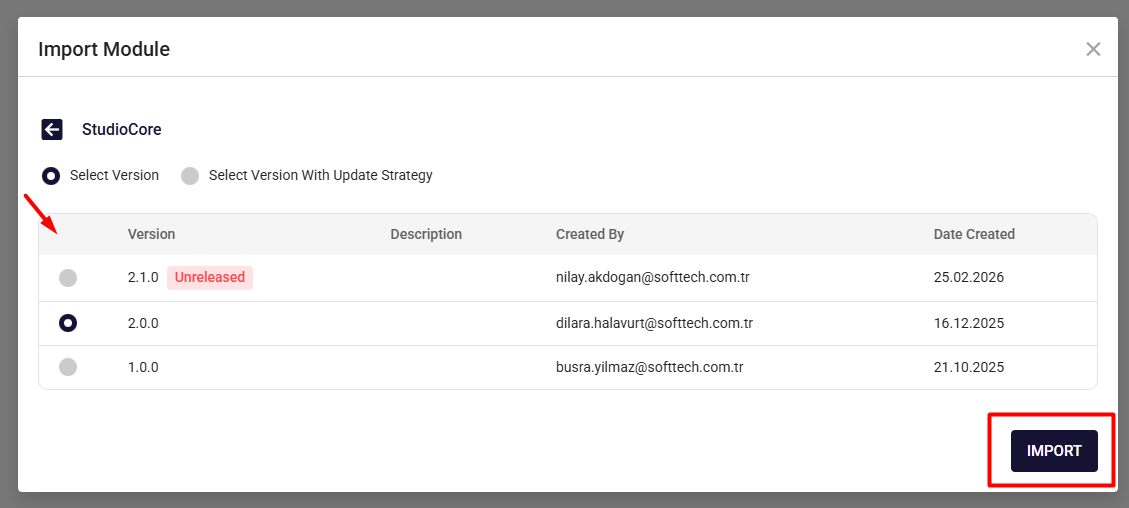
Import Module Dialog Overview
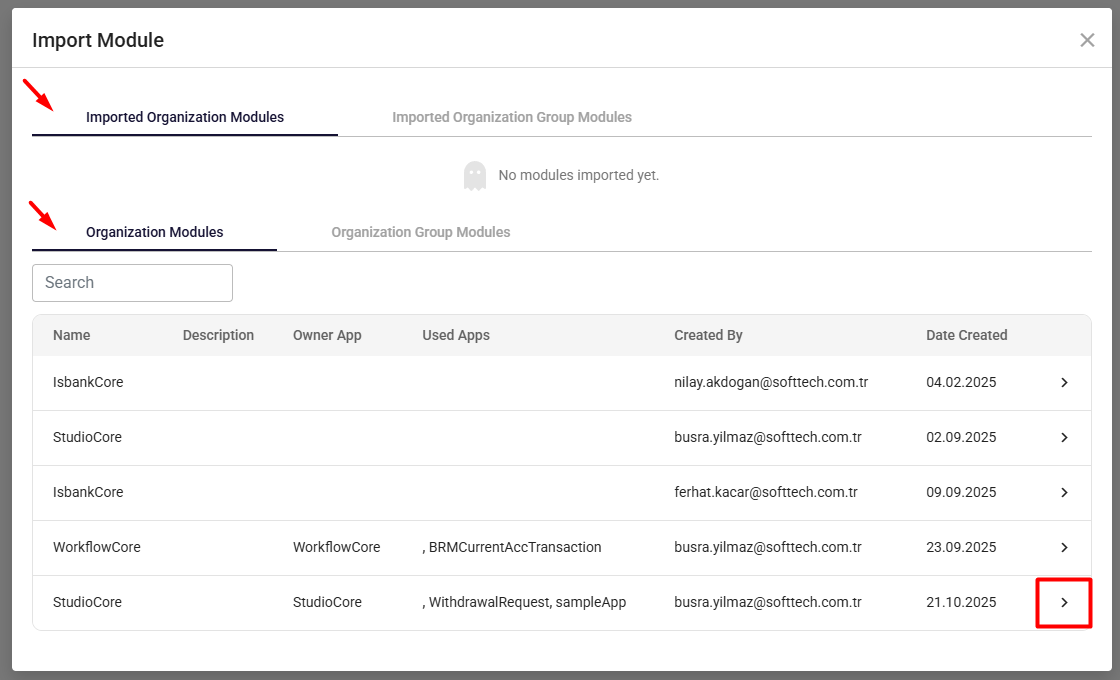
After clicking Import Module, a dialog will appear displaying two sections:
- Imported Organization Modules
- Displays modules that have already been imported into the project.
- Organization Modules
- Contains the list of available modules that can be imported.
- Modules can be imported by clicking the arrow icon on the right side.
- Select the desired module version.
- Complete the import process.
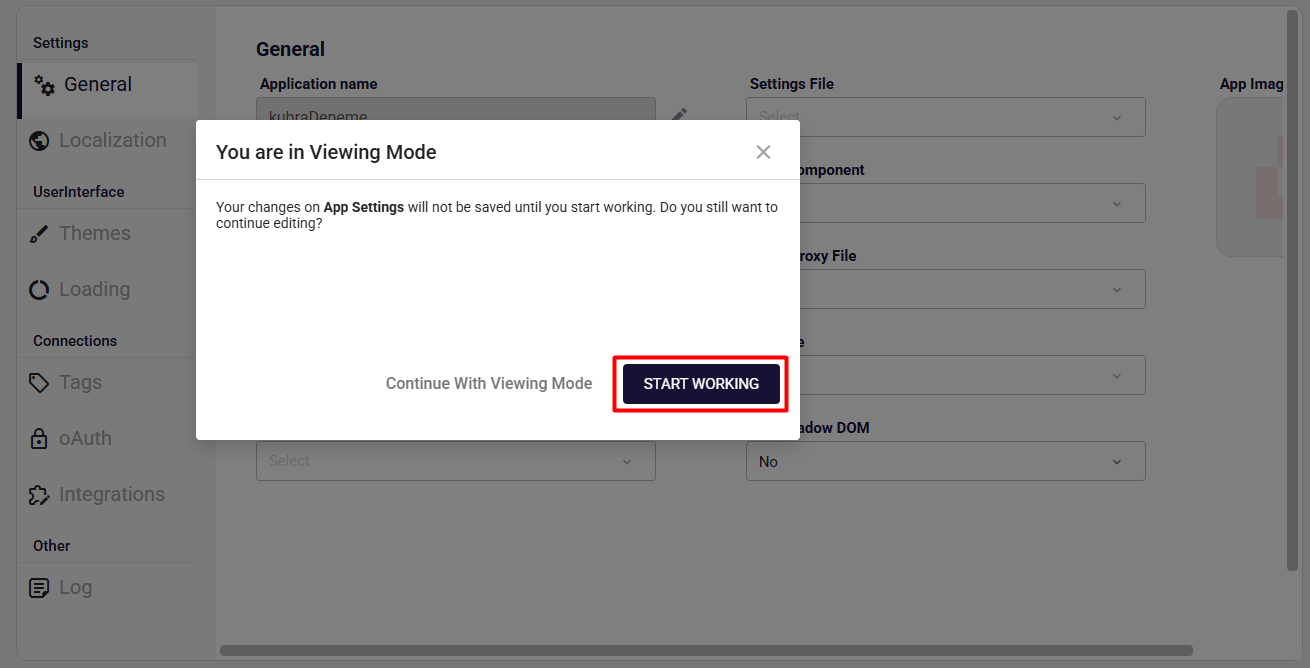
Configuring Settings
Some essential settings must be configured for the application to function properly.
- From the Explorer panel on the left, click the Settings icon on the right.
![]()
- Click Start Working to enable editing of the application settings.
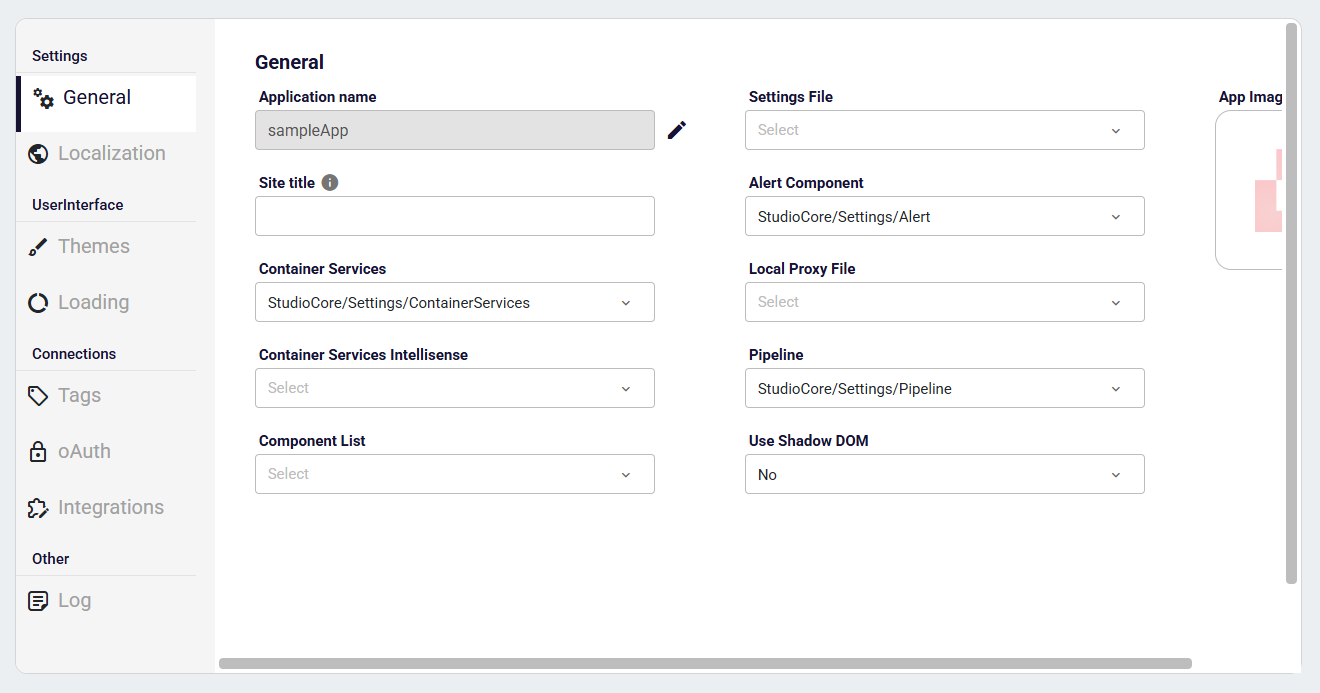
Configuring Required Settings
- Configure the required settings from this panel.
- Settings can also be automatically populated by selecting values from the imported module.
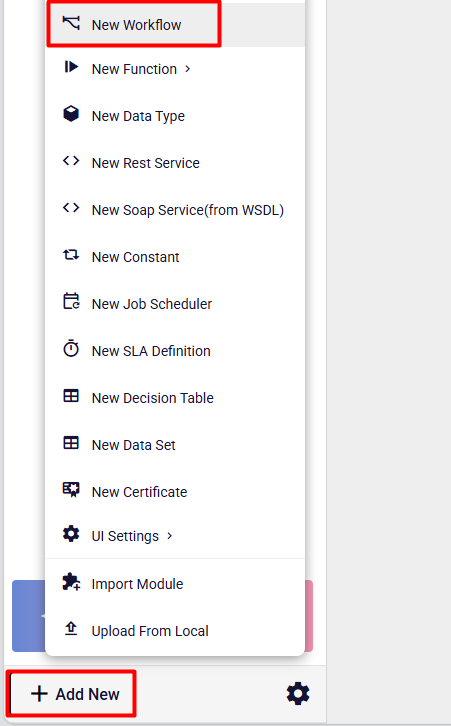
Creating a Workflow Model
- To create a process, click the Add New button located at the bottom-left corner.
- From the opened menu, select New Workflow.
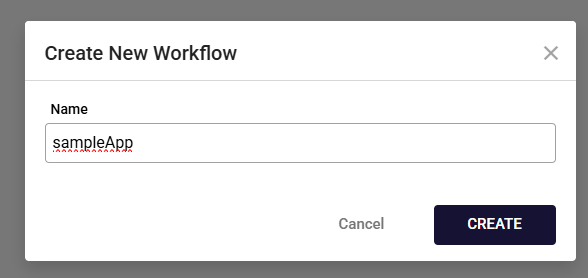
- In the dialog that appears, enter a name for the workflow function.
- Click the Create button.
Designing the Workflow
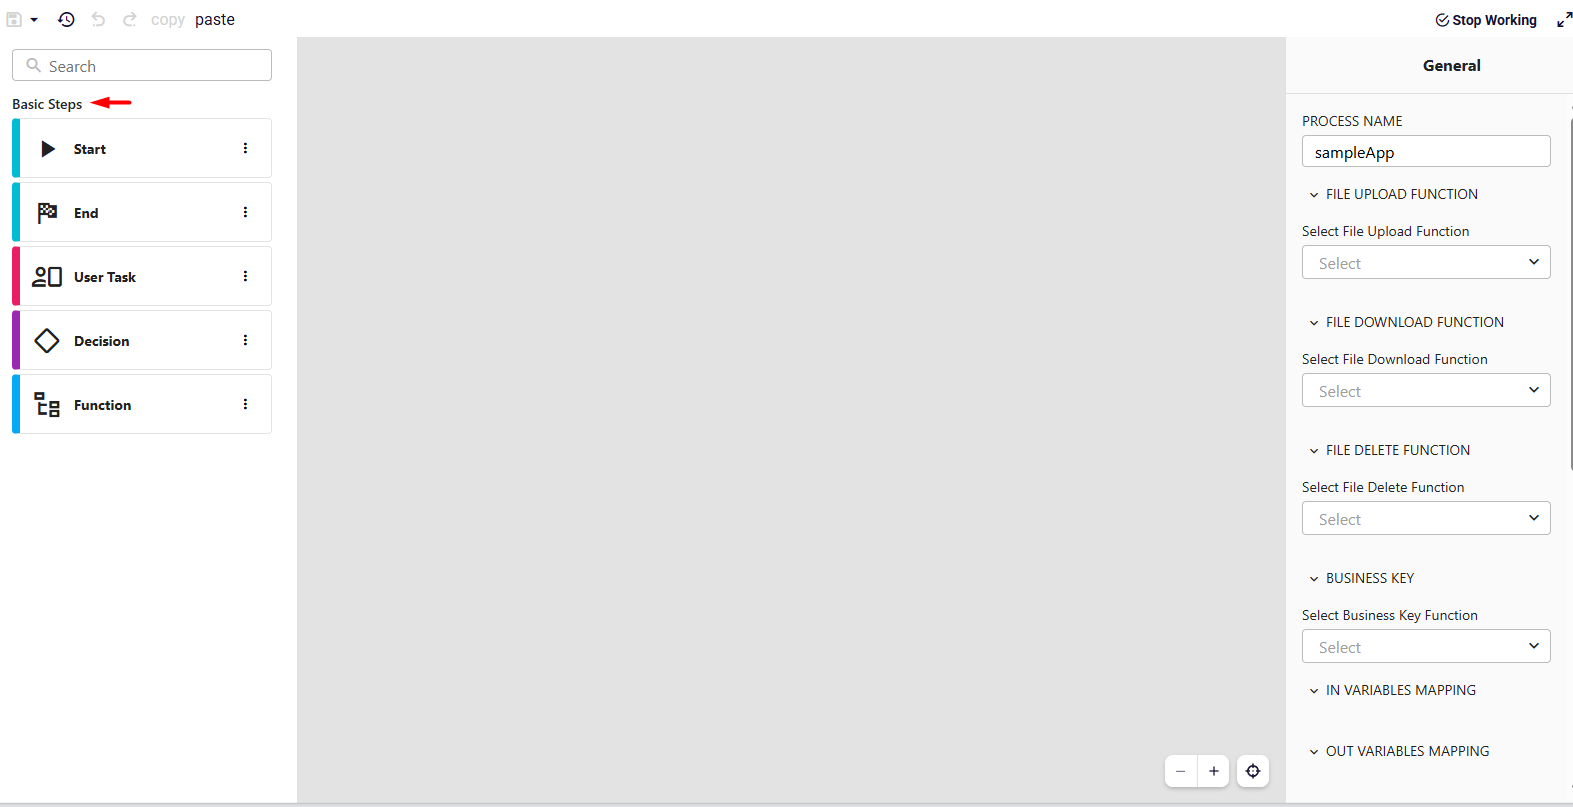
- After creating the workflow, you will be redirected to the workflow design screen.
- In the Basic Steps section (highlighted on the screen), you can start building your process using drag-and-drop.
Configuring a User Task
At this step, the workflow waits and does not proceed until the assigned user or role completes the task. For this task, assignee/role and input/output variables can be defined.
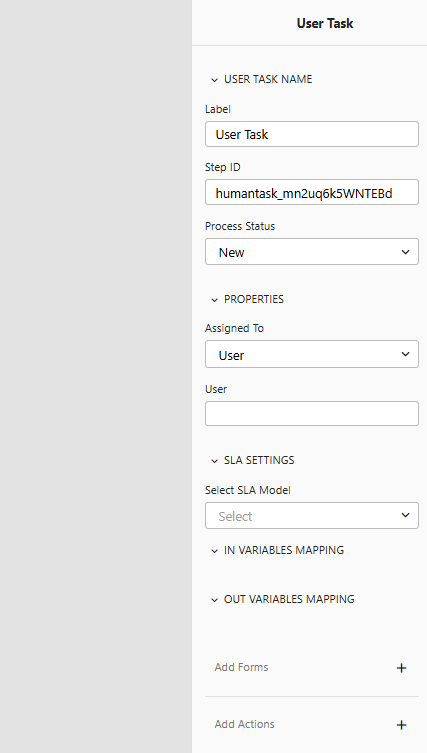
Key Fields
- Label: The name that will appear in the editor.
- Step Id: Initially generated randomly by the editor; it can be revised to a meaningful value.
- Process Status: Select the status of the workflow at this step. Options include:
Custom,New,Pending-Approval,Pending-InProgress,Resolved-Cancelled,Resolved-Completed,Returned,Returned-Originator,Returned-Recipient.

Properties
- Assign the task to a user or swimlane:
- User: If you want to assign to a specific user, reference the user from the process context.
- Swimlane: If you want the task to go to a pool instead of a specific user.
- To assign the task to the workflow initiator:
${flow.context.processInstance.initiatorUser.userId}


- SLA: Define SLA durations for the task. You can attach a pre-defined SLA model.
- Add Form: Select the screen to open for this User Task. You can choose a screen developed within the app or a shared screen from the core module. In the Roles section, specify which roles can view the screen.
Actions
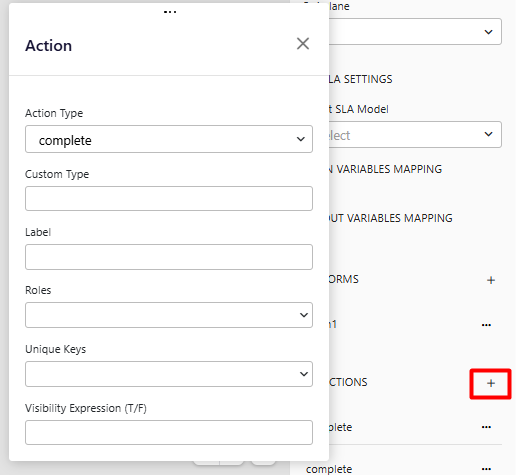
- Action Type: Choose the type of action:
Complete,Cancel,Return,Save,Function,Update,Terminate,ChangeStep. - Custom Type: Customize the action label.
- Label: The name that will appear on the screen for this action.
- Roles: Specify which roles can initiate the action.
- Unique Keys: Used to define rules for users within the workflow. For example:
- Prevent the initiator from approving any steps
- Prevent a user from approving the same step multiple times
- Visibility Expression: Control whether the action button is visible. Options:
TrueorFalse.
Creating a Service Task
Service Task is used to define tasks that will be executed automatically by the system. These tasks are typically used for:
- Executing workflow functions
- Calling internal or external services
- Updating data
Key Fields
- Name: By default, the workflow function name is used for the Service Task. It can be edited if needed.
- Step ID: The editor assigns a random ID when the step is created. It can be updated to a more meaningful value.
- Properties: You can select one of the available functions. Based on the selected function, In/Out Variables can be mapped.

Configuring a Switch Task
- The Switch (Decision) element is used in the workflow to manage conditional paths.
- New conditions can be created by adding cases under the Cases section.

Key Fields
- Name: A descriptive name for the decision element.
- Step ID: Automatically assigned when the decision is added; can be updated if needed.
Select Decision Option
When configuring the decision, you can choose one of the following evaluation methods:
- Expression: Use a custom logical expression to determine the workflow path.
- Decision Table: Maps input values to output values to define branching. Ideal for complex rules with multiple input combinations.

- Decision Tree: Defines rules hierarchically and visually. Each branch represents a condition leading to a specific outcome. Useful for multi-level decision logic.

Add Case
- Click the + button to add a new case.

Case Configuration
- When a case is added, the condition selection panel appears at the bottom.
- Clicking on a case allows configuration of the right and left paths based on the on-screen guides:
- Right arrow: Represents the Right branch.
- Left arrow: Represents the Left branch.
- Conditions can be based on Case or Variable:
- Case selected: Adds a new decision step in the workflow (e.g., creates 2 if/else branches).
- Variable selected: Evaluates the condition based on the selected parameter or workflow context values.


Creating Roles and Swimlanes
- Roles and swimlanes are defined to determine which users or groups are responsible for tasks within the workflow.
- These definitions help structure the process and assign responsibilities clearly.
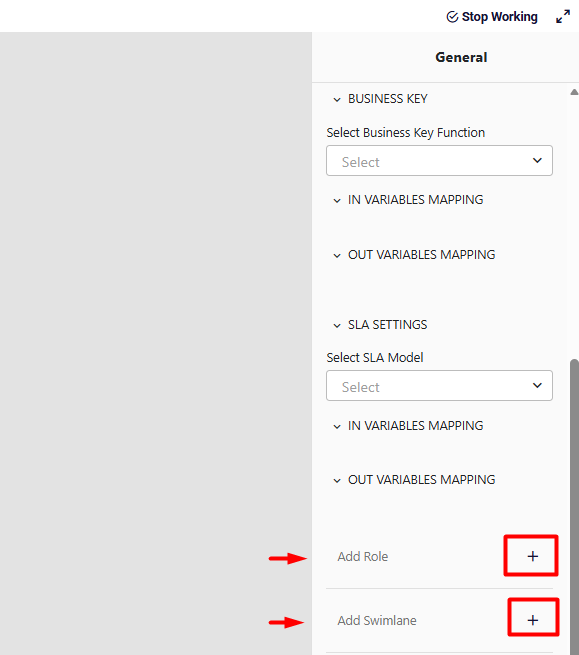
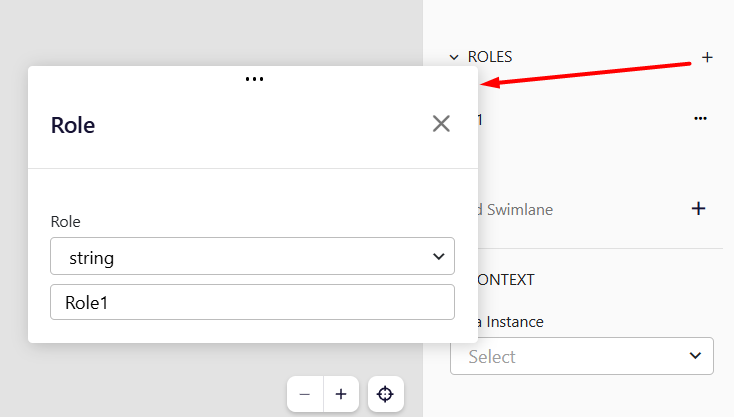
Role
- Role is used to define user roles that will be authorized within the process.
- Roles can be added by clicking the + button next to Add Role.
- Values can be defined as either:
- String
- Literal
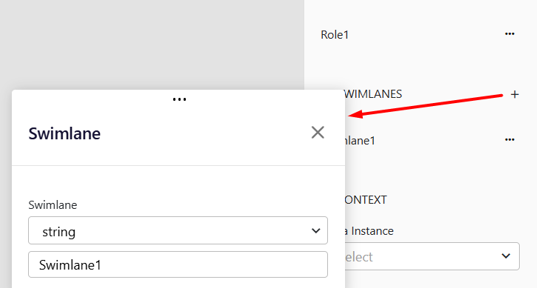
Swimlanes
- Swimlanes are used to group and organize responsibilities within the workflow.
- They represent different participants or responsibility areas in the process.
- Swimlanes can be added by clicking the + button next to Add Swimlane.
- Values can be defined as either:
- String
- Literal
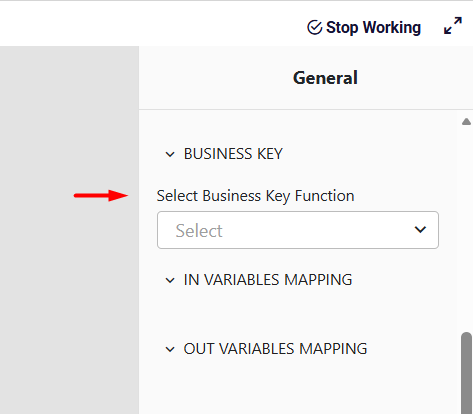
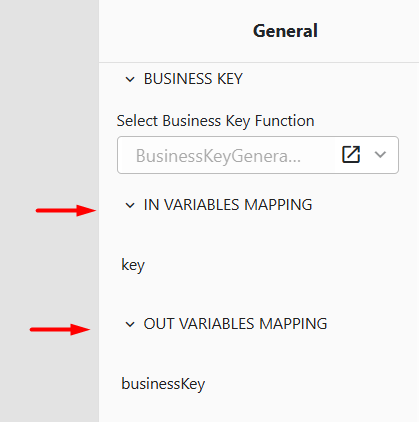
Business Key Generation
- If there is a function defined for generating the key used in the process, the key can be produced accordingly.
- Based on the selected function, input and output parameters can be mapped using In Variables and Out Variables options.
- As an example, a BusinessKeyGenerator method can be used as shown below:
- In Variables:
key - Out Variables:
businessKey
- In Variables:
Creating Context / Data Types
- You can define the data structures that will be used within the workflow process.
- Data Types allow you to define the data models used throughout the workflow.
- Context defines the Workflow Context, which represents the data objects used during the process.
- Context can be added via the Input section.
Key Points
- Use Data Types to structure and validate the information your workflow will process.
- Use Workflow Context to manage runtime data objects and make them accessible across tasks.

Drawing the Workflow
In this section, an example workflow process will be created.
A simple workflow has been designed as shown below. This example will be used for explanation purposes.
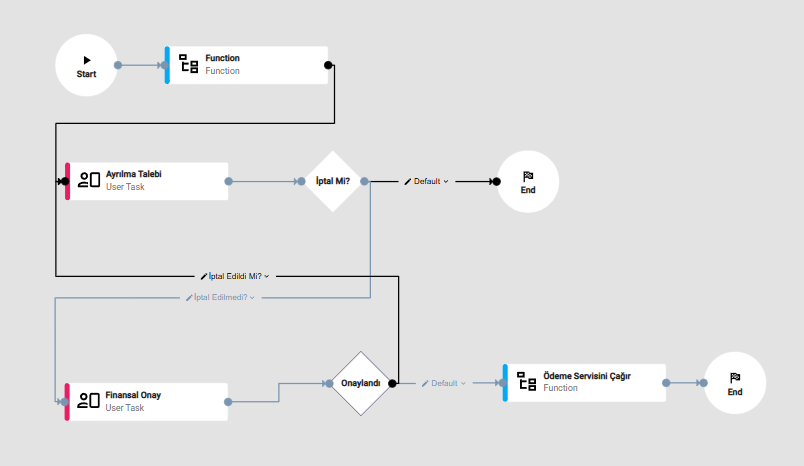
Workflow Description
- The process starts with a Start event.
- A Service Task performs an automated operation.
- A User Task is executed by a user.
- A Switch determines the decision path.
- Depending on the outcome, different tasks are executed.
- The process ends with an End event.
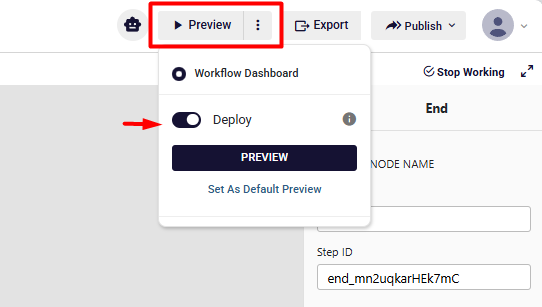
Live Dashboard
- Preview: Click the Preview button to view changes made in workflow models on the Live Dashboard.
- Deploy Status:
- If Deploy is active, current updates will be reflected in preview mode and real-time workflow data will be displayed.
- If Deploy is not active, the workflow proceeds without including the updates; the dashboard only shows the currently deployed version.
What Can Be Monitored on the Dashboard
- The status of workflow steps (Pending, Completed, Failed, etc.) can be tracked in real-time.
- User tasks and roles can be monitored, showing which role or user is active at each step.
- Real-time or historical workflow executions can be reviewed, including performance and SLA information.
Dashboard Features
- Filtering: Use the filtering options to locate specific workflows or steps easily.
- List View: Workflow steps, user assignments, and statuses are displayed clearly in the list.
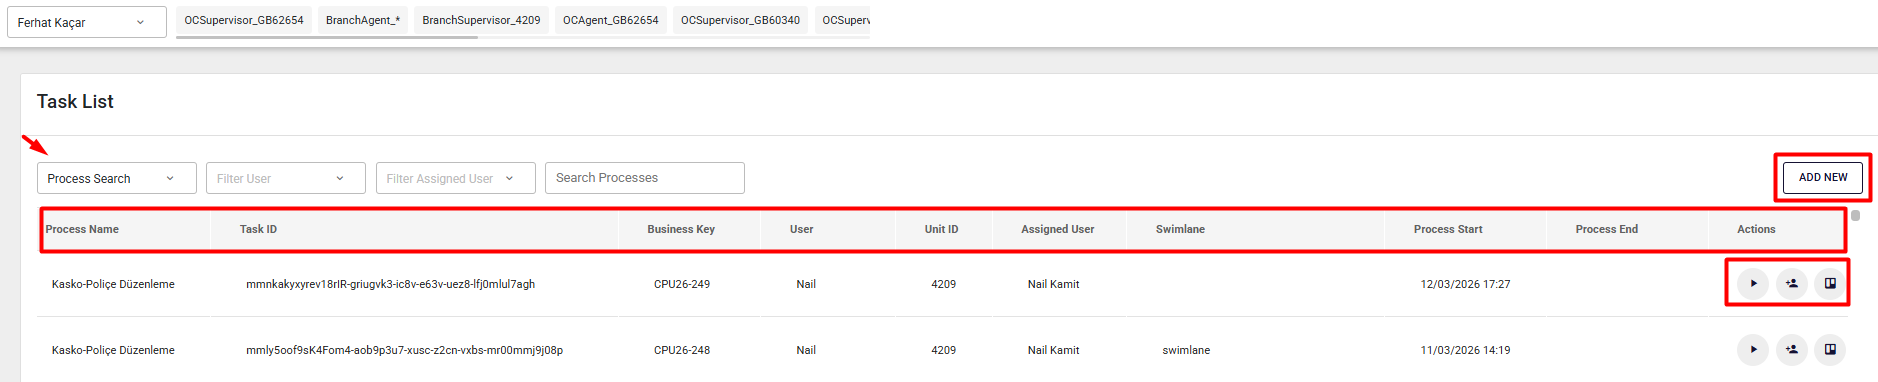
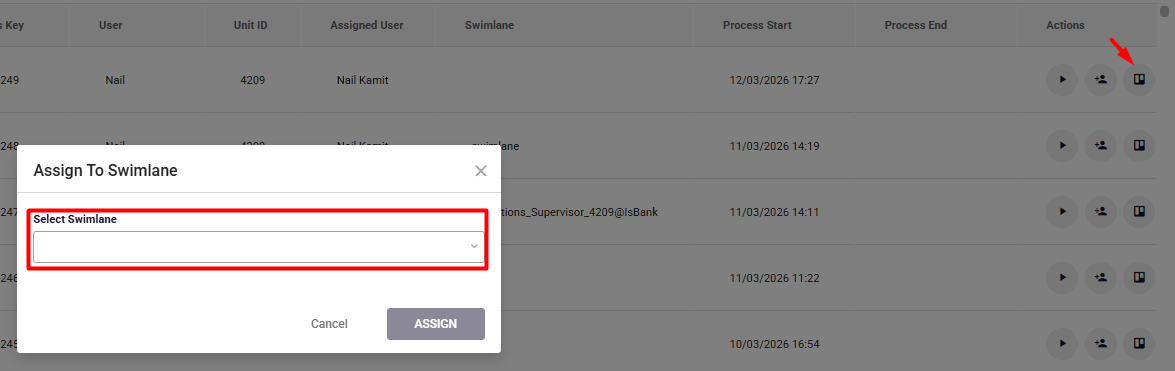
Actions Section:
- Preview: Re-run previously started workflows in preview mode.

- Assign To User: Assign a workflow step to a specific user.
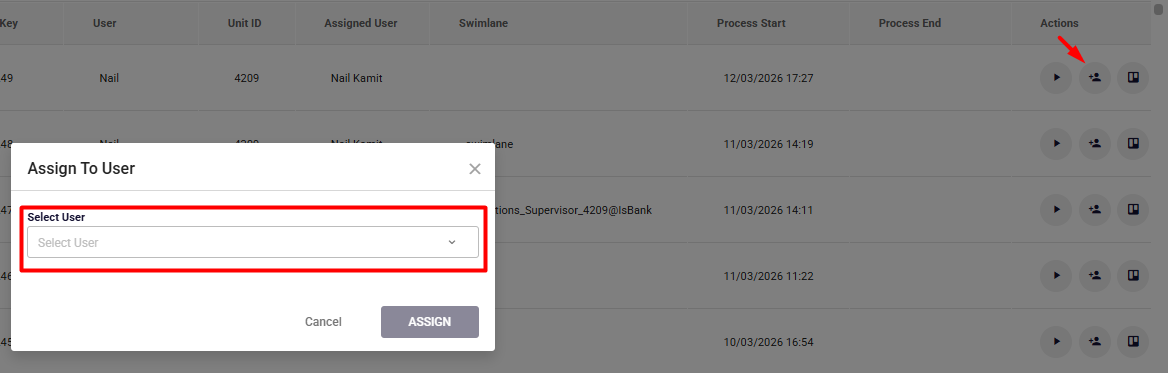
- Assign To Swimlane: Assign a workflow step to a swimlane.
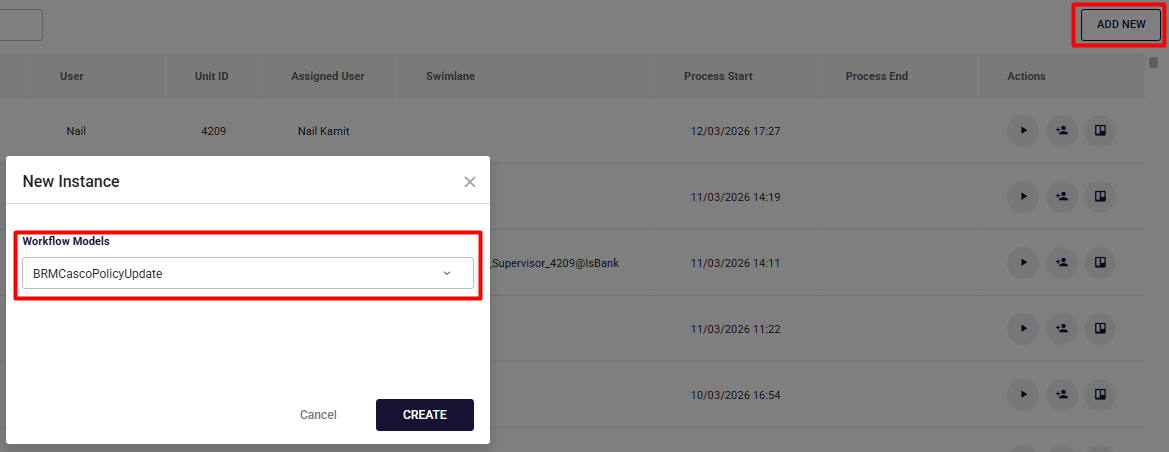
Add New: Start a new workflow process for testing or execution.
Studio Deploy
This process is used to deploy workflow models and related components, making them ready for distribution.
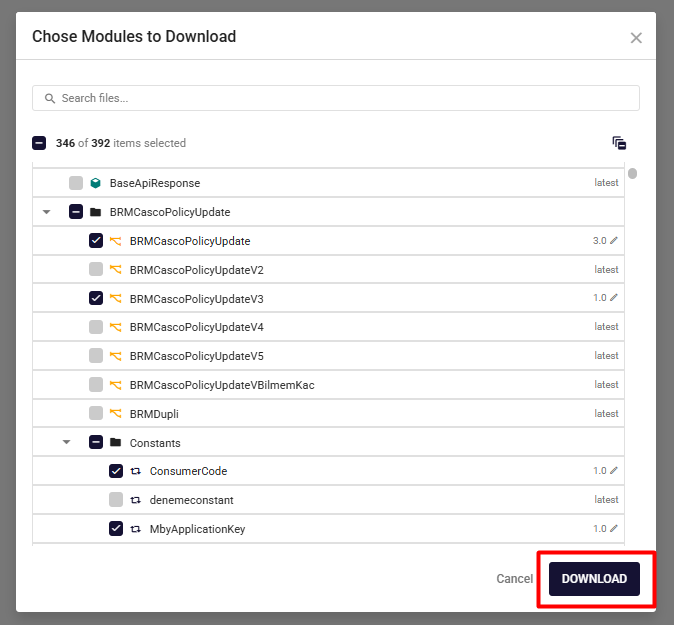
- In the application, click the Export button located at the top-right corner.
- In the modal window that appears, select the models and versions to be included in the package.

- Download the selected package using the Download button.
- Next, go to the application page and click Publish → See Progress Details in the top-right corner.
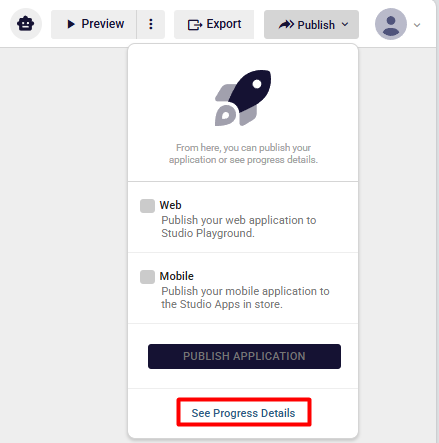
- On the page that opens, locate the prepared package in the table under the Downloads tab.

- Select the package and complete the download by clicking the Download button.
