Decision Component
The Decision node is a core control component that enables conditional branching within a workflow. Through this node, the workflow can proceed along different paths based on conditions evaluated at runtime.
When the Decision component is selected, it is configured via the properties panel located on the right-hand side.
Properties
The behavior of the Decision component is defined through the properties panel. This panel contains the core configuration fields that determine both the identifying information of the Decision component and its decision-making logic. When configuring a Decision component:
- The type of decision mechanism is selected.
- The way conditions are evaluated is defined.
- Cases and their corresponding outgoing connections are mapped.
These settings directly determine how and in which direction the workflow will proceed at runtime.
Name
Step Name represents the visible name of the Decision component within the workflow.
Step ID
Step ID is the technical identifier that uniquely defines the Decision component within the workflow.
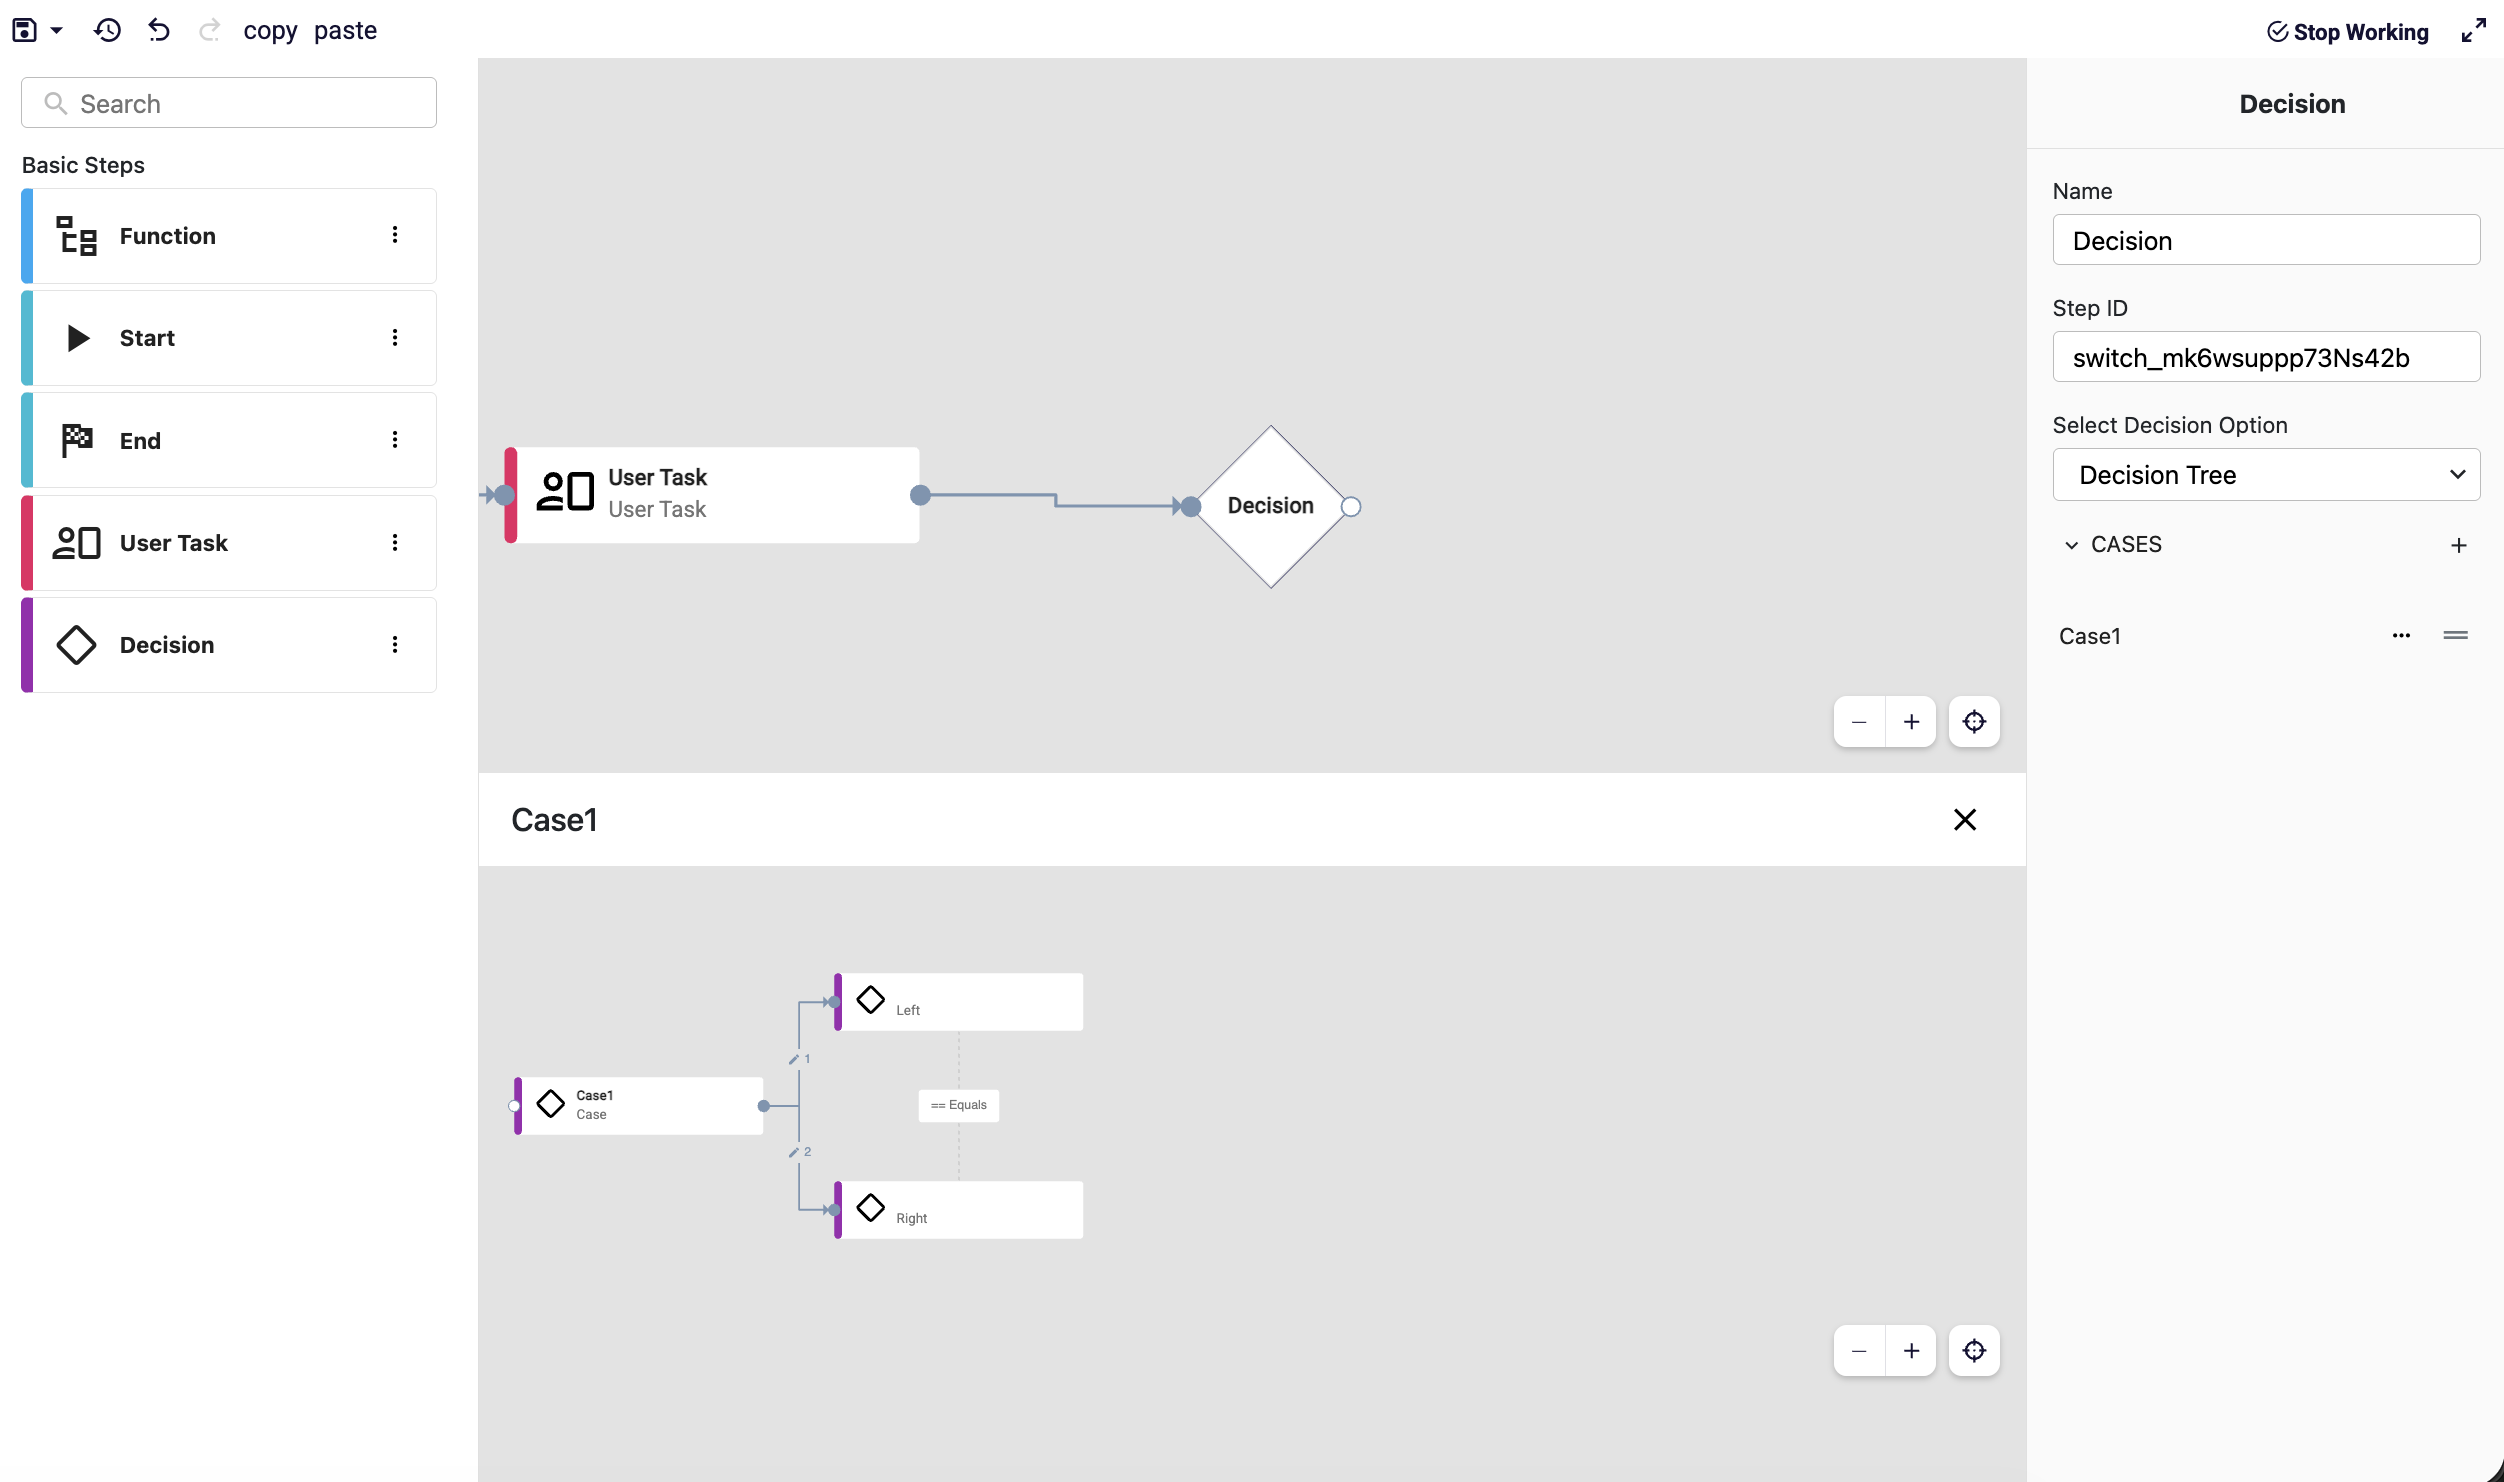
Decision Option
The Decision Option field determines which decision mechanism the Decision component will use. This selection directly affects how conditions are defined, how they are evaluated, and how the workflow branches. The Decision component supports three different decision types:
- Expression
- Decision Table
- Decision Tree
Each option is designed for decision scenarios with different levels of complexity.
Expression
Expression is the most basic and direct decision-making method. In this option, the decision is evaluated using a single logical (boolean) expression.
- The condition is evaluated using runtime data.
- The workflow is routed based on a
trueorfalseresult. - It is generally preferred for simple and single-condition checks.
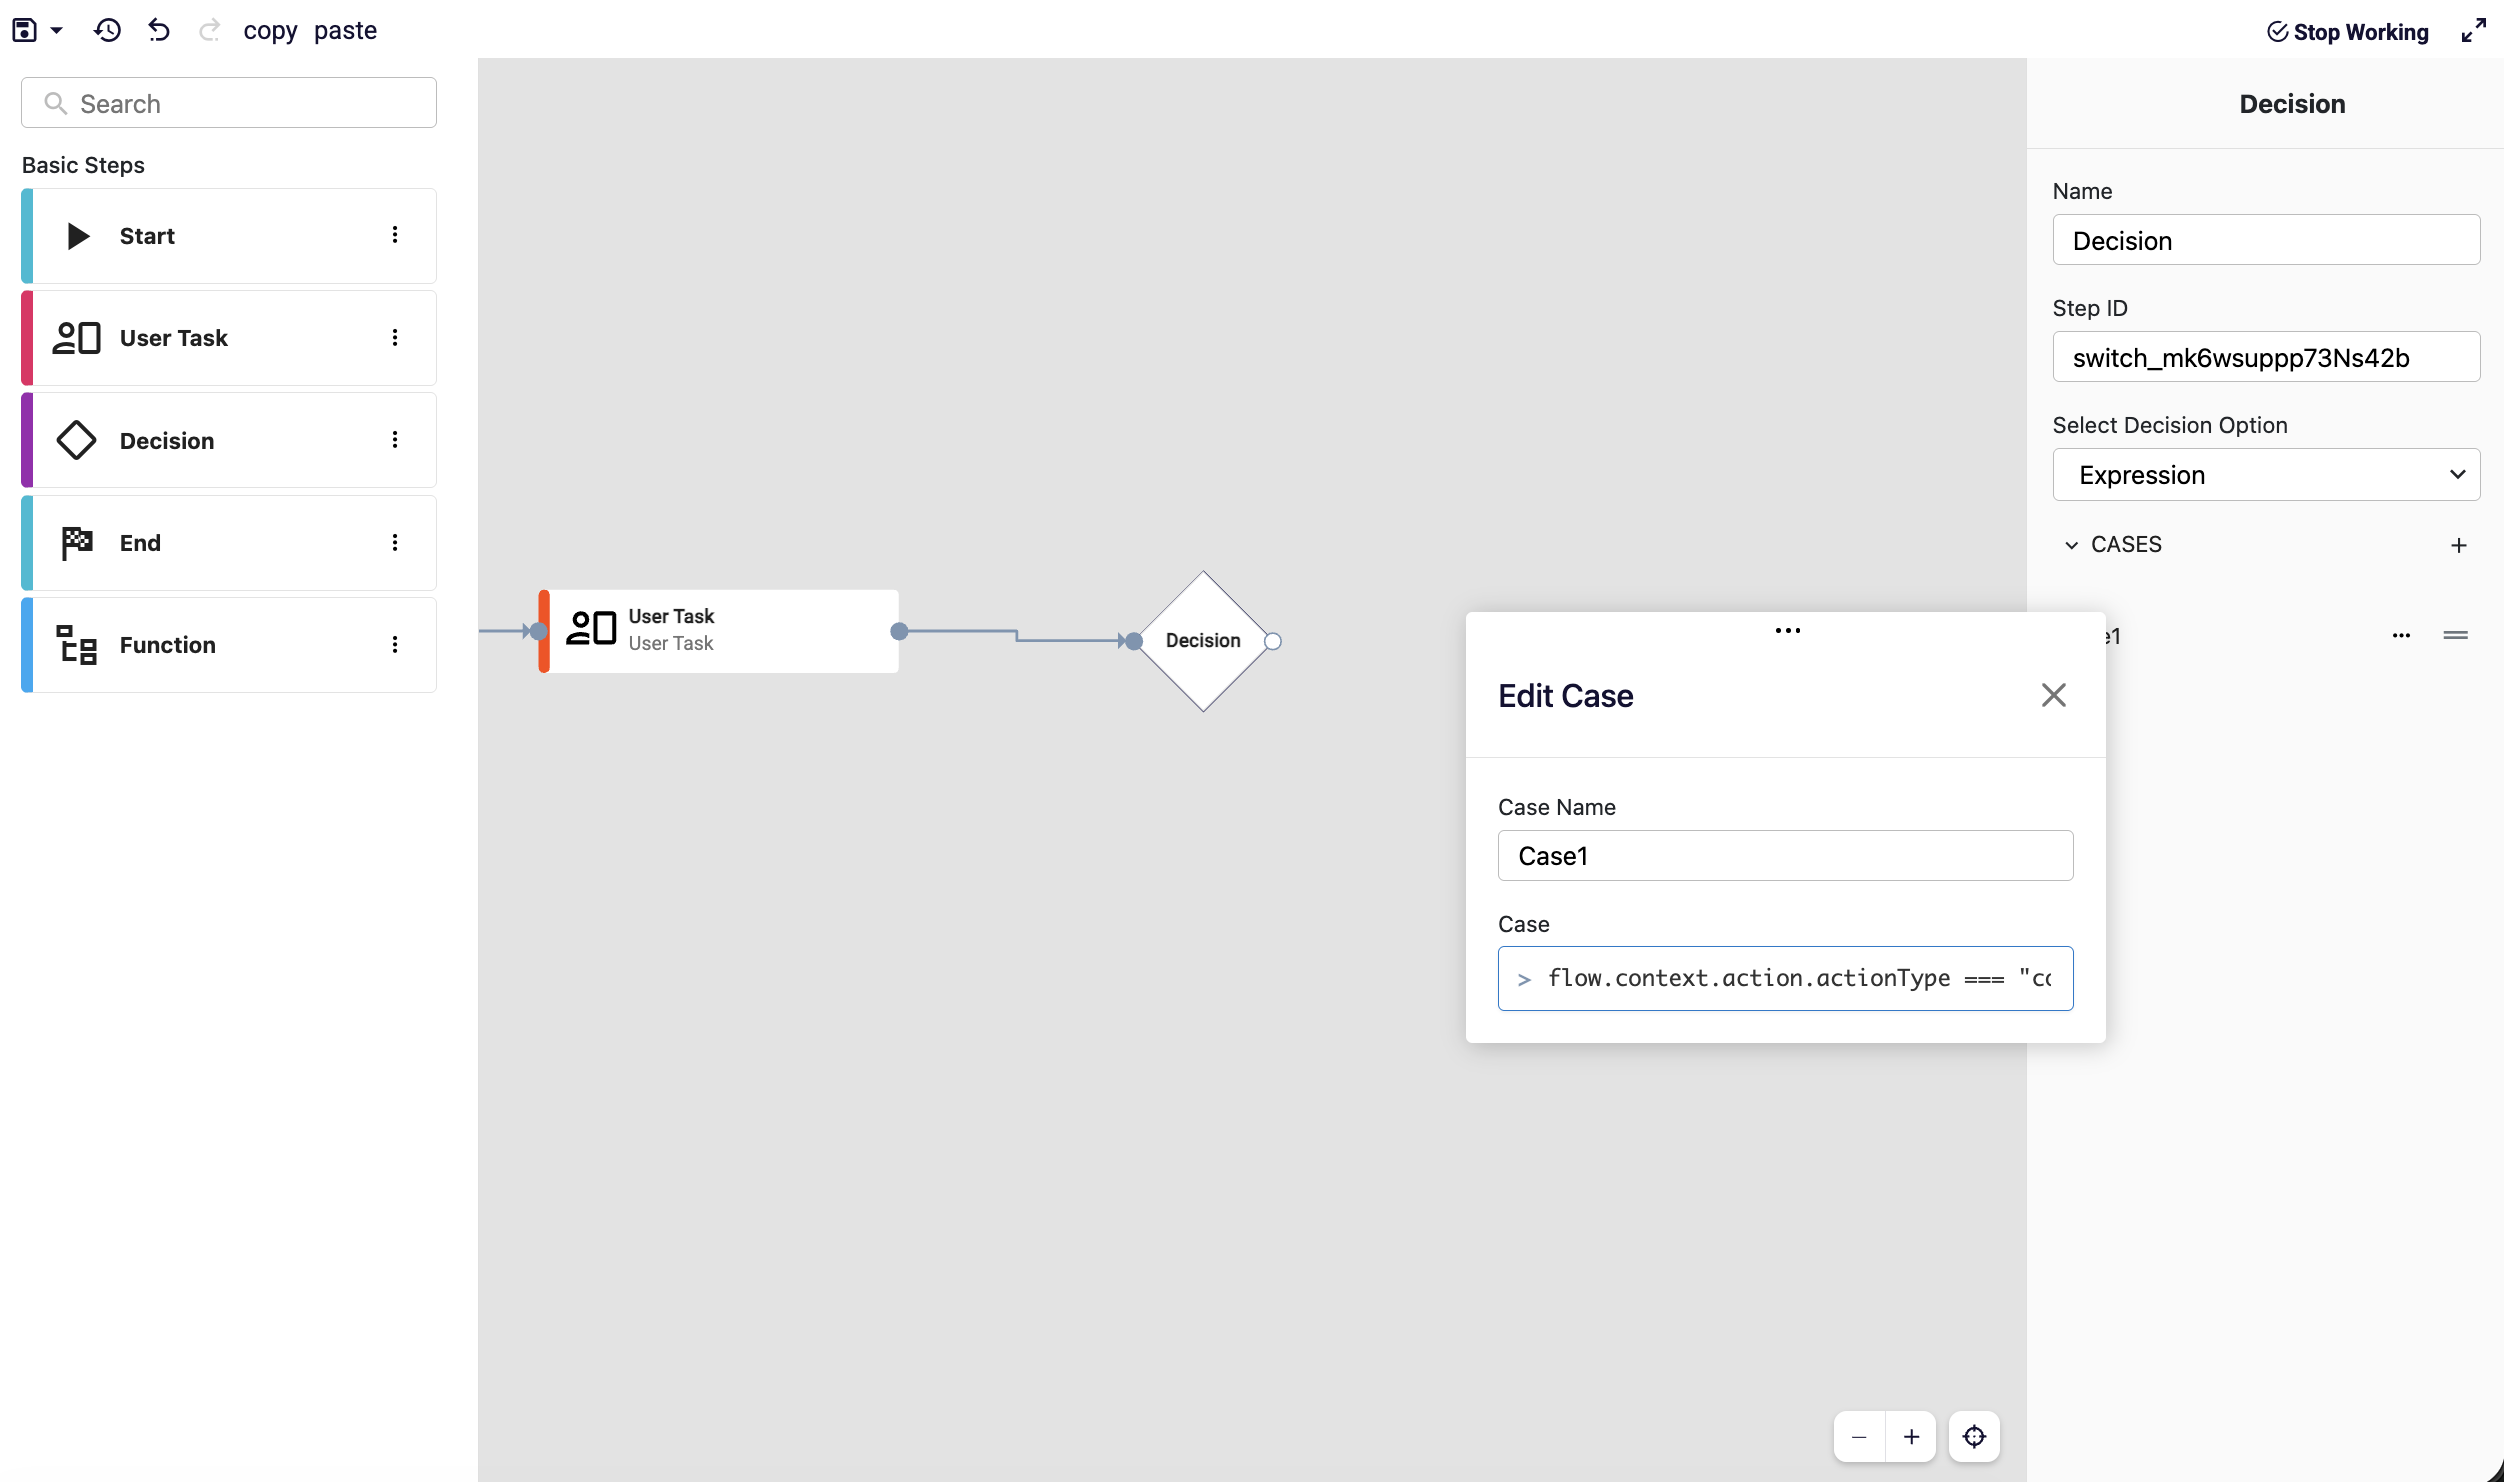
To access workflow data inside an expression, expressions must start with the flow object. flow represents all contextual data related to the current workflow execution and enables dynamic decision logic.
Example Expression:
flow.context.action.actionType === "complete"
Decision Table
A Decision Table allows multiple conditions and their possible combinations to be defined using a tabular structure.

When Decision Table is selected as the Decision Option, case conditions can access both the workflow context (flow context) and the data of the selected decision table.
This allows decision logic to be based not only on workflow data but also on the input and output values of the Decision Table.
The dt object represents the selected Decision Table in the Decision component.
dtis only available when Decision Table is selected- It can be accessed directly inside case expressions
Basic structure:
dt.input
dt.output
Decision Tree
A Decision Tree allows decisions to be modeled using a hierarchical and branching structure.

- Each node represents a decision point
- Decisions can trigger sub-decisions, forming a multi-level structure
- The workflow progresses through the tree structure
Decision Connections and Case Mapping
By design, a Decision component can have multiple outgoing connections. Each outgoing connection represents a specific case defined within the Decision component.
For this reason, connections coming out of a Decision component are not ordinary flow connections; they explicitly define which condition triggers which execution path.
Each outgoing connection from a Decision component must be mapped to a case.
Selecting a Case via Connection
When multiple connections are created from a Decision component:
- All connections originate from a single output point
- A dropdown menu on each connection is used to select which case the connection represents
- This ensures a one-to-one mapping between the visual flow and the decision logic
The dropdown on the connection clearly defines:
- Under which condition the connection will be executed
- Which logical branch inside the Decision component it represents
Case Editing (Pencil Icon)
The pencil icon next to each case is used to edit the case details. Clicking the pencil icon opens the Edit Case dialog. Any changes made here directly affect the decision logic of the corresponding case.
Renaming a Case
A case name can be changed by double-clicking on it in the case list. After entering a new name, the case is renamed.
- This operation only affects the visible name of the case
- The decision logic itself is not modified
This mechanism is designed for fast renaming and easier organization.