Decision Table Editor
The Decision Table Editor is a rule-definition tool that allows you to model complex decision logic through a structured, tabular interface. With this editor, you can define conditions, outputs, and rule combinations in a clear and maintainable format—without writing code.
Using decision tables, you can break down business logic into rows of rules, specify how different inputs should be evaluated, and determine which outputs should be produced under various scenarios. This approach ensures consistent decision-making, improves readability, and makes rule management easier for both developers and business users.
How to Create a New Decision Table?
To create a new Decision Table, navigate to the left-hand menu and click the Add New button. From the dropdown menu that appears, select New Decision Table.
Next, enter the name of your Decision Table in the designated field and click the Create button to complete the setup.

Overview of the Decision Table Editor
The Decision Table Editor provides a structured interface that allows you to manage decision rules in a tabular format. The editor consists of several key sections, including hit policy selection, input and output column definitions, rule management, and the configuration of the else condition.
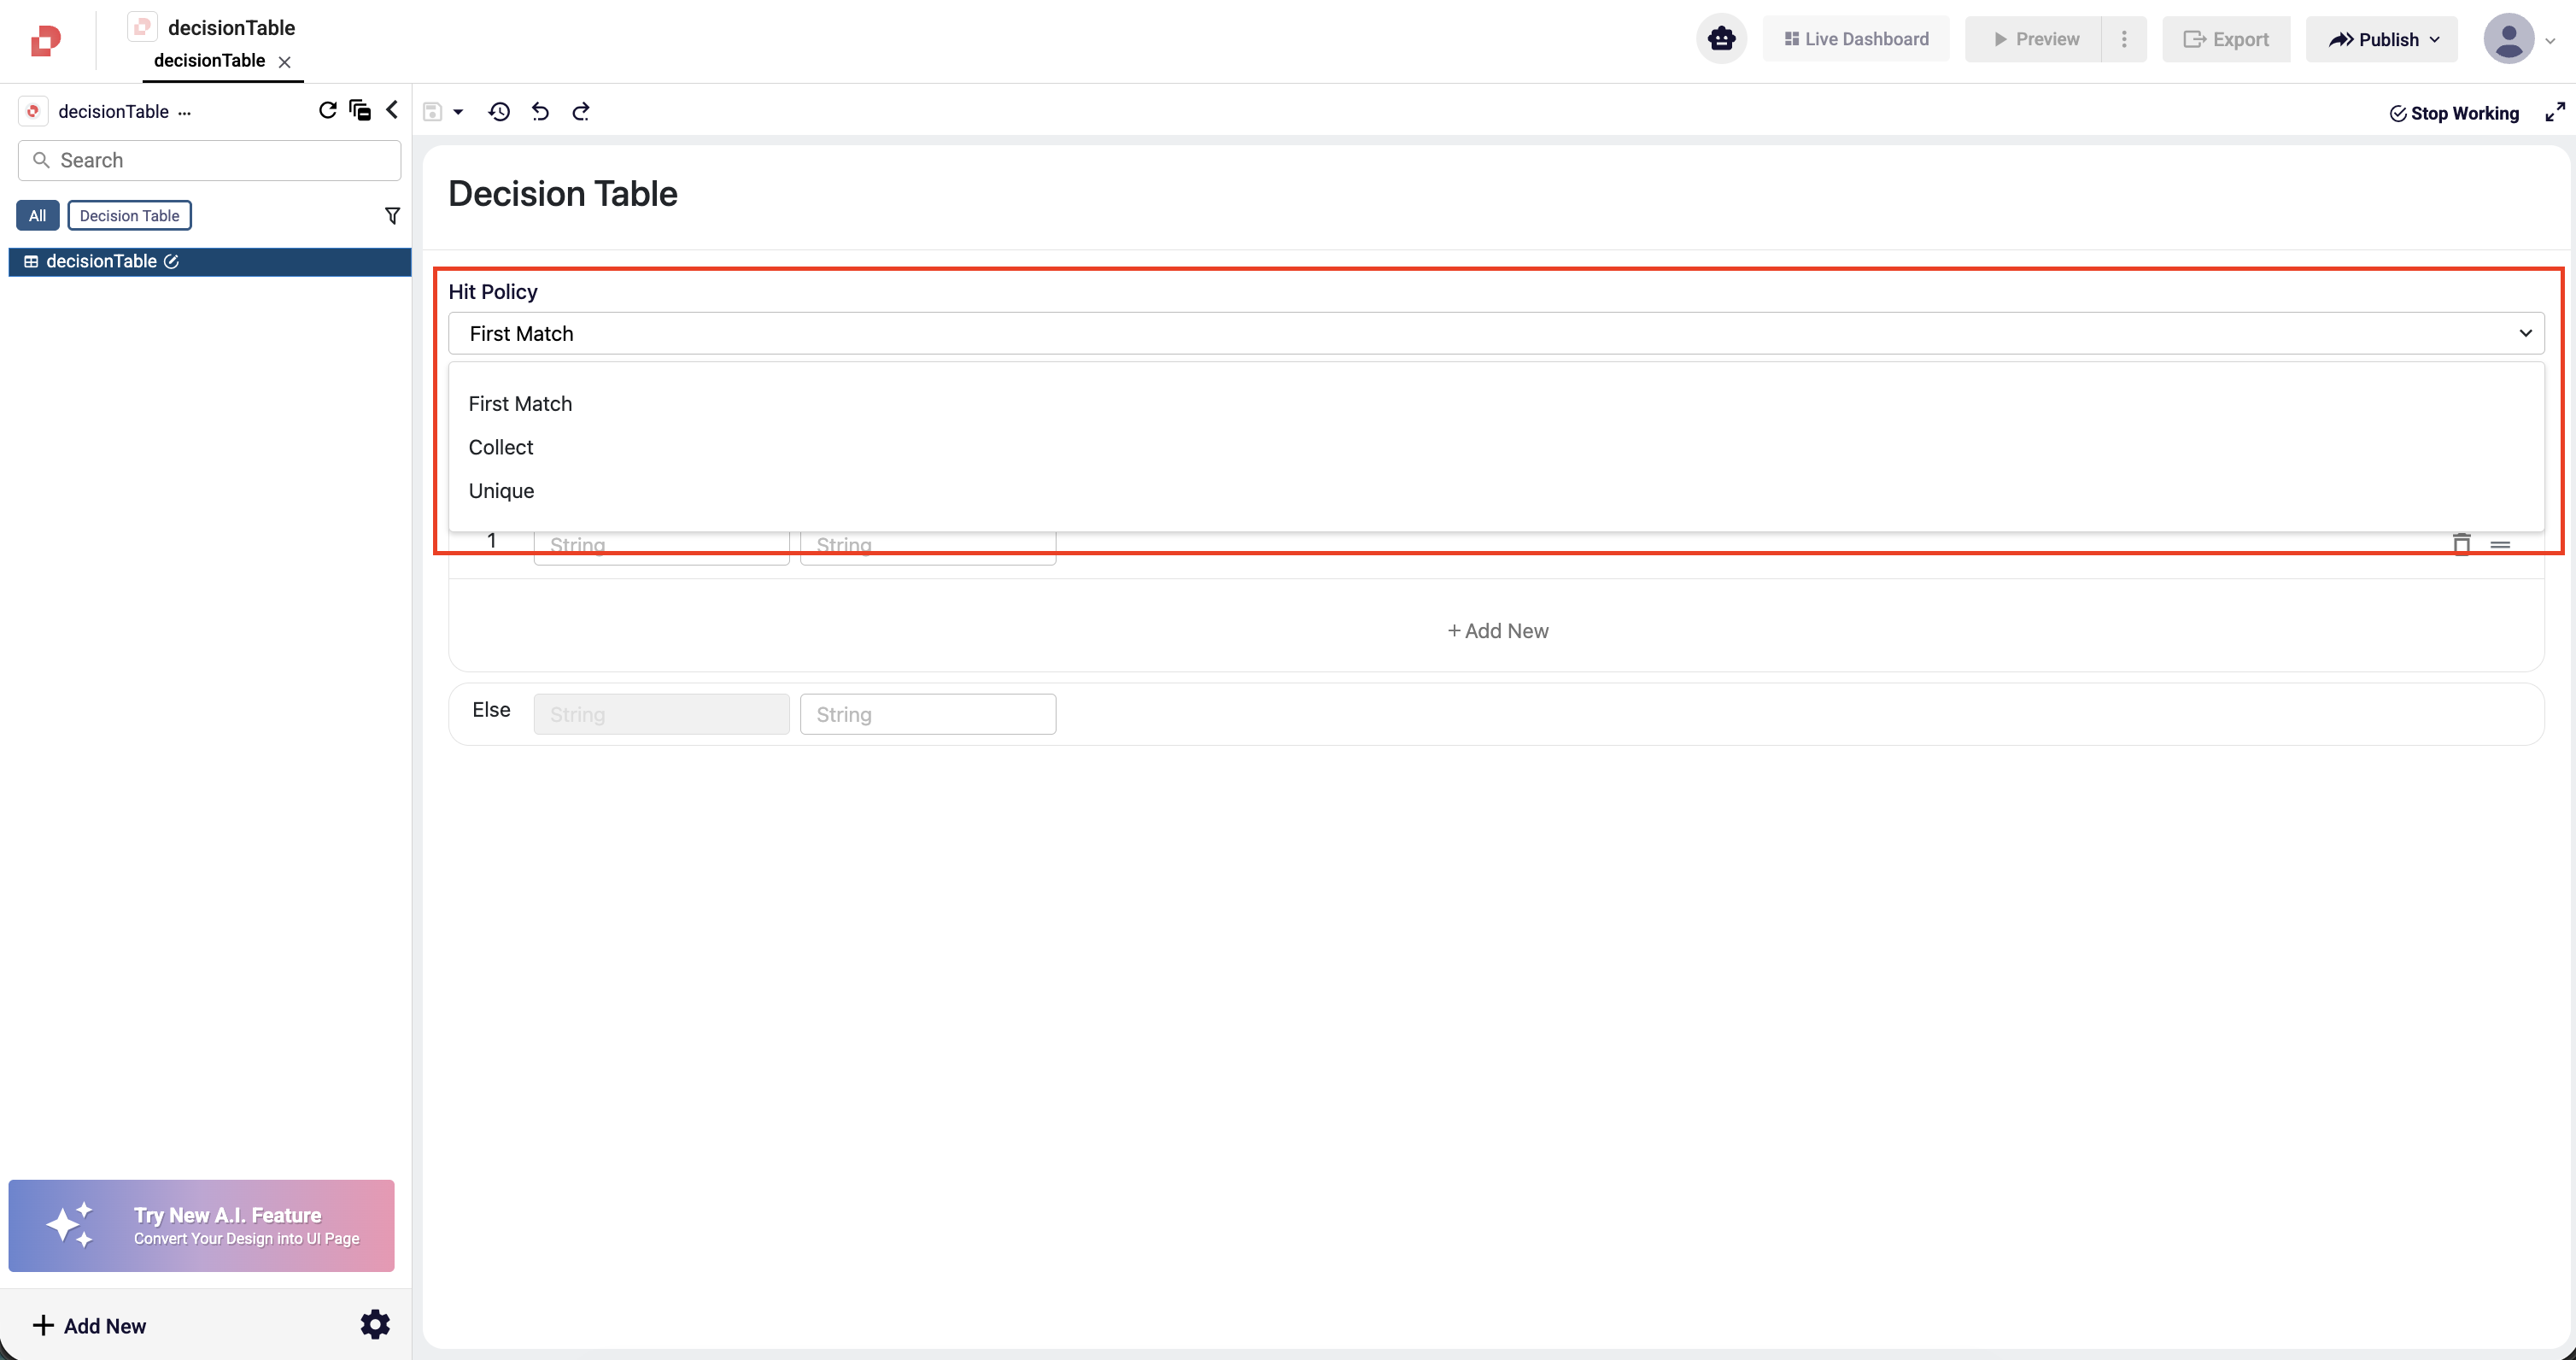
At the top of the screen, you will find the Hit Policy field, where you can define how the table should behave when multiple rules match simultaneously.
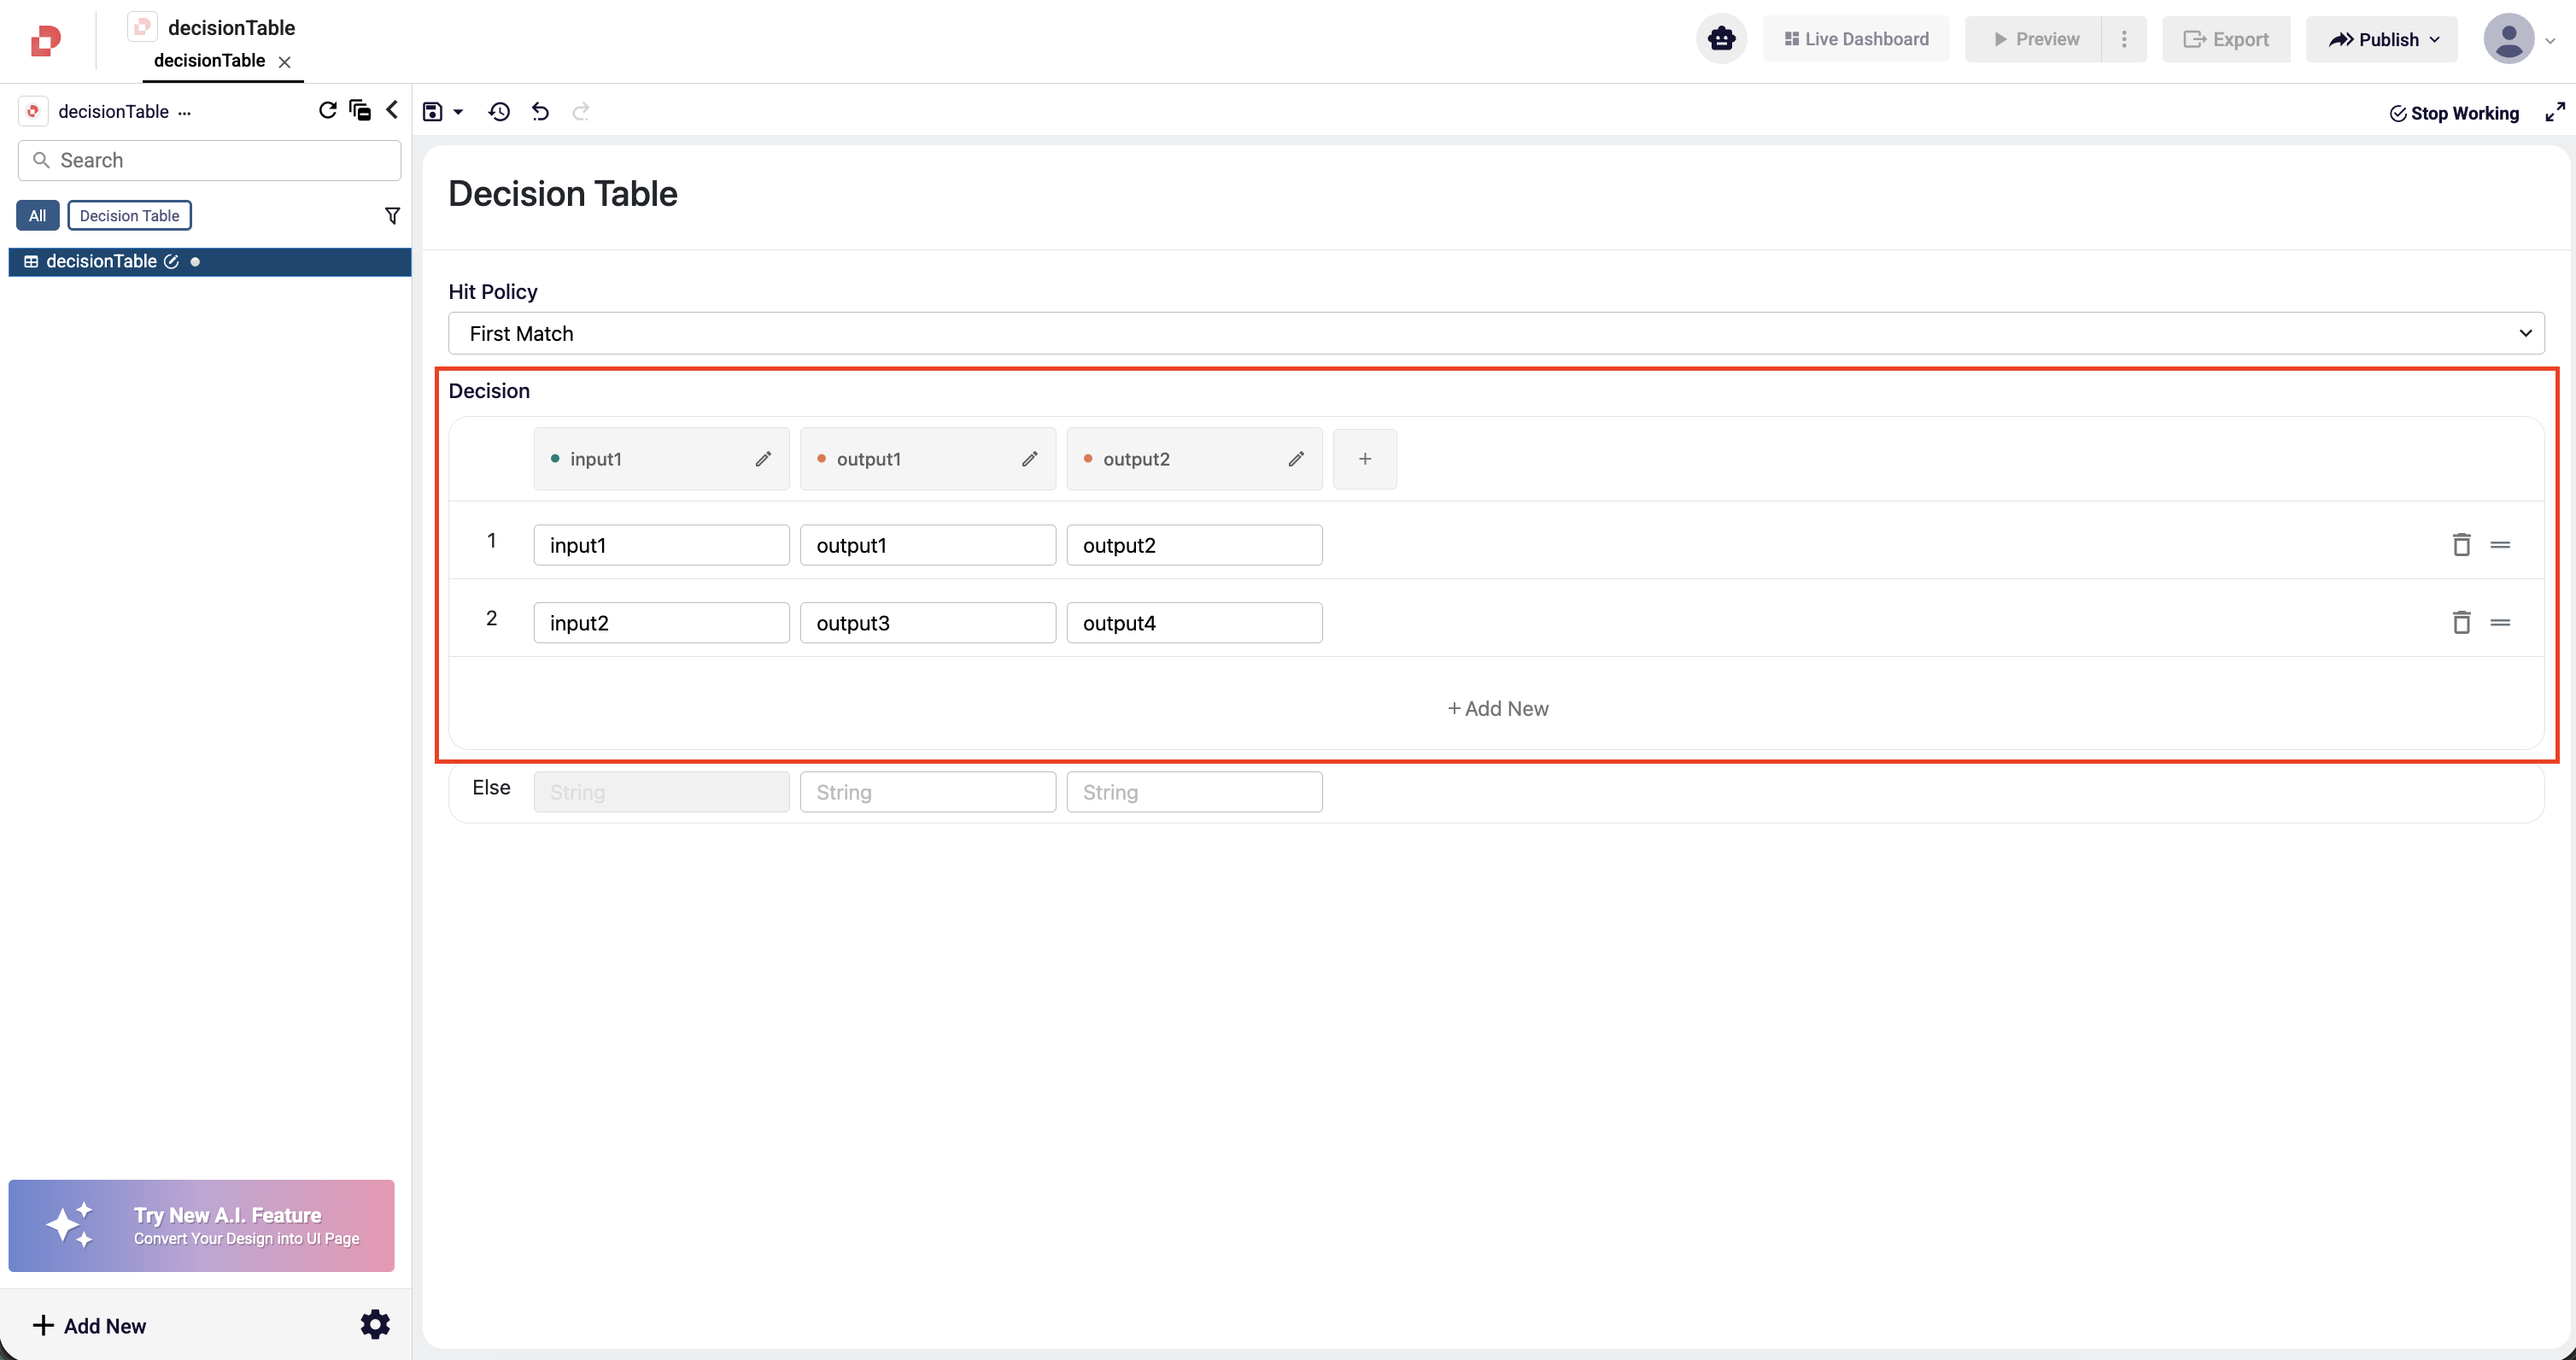
Below the hit policy, the Decision section displays your input and output columns. Each column is shown with its name and data type, and the edit icons allow you to update column names or add new ones as needed.
Directly beneath the columns, you can manage the rule rows. Each row represents a specific condition and the corresponding output. Users can add new rules, edit existing ones, or remove rules from the table.
At the bottom of the editor, the Else row defines the output that should be used when none of the defined rules match.
This structure allows the Decision Table Editor to present decision logic in a clear, organized, and easily maintainable way.

What Is Hit Policy and How Is It Used?
Hit Policy defines how a Decision Table behaves when multiple rules match at the same time. Each Decision Table uses a single hit policy, and this selection directly determines how the final output is produced.
In the Decision Table Editor, the Hit Policy field is located at the top of the screen. The dropdown menu includes the following options:
- First Match: Returns the result of the first rule that matches. Rules are evaluated from top to bottom.
- Collect: Returns all results of the rules that match as a combined list.
- Unique: Ensures that only one rule can match. If more than one rule matches, an error is triggered.
Choosing the correct hit policy is essential for defining the expected decision flow, as it controls how rule evaluation is handled and how outputs are generated.
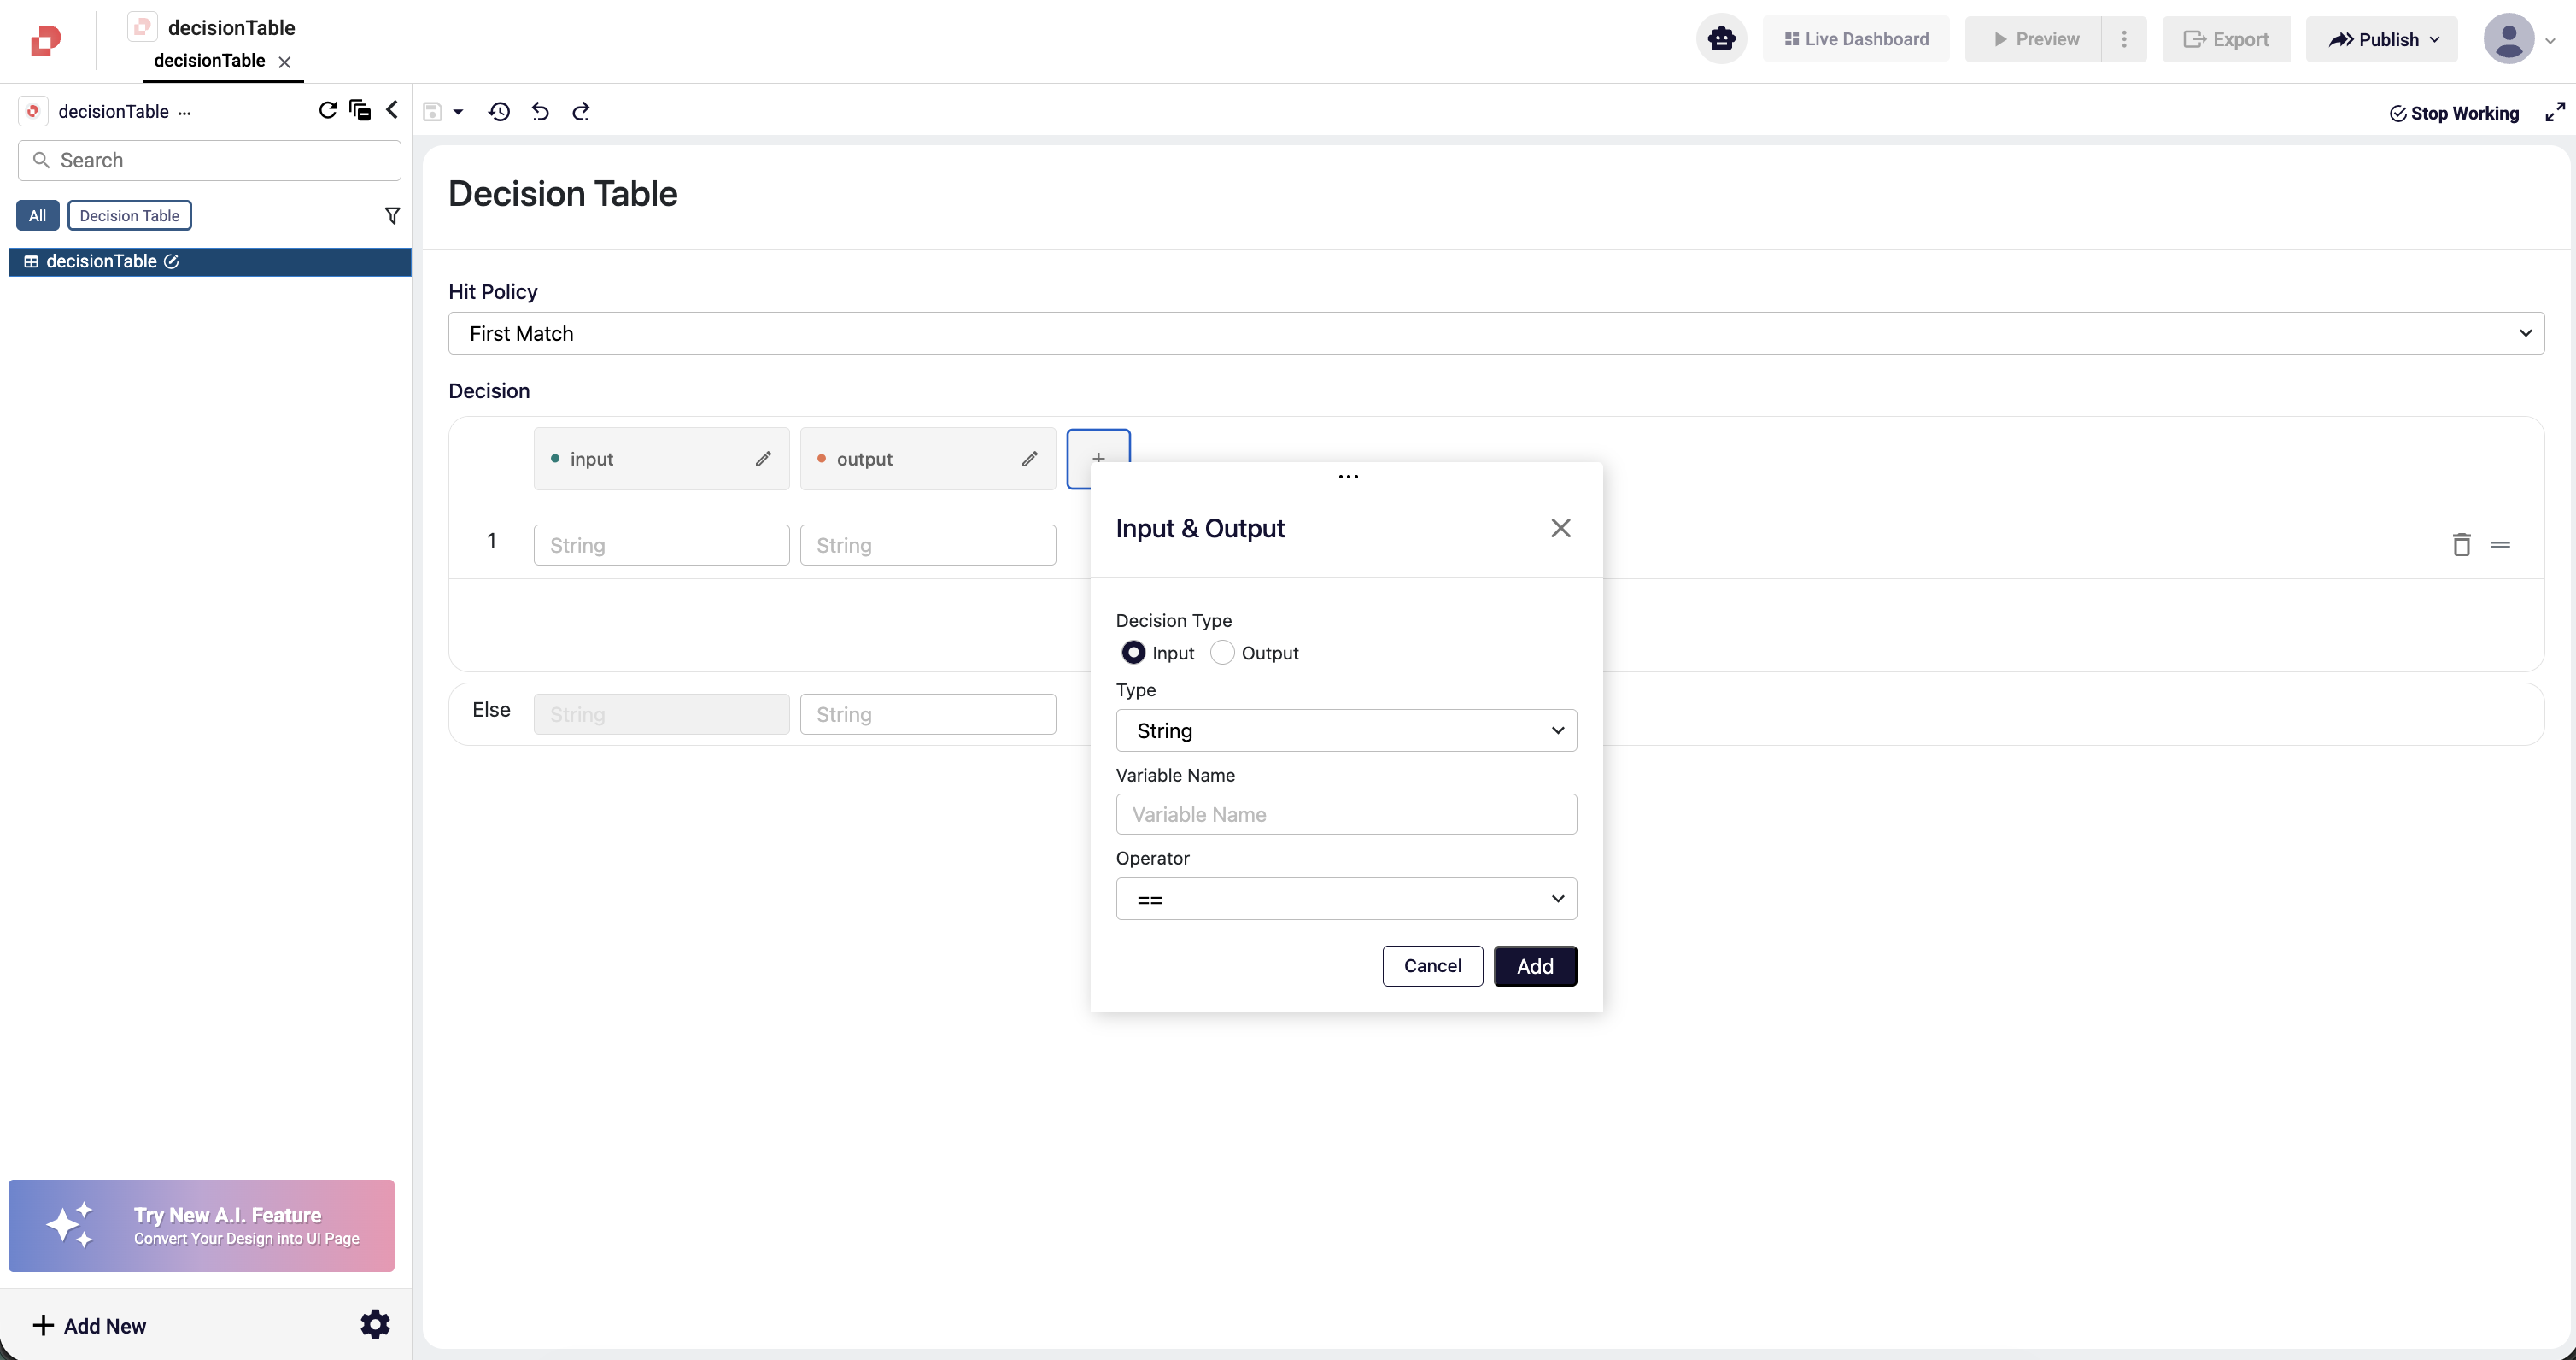
How to Define Input Columns?
Input columns determine the conditions under which the Decision Table evaluates its rules. To add a new input column, click the + button in the Decision section. A modal window will open with the “Input” option selected by default.
In this window, the following fields are used to define an input column:
- Type: Specifies the data type of the input value (e.g., String, Number, Boolean).
- Variable Name: The name of the input column. This is the label that will appear in the table and will be used when entering values for each rule.
- Operator: Provides comparison operators based on the selected data type (e.g., ==, !=, >, <).
After filling in the required fields, click Add to insert the input column into the table. Once added, the input column appears on the left side of the Decision Table and becomes available for entering values in each rule row.
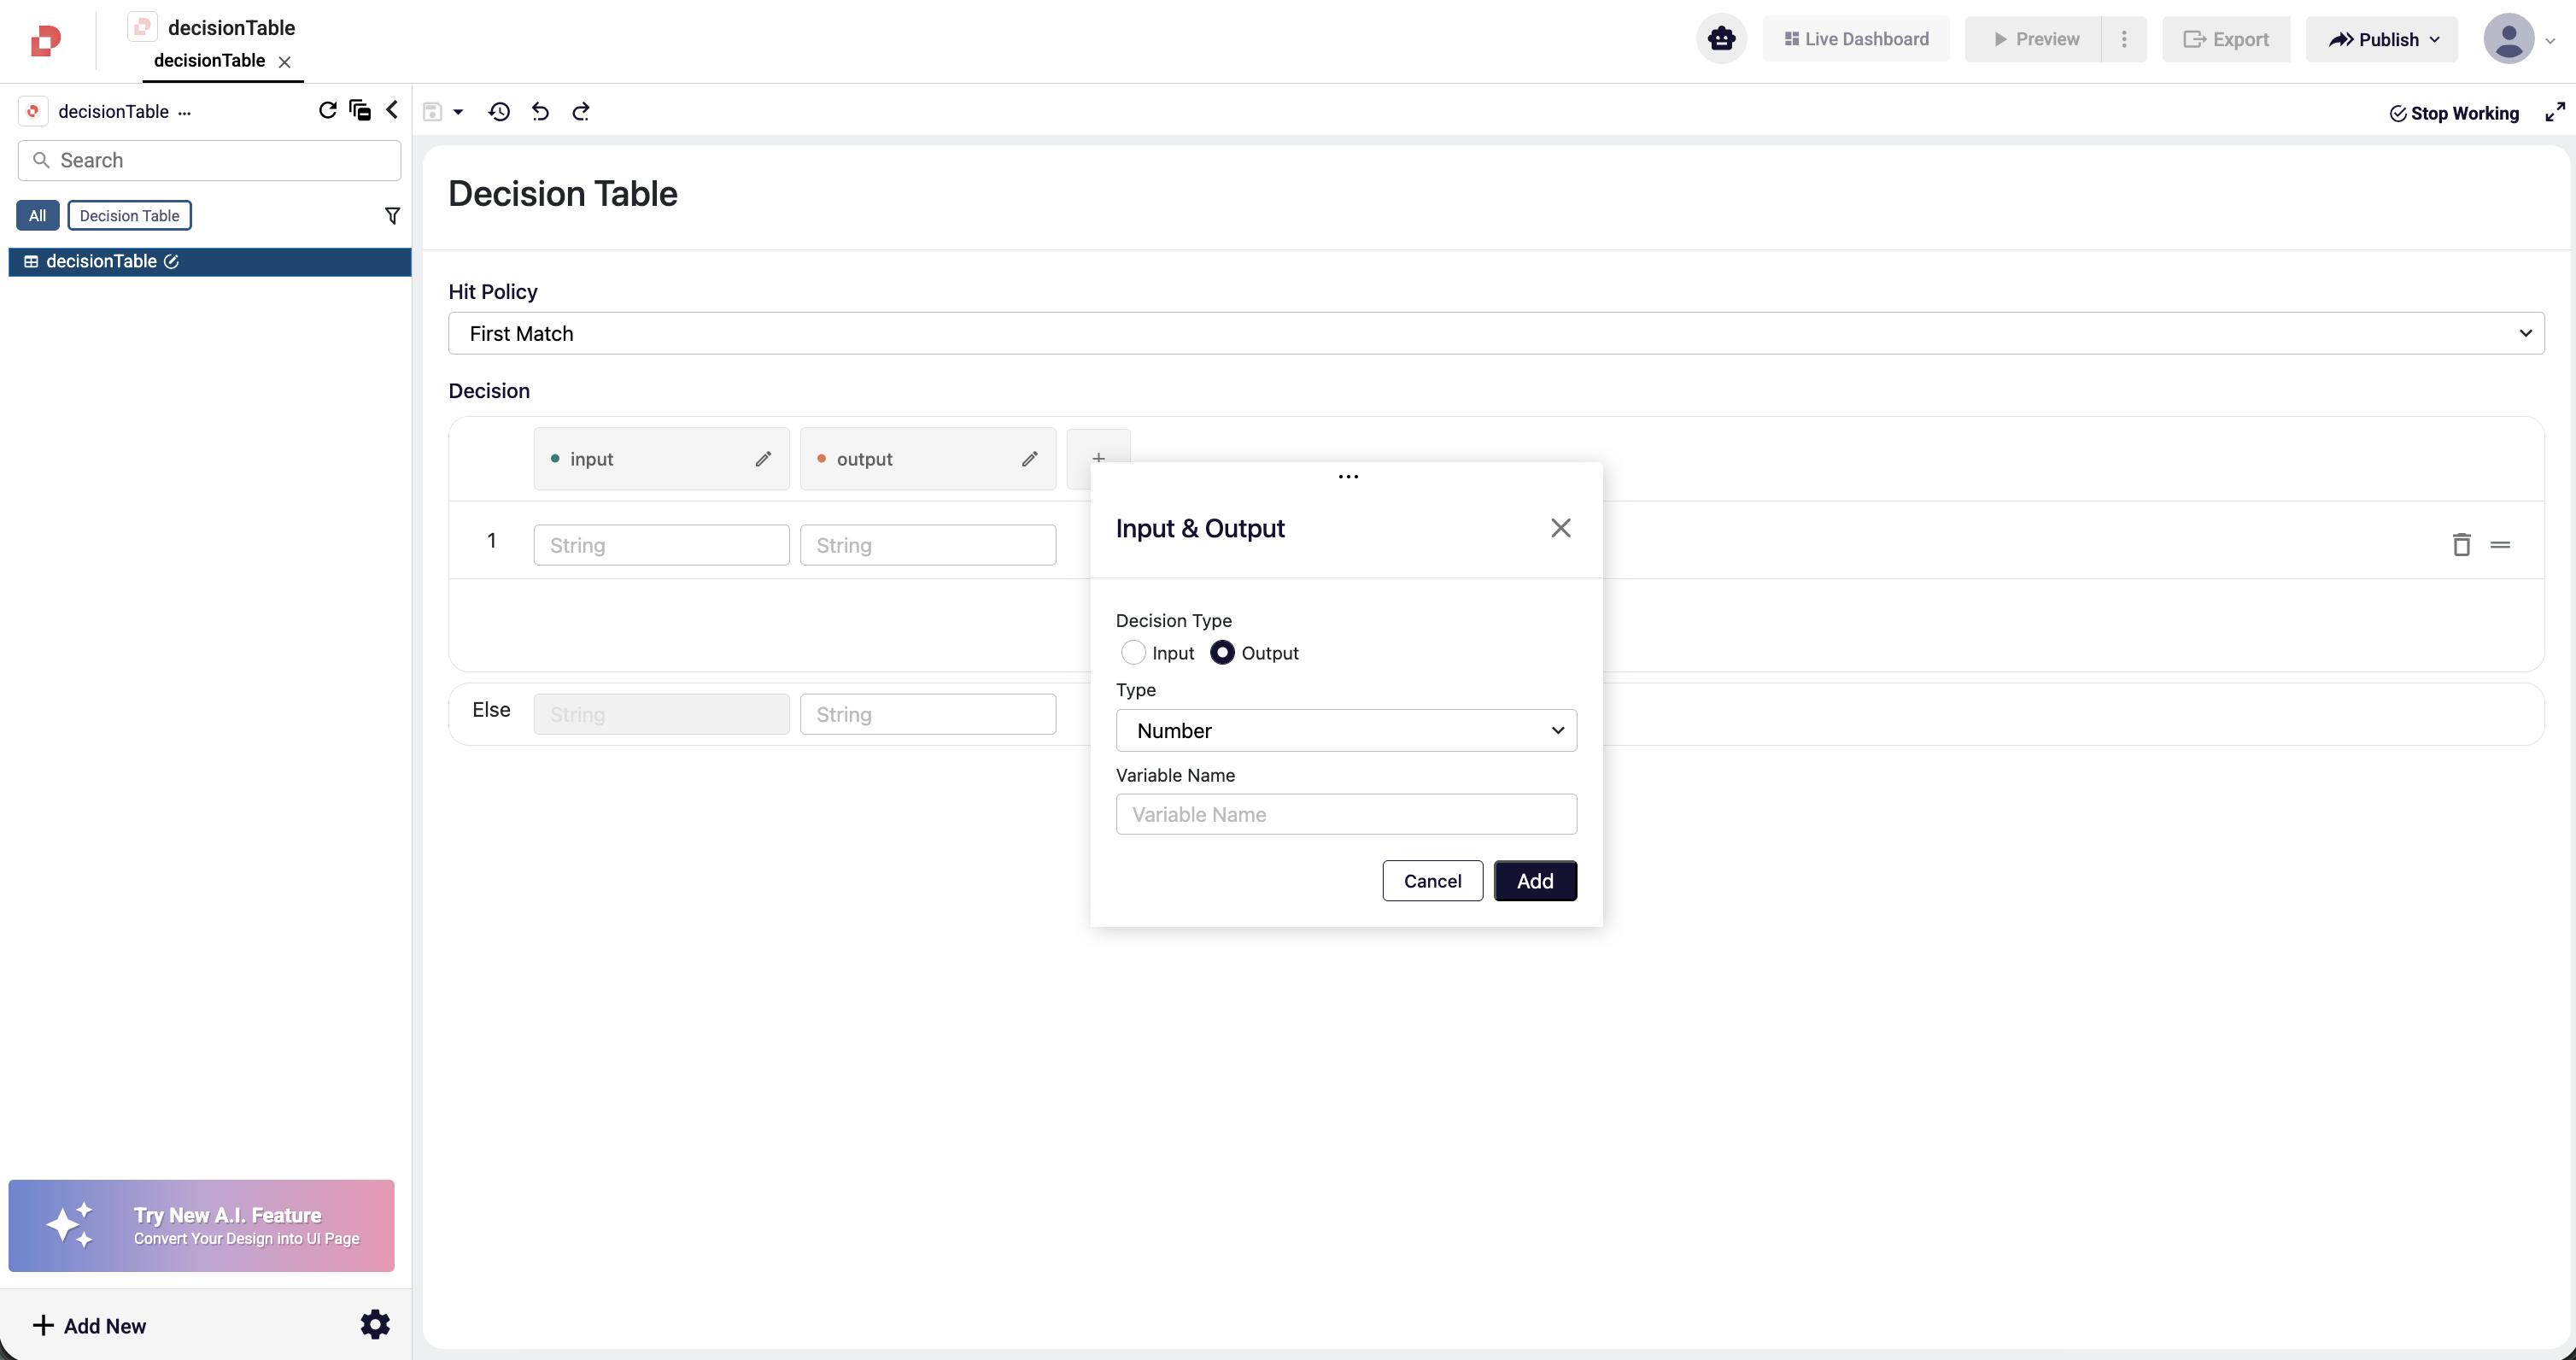
How to Define Output Columns?
Output columns represent the result values produced by the rules within a Decision Table. To add a new output column, click the + button in the Decision section and select the Output option in the modal window.
In this window, the following fields are used to define an output column:
- Type: Specifies the data type of the output value (e.g., String, Number, Boolean).
- Variable Name: The name of the output column. This name represents the field where the resulting values will be written.
After filling in the required fields, click Add to insert the output column into the table. The added output column appears next to the input columns and allows you to enter result values for each rule row.
Output columns play a key role in determining the final outcome of the Decision Table.
Creating and Managing Rules
Each row in the Decision Table represents a specific combination of conditions and the resulting output for that scenario. Therefore, correctly defining rule rows is essential for the table to produce the expected results.
To add a new rule, click the Add New button to insert an additional row into the table. Each rule row includes condition values for the input columns and result values for the output columns.
When creating rules, the following requirements must be observed:
- At least one input column must have a value. If an input field is left empty, that condition is not evaluated. An empty input is treated as “unspecified” or “applicable for any value” within that rule.
- All output columns must have values. Leaving an output field empty makes the rule incomplete and prevents it from being processed. Since every rule must produce a result, all output fields are mandatory.
Users can edit existing rules, delete them, or reorder them as needed. Proper rule ordering is especially important when using the “First Match” hit policy.
With this structure, each rule row defines a specific scenario, ensuring that the Decision Table produces consistent and predictable results based on the defined conditions.
Using the Else Row
The Else row allows you to define a default output for cases where none of the defined rules match. All rule rows are evaluated, and if no rule is applicable, the Decision Table returns the output specified in the Else row.
The Else row contains only output values; input fields are not used in this row. This is because the Else row functions as a fallback mechanism for all remaining or unspecified cases, independent of any conditions.