Step 3 — Persona
For the full editor reference, see the Persona Editor.
Its Place in Our Scenario
We have two kinds of users:
| Persona | Role(s) it carries |
|---|---|
| MakerUser | Maker |
| CheckerUser | Checker |
A persona usually carries one role, but can carry several when needed (e.g. a supervisor persona carrying both Maker and Checker). In that case maker-checker self-approval is enforced separately at the action level.
Step by Step
1. Add New → New Persona
From + Add New, click New Persona. Name the model — usually personas.
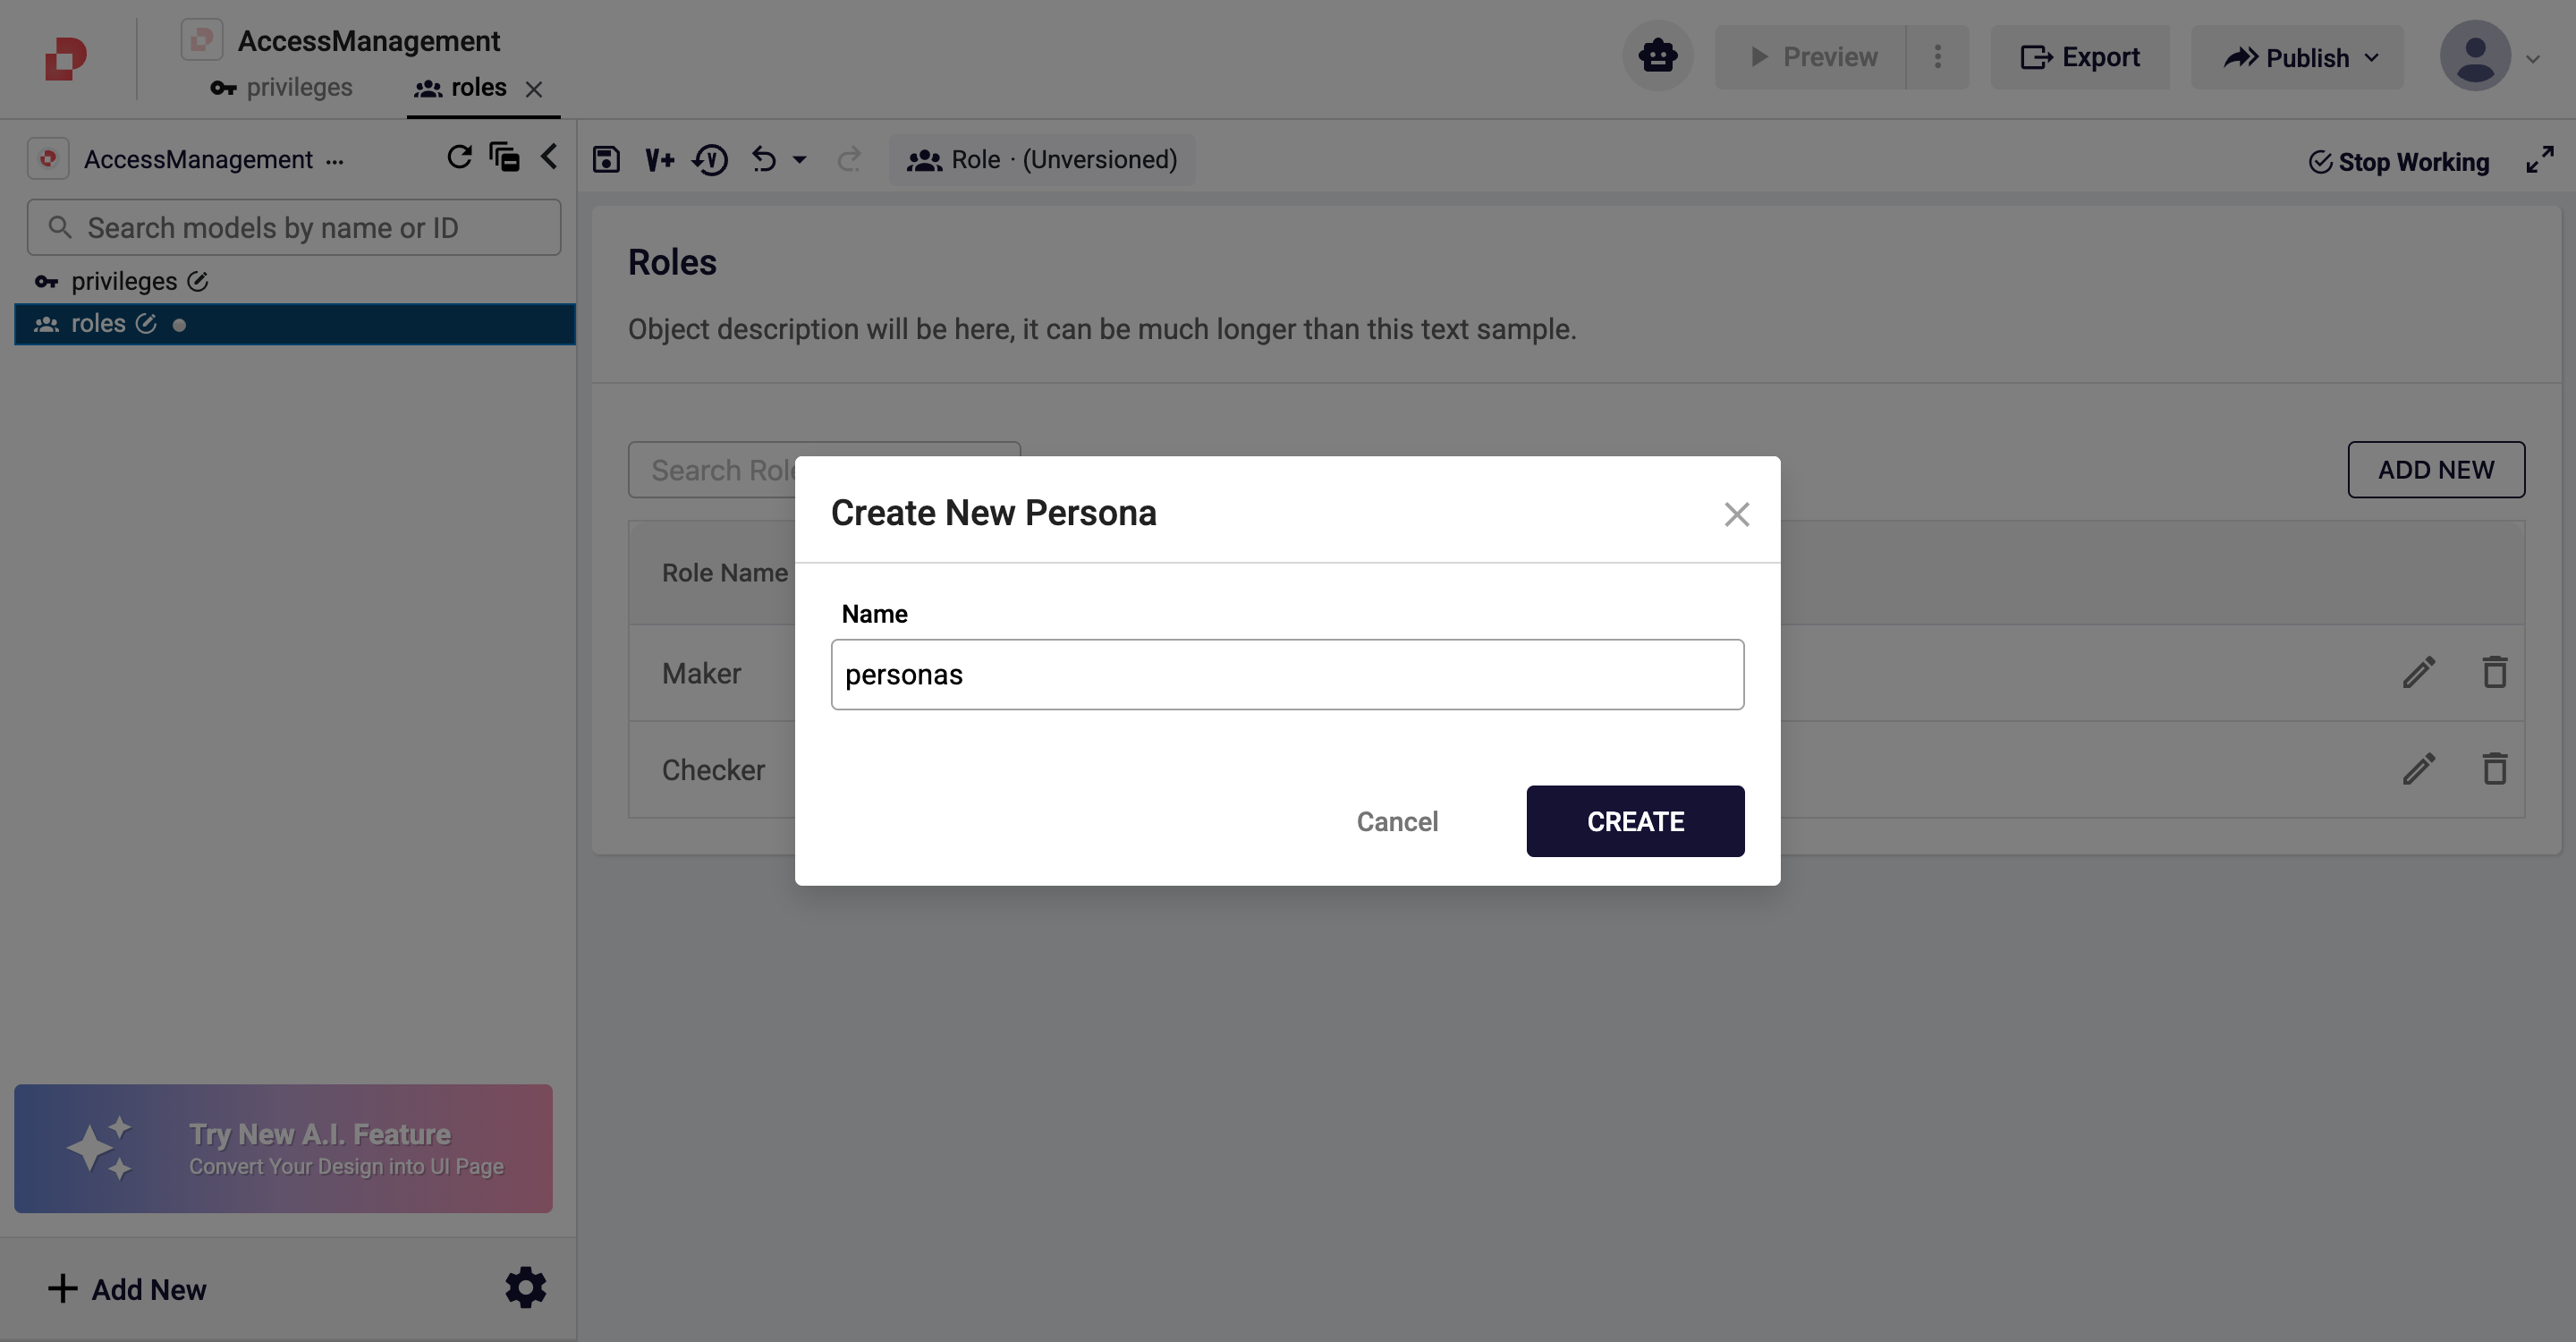
Confirm with CREATE → the empty Persona Editor opens.
2. Add the first persona (MakerUser)
In the list view, press ADD NEW → the persona detail page opens. It has these sections:
| Section | What to enter |
|---|---|
| Persona Name | The unique persona name (MakerUser) |
| Dashboard | The dashboards this persona should see (optional — left empty here) |
| Roles | The role(s) this persona carries |
For MakerUser:
- Type
MakerUserinto Persona Name. - Under Roles, press ADD NEW.
- From the Select dropdown, choose the
Makerrole.
The dropdown lists all roles created in Step 2. To assign several roles, press ADD NEW again for each one.
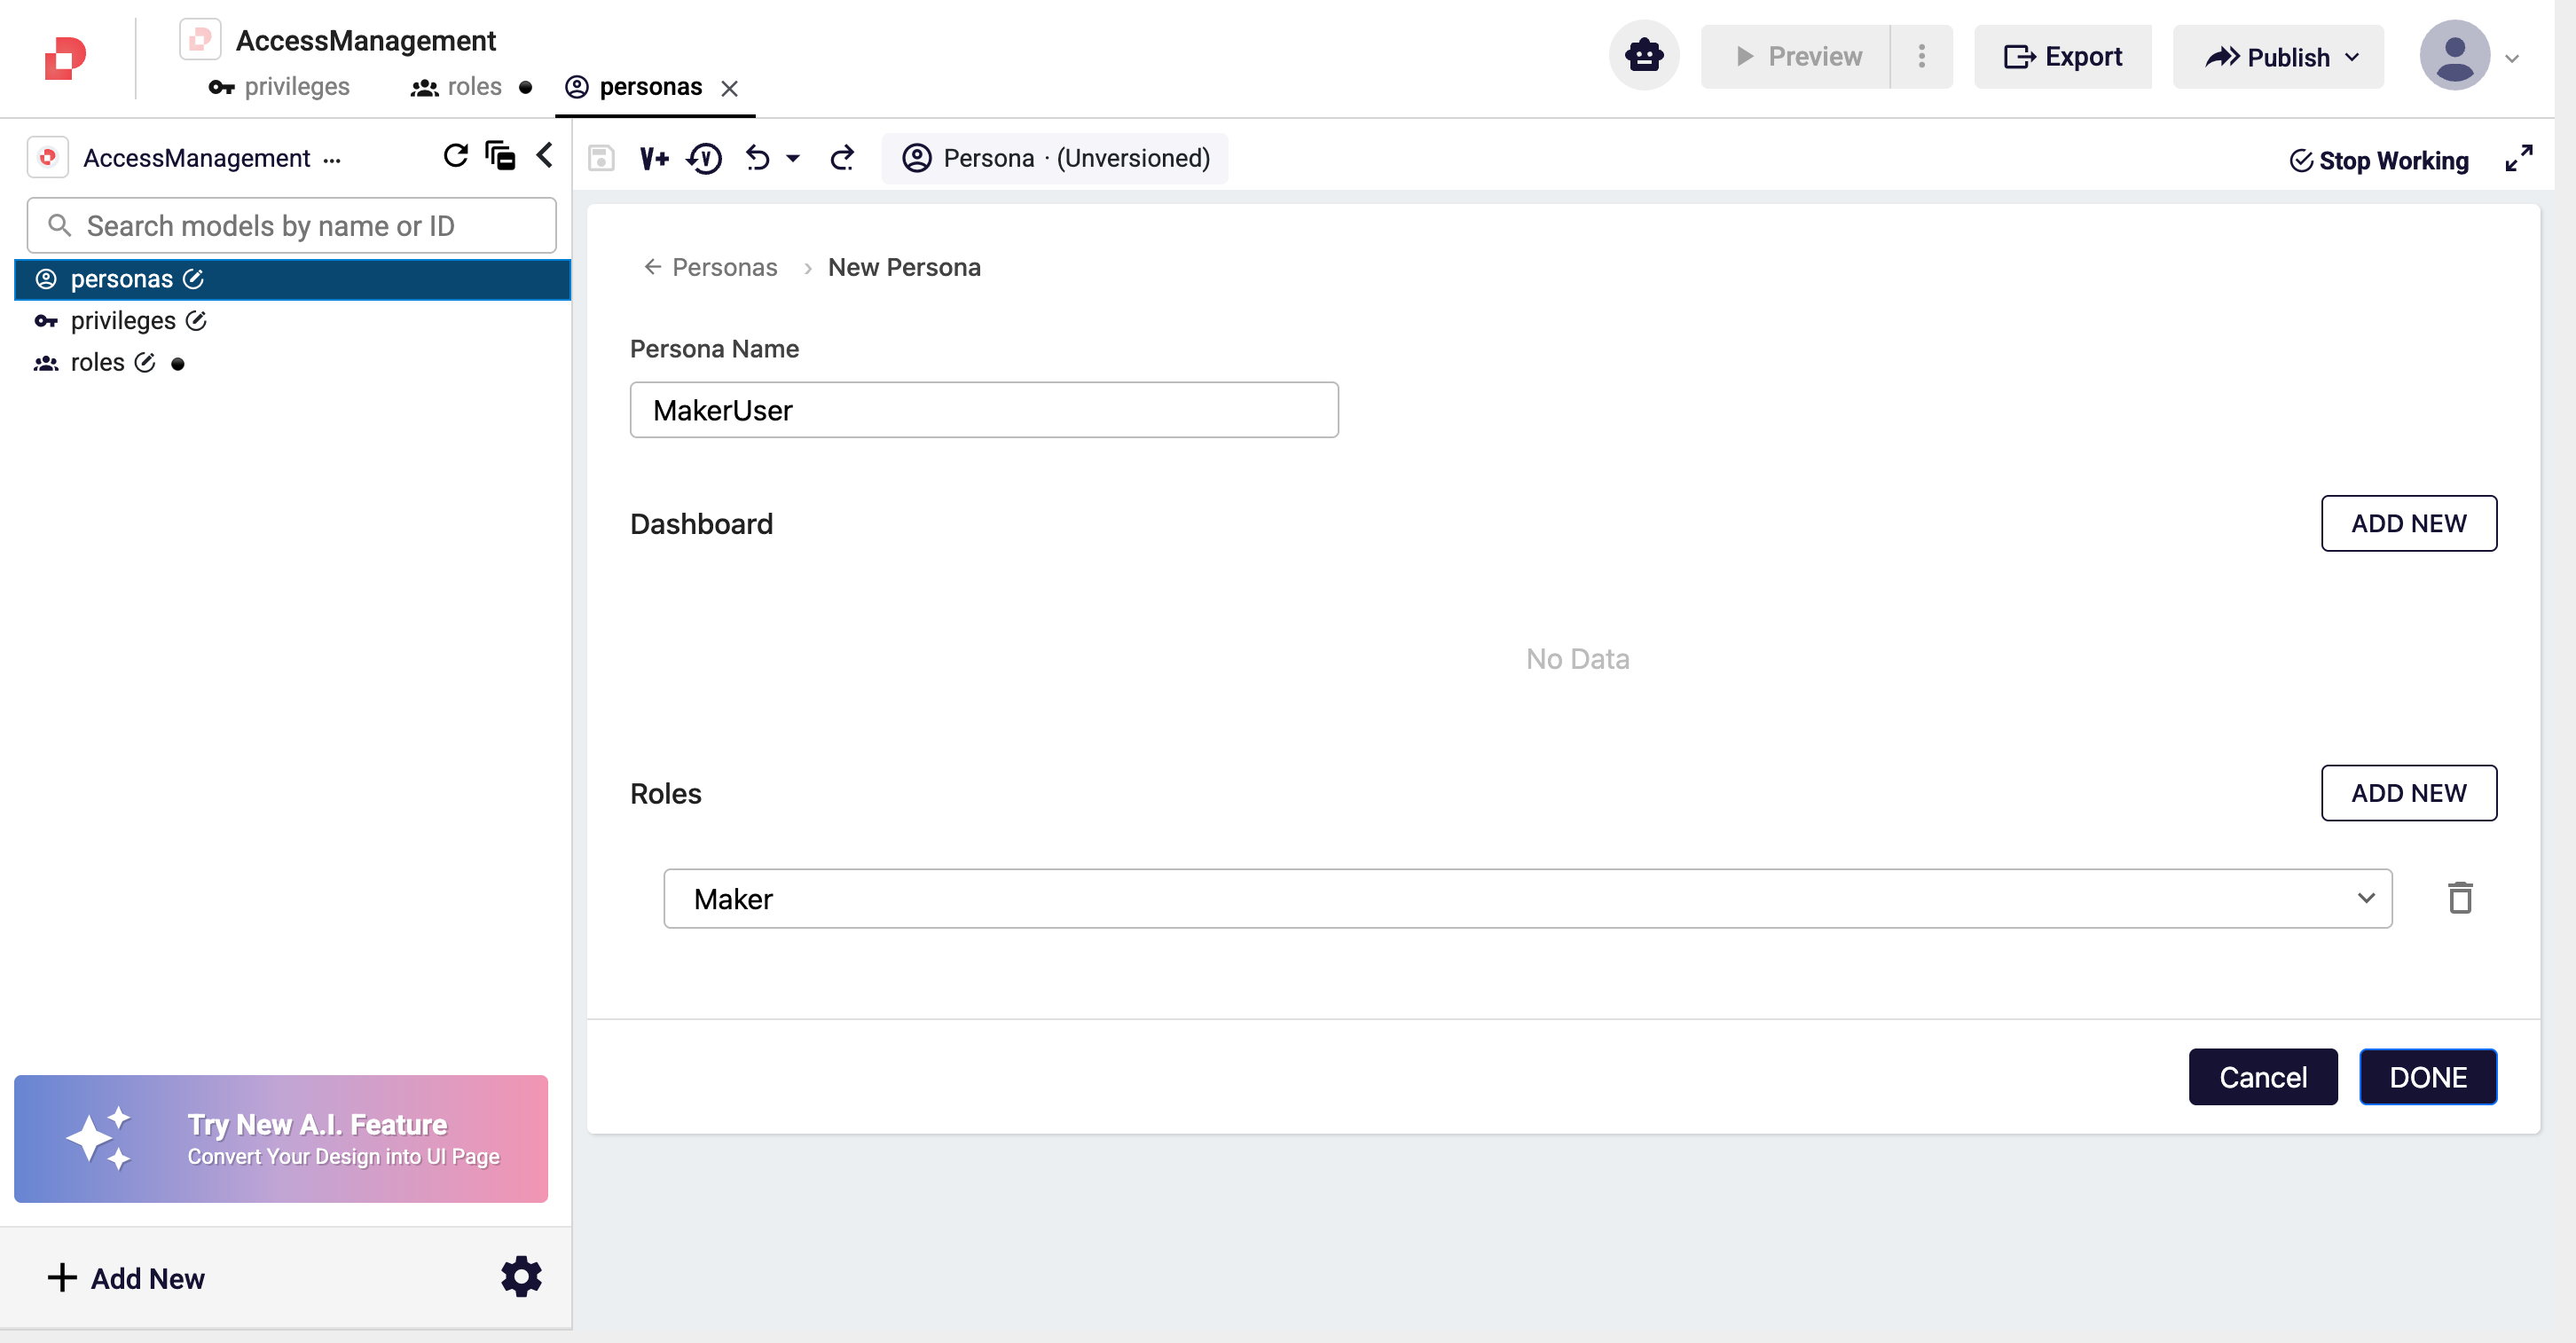
- Press DONE to return to the list.
3. Add the second persona (CheckerUser)
Repeat the same steps:
- Press ADD NEW again → an empty detail page opens.
- Persona Name =
CheckerUser. - Roles → ADD NEW → choose
Checker.
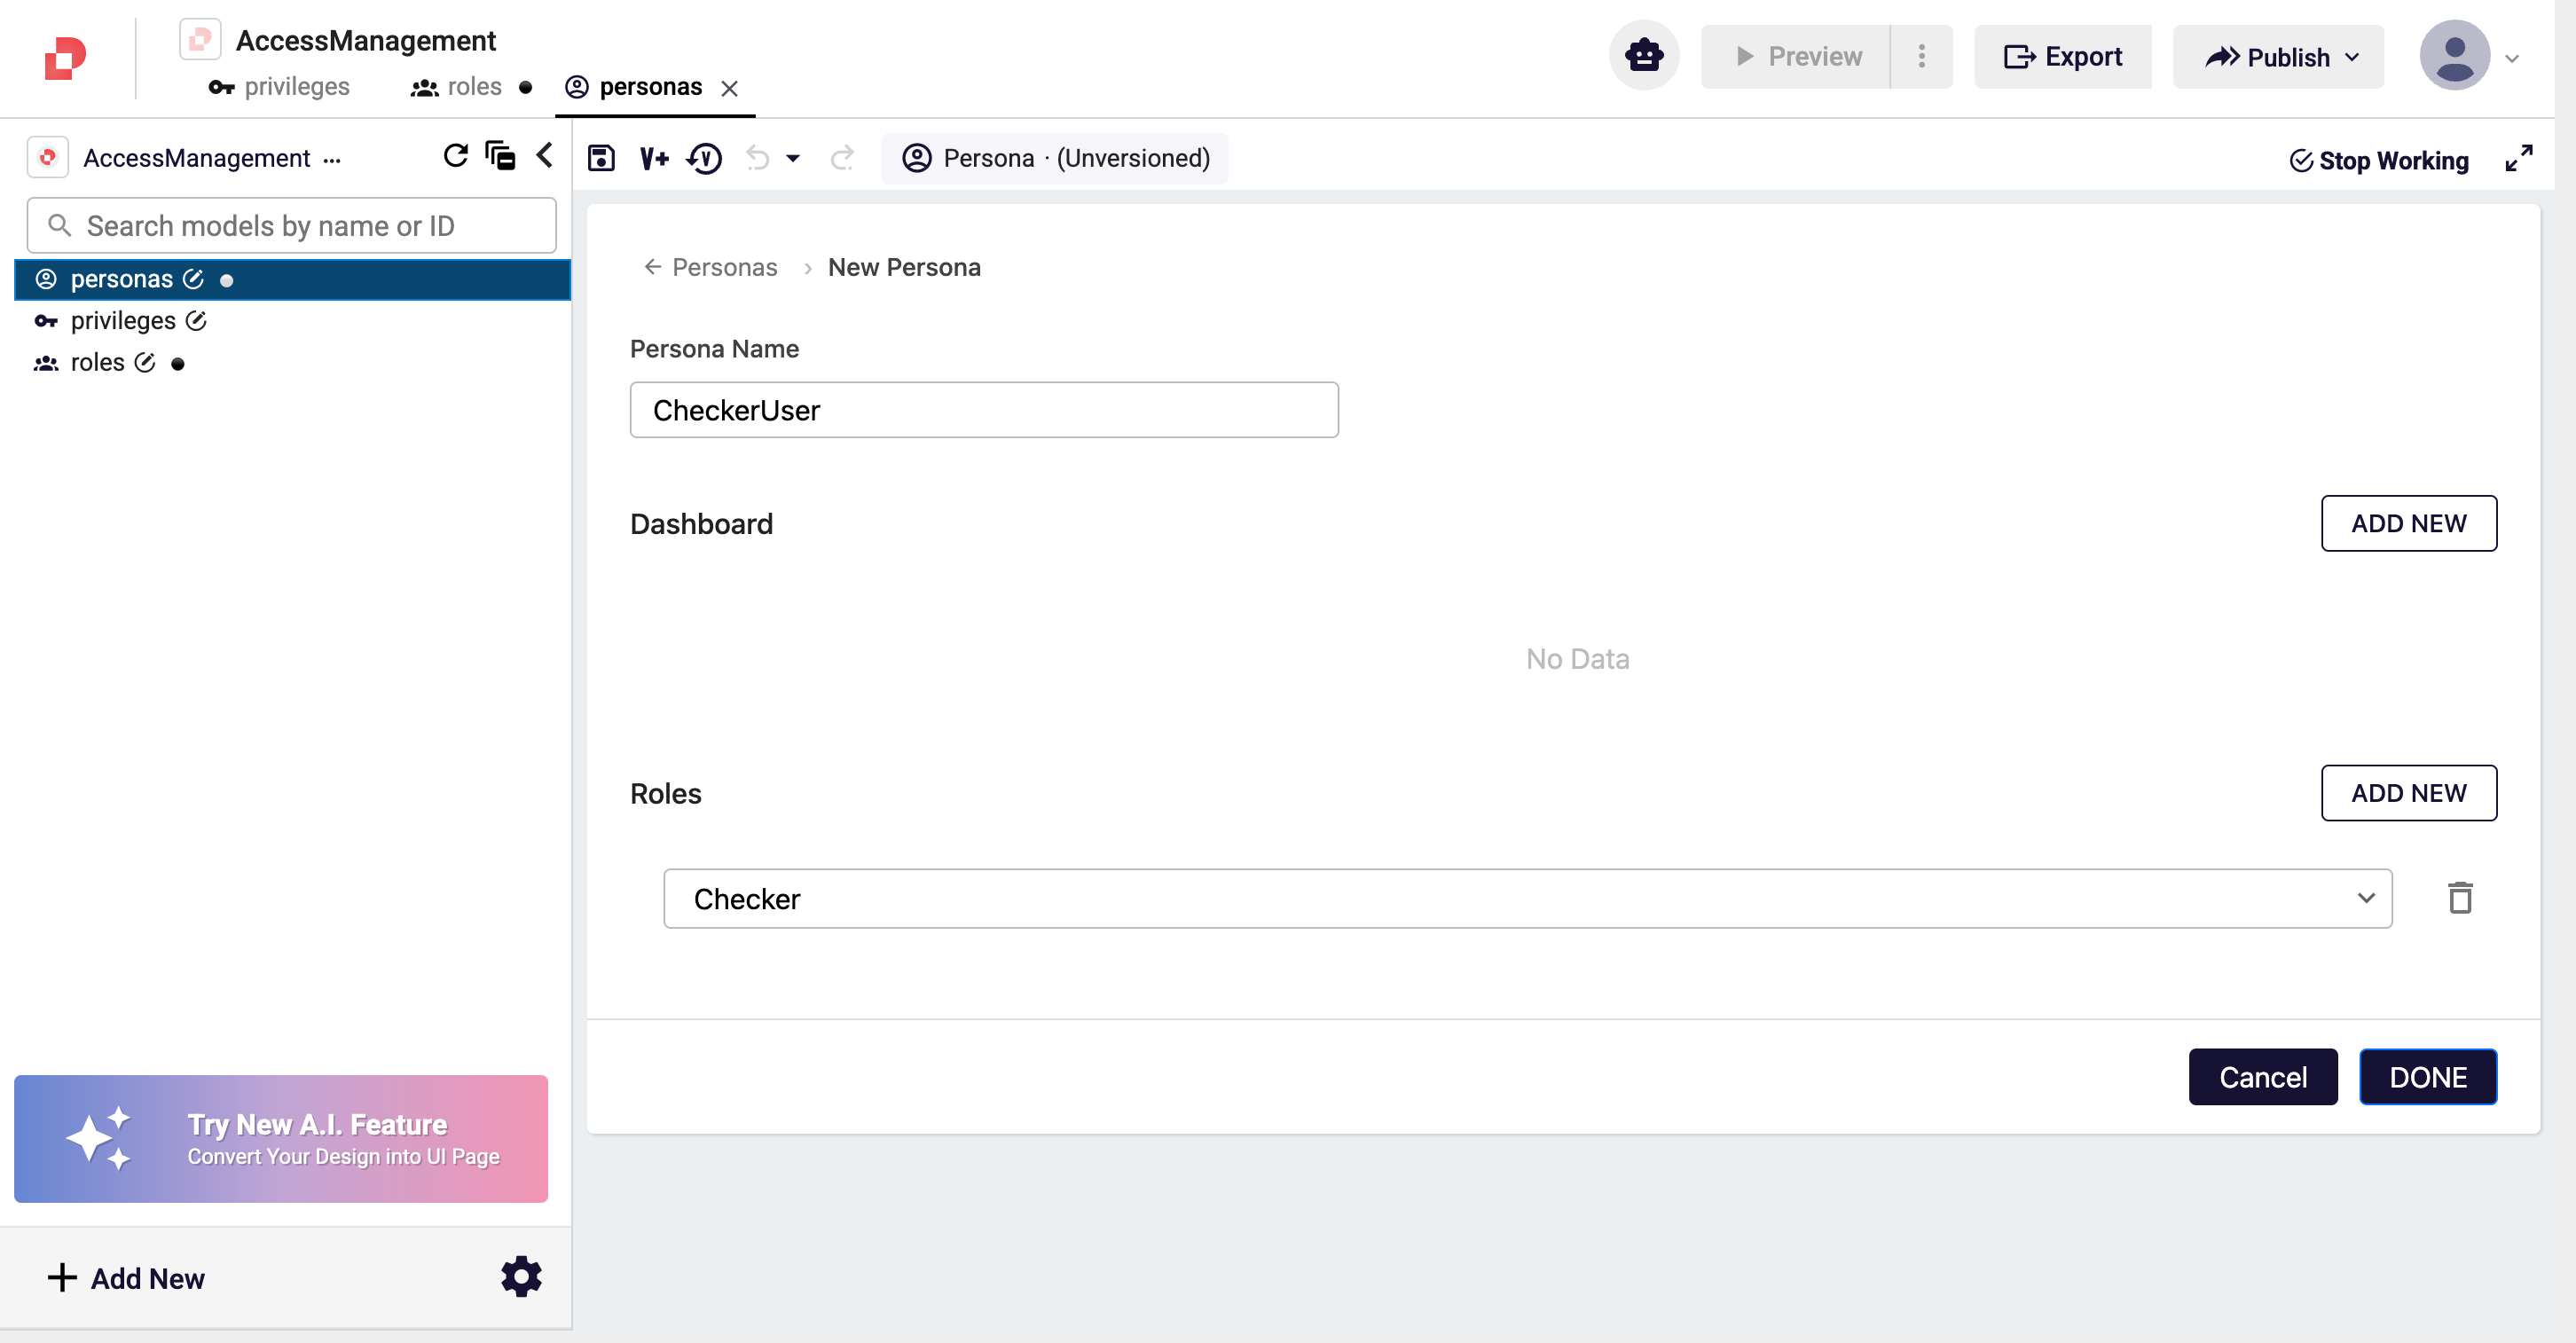
- DONE → back to the list.
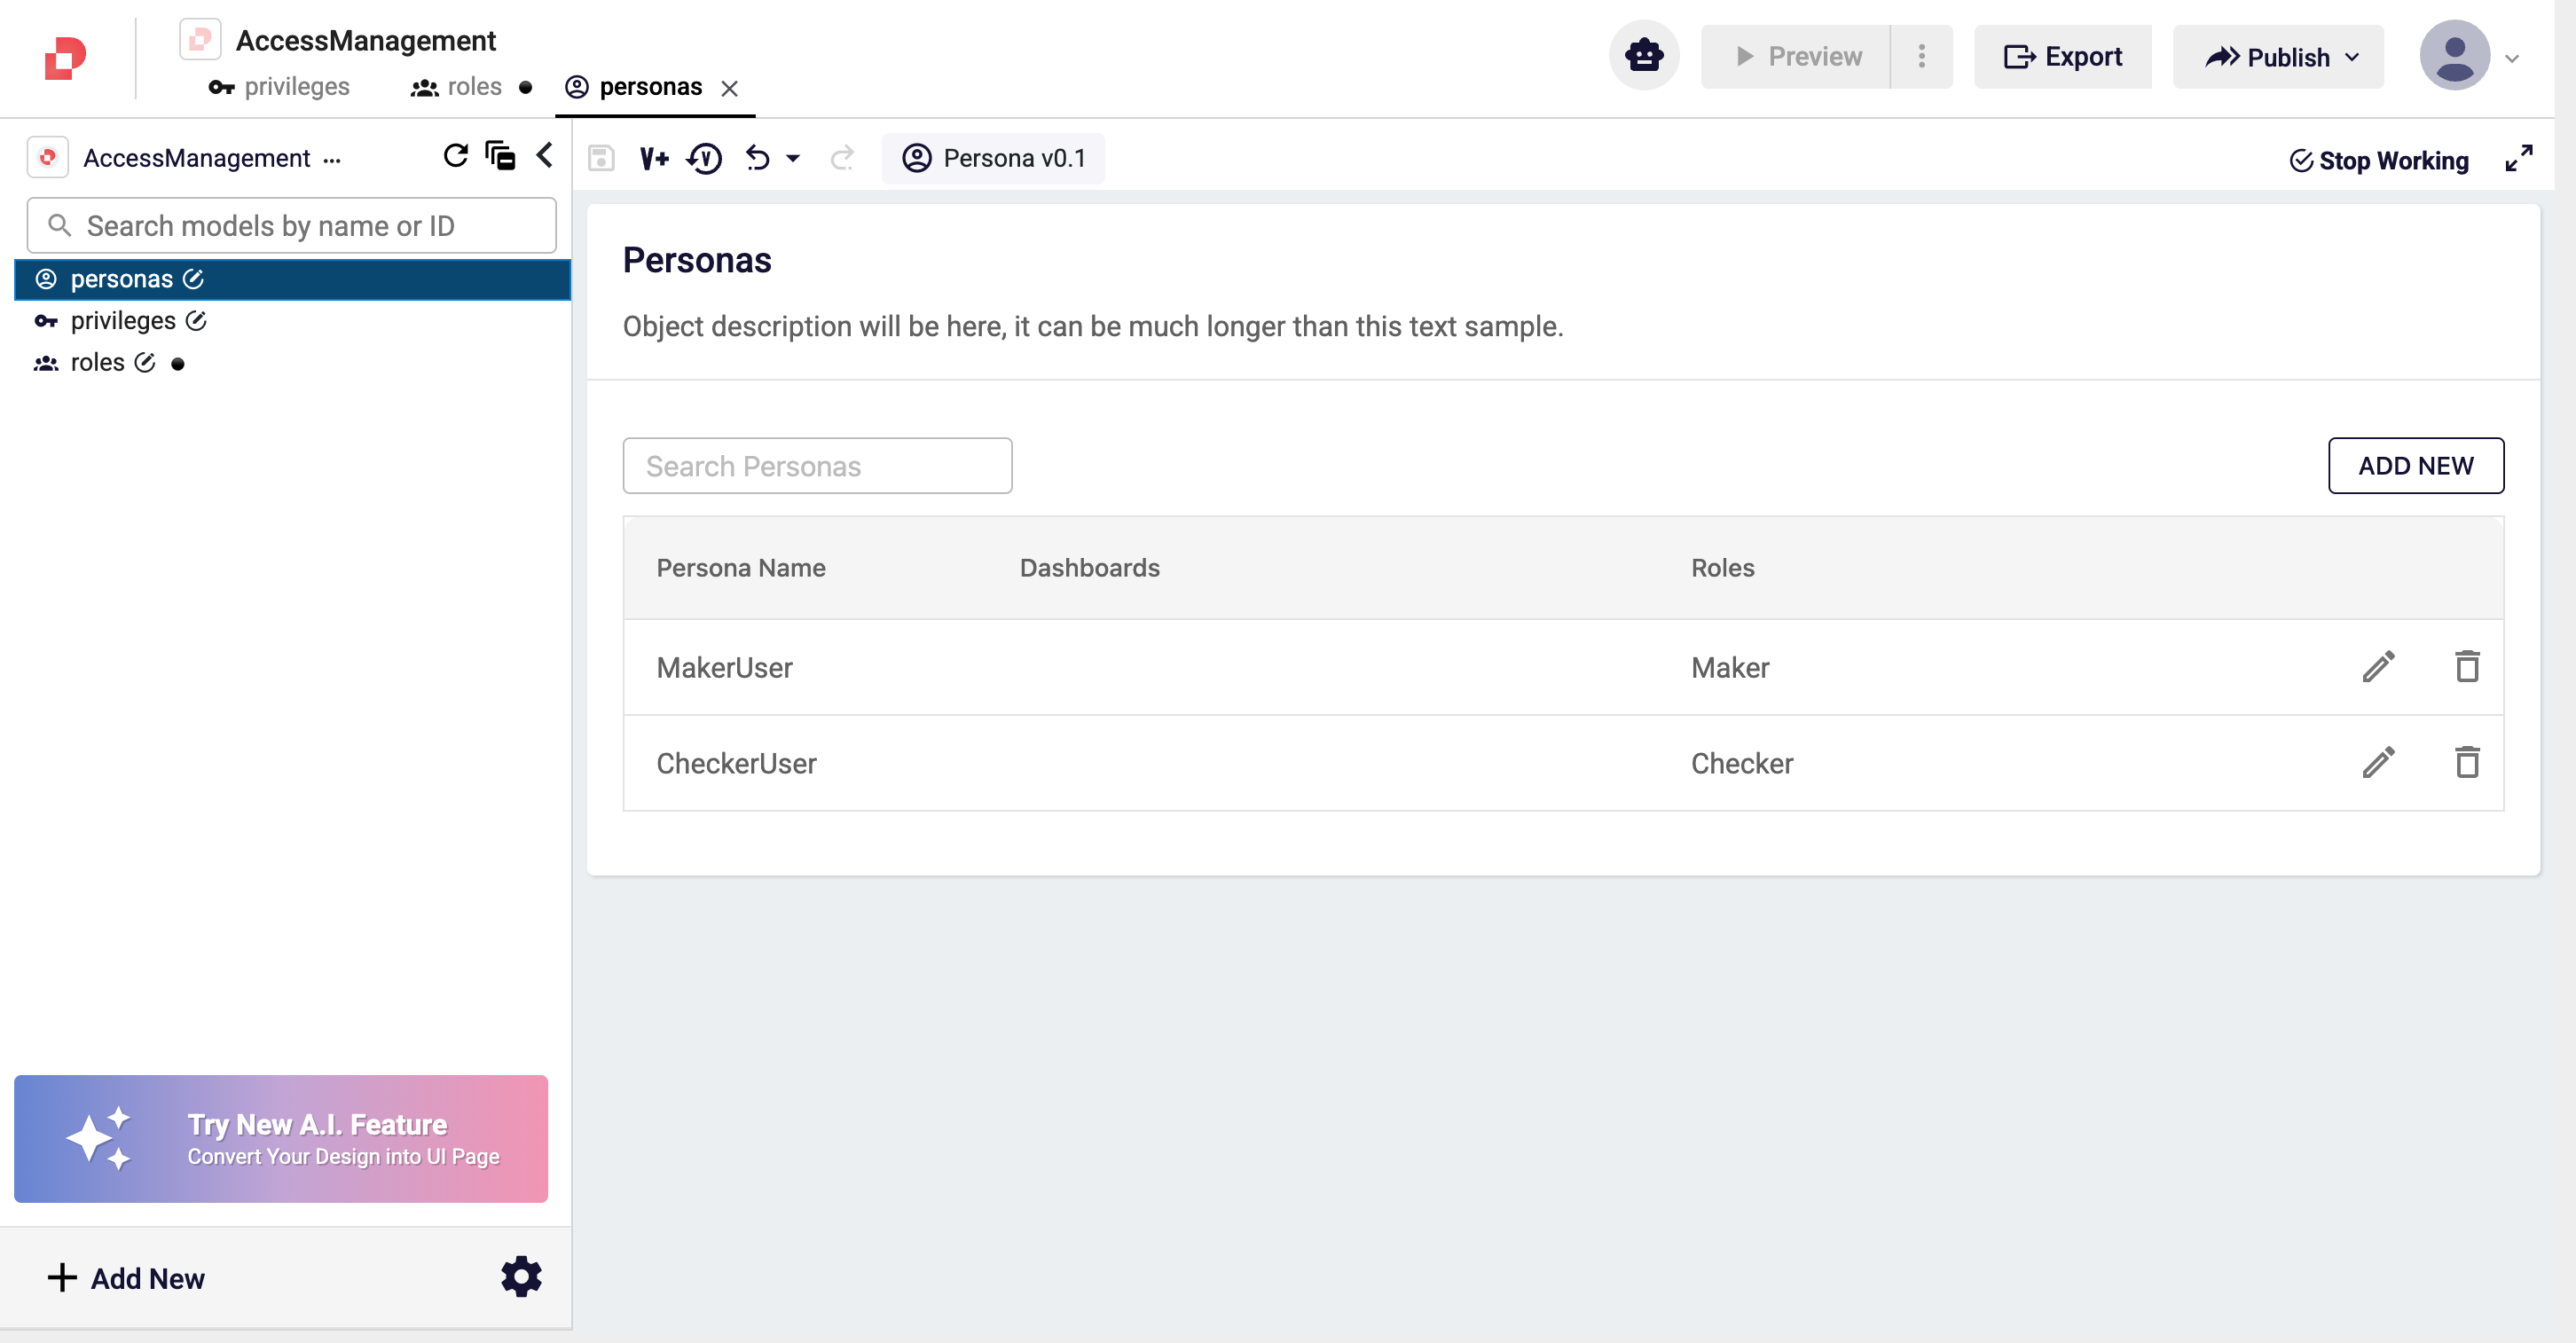
4. Save
Click the disk icon in the toolbar, enter a short summary, and confirm with SAVE CHANGES.
The User–Persona Link (Runtime)
The persona model is only a definition; binding it to a real user happens elsewhere:
- In your user management system (a user database or identity provider), each
user has a stored
personaRefIdfield. - This field says which persona they have (e.g.
MakerUserorCheckerUser). - At login, the system reads
personaRefId, resolves the persona, and passes all of its roles' permissions to the user.
For the runtime integration here — how the user obtains the persona via the
getUser workflow function — see
Runtime Persona Resolution.
Good to Know
- The persona–role relationship is one-way: the persona references the role; the role does not know the persona. The same role can be reused across personas.
- The Dashboard field points to dashboards shown in the UI. Left empty here as the scenario is workflow-focused.
- Renaming a persona breaks the
personaRefIdvalues in user records. Update the user records before renaming in production. - A persona with multiple roles: if a user can be both maker and checker, add two roles to the persona. Self-approval prevention is then done separately at the action level.
So Far in Our Scenario
| Done | Step |
|---|---|
✅ 3 privileges (submit_record, approve_record, view_record) | 1 |
✅ 2 roles (Maker, Checker) | 2 |
✅ 2 personas (MakerUser, CheckerUser) | 3 |
The "who → does what" line is now complete:
User → Persona → Role → Privilege
  ?    MakerUser    Maker    submit_record + view_record
  ?    CheckerUser  Checker  approve_record + view_record
We have not yet said which real user is bound to which persona — that happens on the runtime side.
Next Step
Now we move to the workflow side: with the Swimlane we decide which role(s) may pick up a task in the workflow.