Step 4 — Swimlane
For the full editor reference, see the Swimlane Editor.
Its Place in Our Scenario
We create two swimlanes, each matching a step in the workflow:
| Swimlane | Role(s) | Used in which step |
|---|---|---|
maker_lane | Maker | The maker's record-creation step |
checker_lane | Checker | The checker's approval step |
A swimlane can hold several roles (e.g. both Editor and Approver). Then a user with any of those roles can pick up the swimlane's task.
Step by Step
1. Add New → New Swimlane
From + Add New, choose New Swimlane. Name the model — usually
swimlanes.
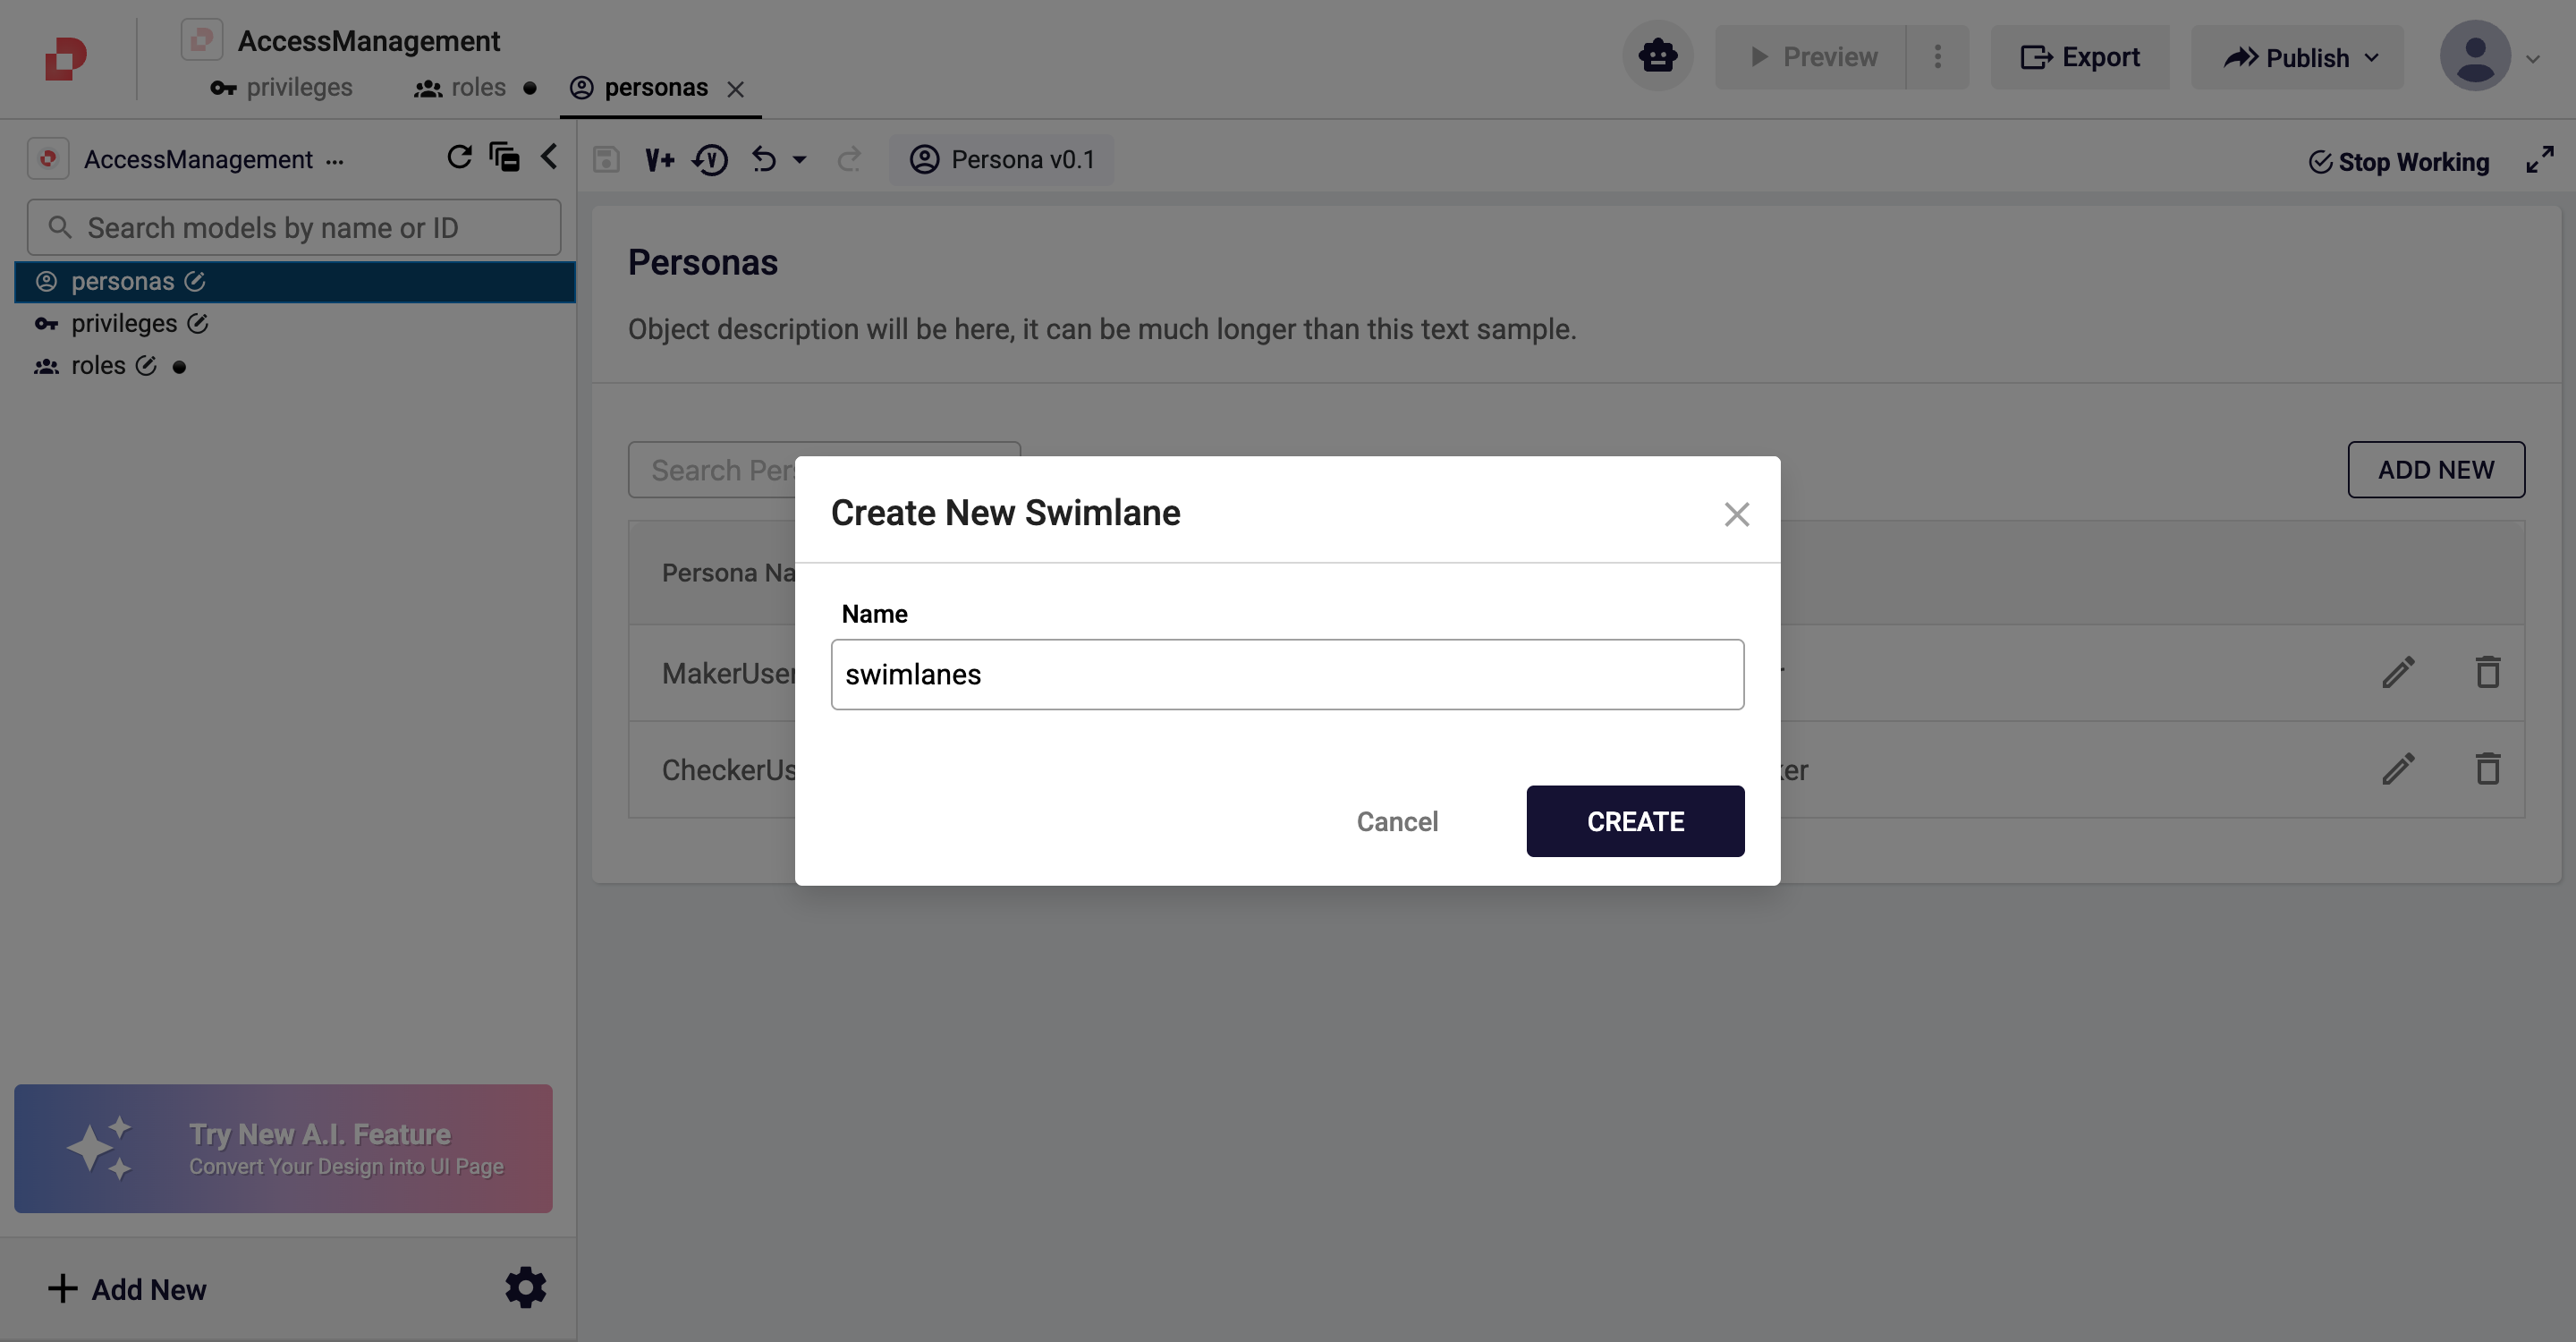
Confirm with CREATE → the empty Swimlane Editor opens.
2. Add the swimlanes one by one
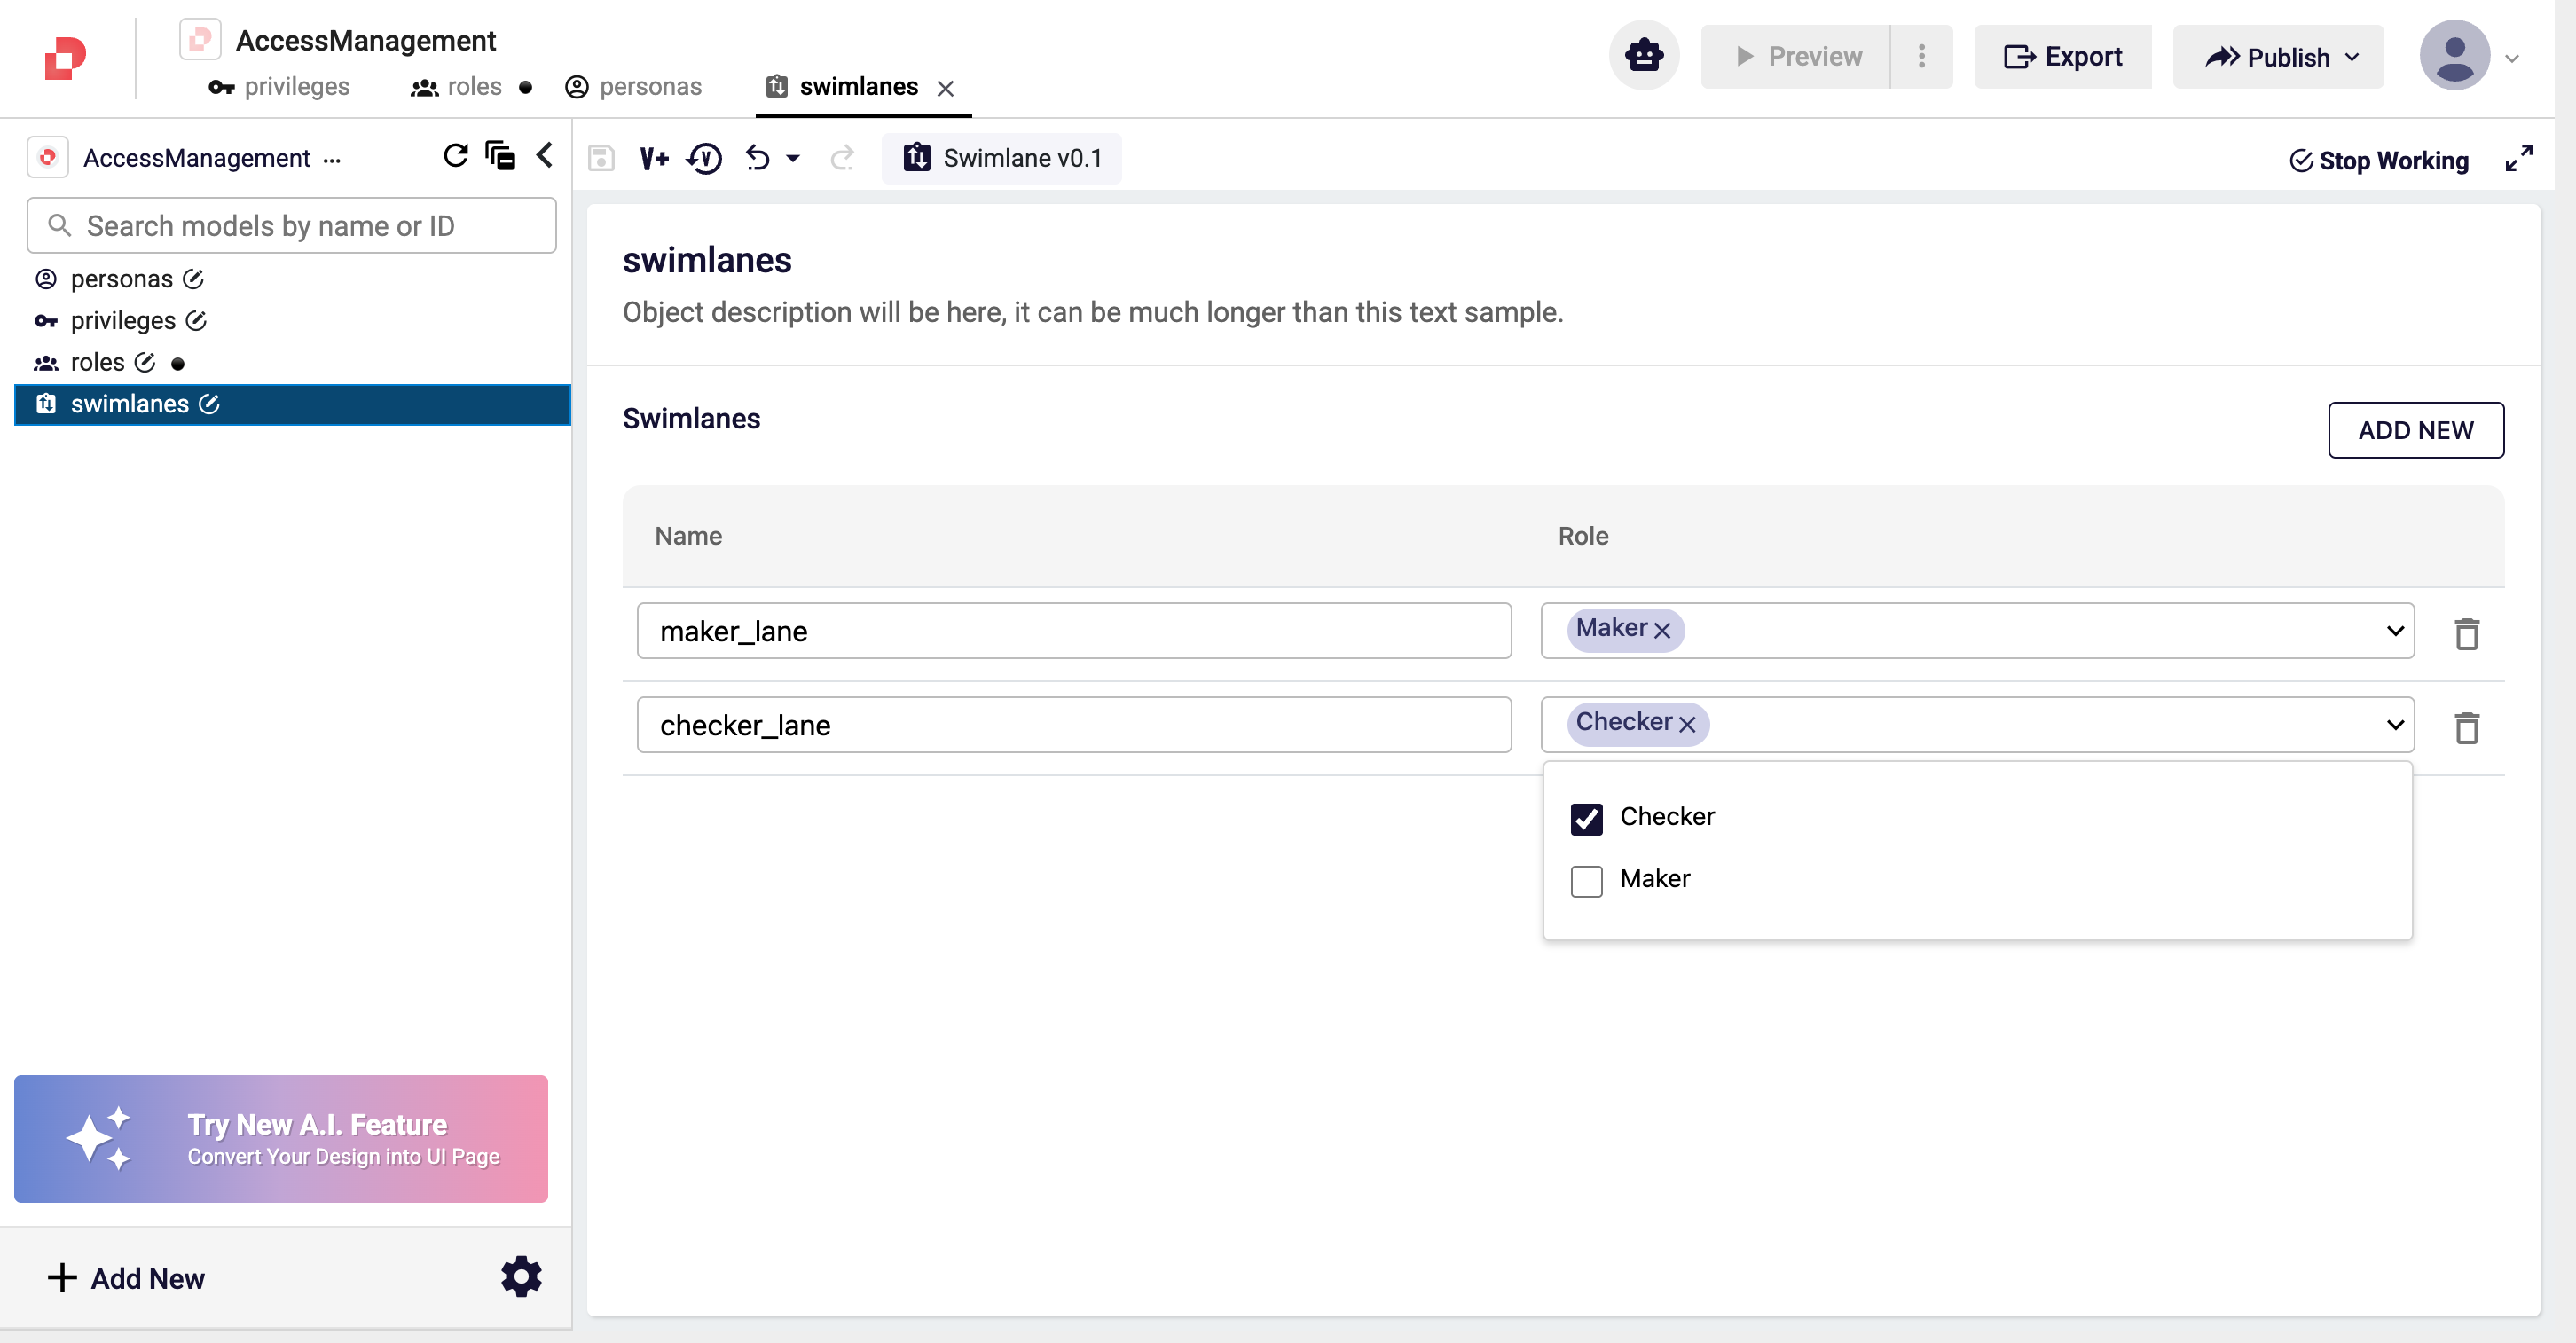
The Swimlane Editor is a plain table: each row is a swimlane with two columns — Name and Role. Unlike the other models, a swimlane has no separate detail page; everything is filled in inline.
For maker_lane:
- Press ADD NEW at the top right → a new row appears.
- Type
maker_laneinto Name. - Click the dropdown in the Role column → the list of all defined roles (Maker, Checker from Step 2) opens.
- Choose the
Makerrole.
For checker_lane:
- Press ADD NEW again for a second row.
- Name =
checker_lane. - From the Role dropdown, choose
Checker.
The Role column allows multiple selection. If the same task can be picked up by several roles, tick the boxes next to each role in the dropdown.
3. Save
Click the disk icon in the toolbar, enter a short summary, and confirm with SAVE CHANGES.
Good to Know
- A swimlane does not know a user directly at runtime — it only knows roles. At login, the system checks whether any of the persona's roles matches the swimlane's role list; on a match the user sees that swimlane's tasks.
- The swimlane–workflow link is one-way: the swimlane does not know the workflow; a swimlane is assigned to each User Task in the workflow editor (next step shows this).
- The same role can be used in several swimlanes, and a user can see tasks from several swimlanes at once — every eligible task lands in their pool.
- Deleting or renaming a swimlane breaks the User Tasks that reference it. Update the workflow side first.
So Far in Our Scenario
| Done | Step |
|---|---|
| ✅ 3 privileges | 1 |
| ✅ 2 roles (Maker, Checker) | 2 |
| ✅ 2 personas (MakerUser, CheckerUser) | 3 |
| ✅ 2 swimlanes (maker_lane, checker_lane) | 4 |
The Access Management models are now in place:
WORKFLOW SIDE                                  USER SIDE
(where the workflow assigns)                   (what the user is authorized for)

swimlane    →  role  ← persona  ←  user
maker_lane     Maker     MakerUser    (logged in)
checker_lane   Checker   CheckerUser  (logged in)

                ↓
              privilege
              submit_record, approve_record, view_record
Next Step
Next we define the Actions — the buttons shown on workflow User Tasks and their privilege control.